
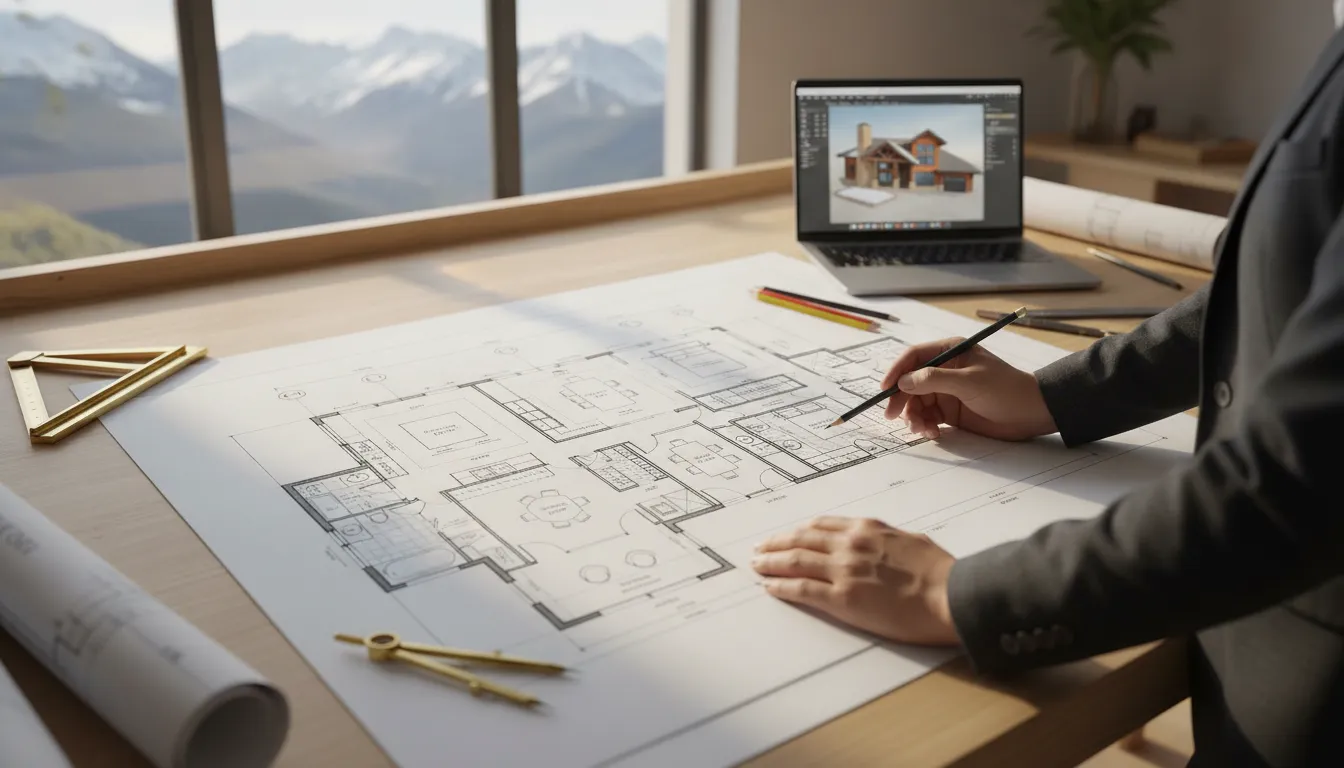
Designing a custom home starts with questions, not walls. Where does the morning light enter? Which rooms should connect? How will groceries move from the garage to the kitchen? Where will guests gather, and where can household members find quiet? These decisions shape the way your home feels and functions every day. Learning how to design a custom floor plan helps you organize those priorities before choosing finishes or approving drawings. You will also need to account for Utah property conditions, including slope, drainage, snow, views, privacy, and local requirements. This guide walks through the planning process and the professional support that can turn your ideas into buildable plans.
Key Takeaways
- Start with how you live: List daily routines, household priorities, storage needs, privacy preferences, hobbies, and future plans before choosing room sizes.
- Design around the Utah property: Evaluate sunlight, views, slope, drainage, access, utilities, zoning, snow storage, and outdoor connections early.
- Confirm the plan with professionals: Use online tools to test layouts and furniture placement, then ask an experienced Utah builder to review structure, permits, materials, constructability, and costs.
Plan Your Custom Floor Plan Around Daily Life
A custom floor plan should reflect how your household actually lives, not simply fit a certain number of bedrooms or reach a target square footage. Before choosing room dimensions, think through a typical weekday, a relaxed weekend, and the activities that bring people into your home.
Start with a written design brief that outlines your priorities, preferred materials, lifestyle, and budget. Include photos, mood boards, and examples of floor plans you like. Add a note explaining what appeals to you about each example, such as its storage, natural light, room arrangement, or connection to the yard. This gives your builder a useful starting point and makes design decisions easier to evaluate.
List routines, hobbies, pets, and entertaining needs
Write down how your household uses the home from morning to night. Do children need a homework area near the kitchen? Do you work from home, exercise indoors, or spend weekends cooking for friends? Your answers may point to a dedicated office, larger pantry, workshop, or living area with better seating and circulation.
Include your pets in the plan. A mudroom with a wash station, storage for food and supplies, or direct access to a fenced yard can make daily care easier. If you entertain often, consider how guests will move from the entry to the kitchen, dining area, bathroom, and outdoor spaces without passing through private rooms.
Review the Red Rooster Construction project gallery for ideas, then note which layouts and outdoor connections fit your routine.
Separate must-haves from nice-to-haves
Create separate lists for essentials, preferences, negotiable features, and elements you do not want. Must-haves might include a main-floor bedroom, walk-in pantry, three bathrooms, or garage workshop space. Nice-to-haves could include a beverage center, soaking tub, bonus room, or outdoor fireplace.
This distinction helps when the design or budget needs to change. Rather than removing features at random, you can protect the items that matter most and reconsider lower-priority additions. It also helps your design team understand the reason behind each choice.
Save photos and floor plans that show ideas you like, but focus on the specific feature instead of copying an entire plan. A layout that works for another household may not suit your property, routines, or budget.
Plan for work, family time, and privacy
Think about which spaces should feel connected and which should remain separate. An open kitchen, dining area, and family room can make it easier to cook while staying involved in family activities. Bedrooms, bathrooms, and home offices often need more distance from noisy gathering areas.
Consider sound as you arrange rooms. A laundry room, bathroom, or storage area between a bedroom and living room can create useful separation. A home office may work best away from the entry and television area, while a playroom can stay close enough for supervision without taking over the main living space.
Your property should influence these decisions, too. Views, privacy, sunlight, and breezes can help determine where shared spaces and quieter rooms belong. Share these priorities early with your builder so the plan supports both your schedule and the site.
Allow for storage, accessibility, and future changes
Storage works best when it appears where you need it. Plan for coats and shoes near the entry, cleaning supplies close to the rooms they serve, and food storage beside the kitchen. Account for seasonal gear, sports equipment, tools, holiday decorations, and household records before the walls are drawn.
Think about how the home may serve you several years from now. Wider doorways, fewer level changes, a main-floor bathroom, and a flexible bedroom can make future changes easier. These details support comfortable living without making the home feel institutional.
Flexible rooms are especially useful for growing households. A guest room might later become an office, exercise room, or bedroom for an aging family member. For a remodel or addition, identify existing areas that can be reused before adding new square footage.
Set a budget before choosing square footage
Square footage affects more than framing and flooring costs. A larger home may require additional foundation work, roofing, heating and cooling capacity, windows, doors, cabinets, and utility connections. More bathrooms and complex rooflines can also add to the construction budget.
Set a working budget before choosing the size of the home, then share it with your designer and builder. Early budget discussions allow the team to compare priorities, simplify costly details, and suggest alternatives before the plan becomes too detailed. Keep separate allowances for site work, permits, engineering, utilities, and finish selections.
Use Red Rooster Construction’s Utah homebuilding cost guide to organize major expenses. Actual costs depend on the property, design, materials, and project scope, so treat early estimates as planning tools rather than fixed prices.
Define the project: new build, remodel, addition, or outdoor living
Clarify what you are planning before you begin drawing. A new custom home offers more design freedom, while a remodel must work within the existing structure. An addition may need to connect to the current roof, foundation, plumbing, electrical system, and exterior finishes. An outdoor project, such as a deck or covered patio, still requires attention to access, drainage, structure, and its connection to the home.
Each project type has different constraints. A skilled builder can identify structural problems, costly design choices, and simpler ways to achieve the same result. Red Rooster Construction works on custom homes, remodels, additions, and outdoor living projects, so the best starting point depends on your property and goals.
Once you define the scope, gather existing plans, measurements, photos, and information about previous work. This helps your design team understand what can change, what must remain, and where your budget will have the greatest effect.
Let Your Utah Property Shape the Floor Plan
A custom floor plan should fit more than your lifestyle. It should fit the land itself. A layout that works well on a flat suburban lot may not make sense on a sloped property, a wooded parcel, or a site with sweeping mountain views. Before choosing room sizes or drawing walls, study how the property receives sunlight, handles water, connects to the road, and relates to nearby homes.
Utah properties can vary widely across the Wasatch Front and surrounding communities. A lot in Salt Lake County may present different challenges than one in Summit, Wasatch, Morgan, or Tooele County. Your builder should review the site early, since grading, utilities, access, and soil conditions can affect both the floor plan and the construction budget. Red Rooster Construction’s Utah homebuilding cost guide can help you begin planning for these expenses before the design becomes too detailed.
Study orientation, views, sunlight, slope, soil, and drainage
Walk the property at different times of day before settling on a layout. Note where the sun rises and sets, which areas feel private, where breezes move through, and which views are worth preserving. A custom plan should respond to the site’s views, privacy, solar exposure, shade, elevation, and vegetation instead of placing the home wherever it is easiest to draw.
Pay close attention to slope and drainage. A hillside lot may need retaining walls, a stepped foundation, or a walkout basement. Low areas may require additional drainage planning to keep water away from the foundation. Soil conditions can also affect the foundation type and engineering requirements. Documenting these details early gives your builder a clearer starting point and can help prevent expensive design changes later.
Check zoning, setbacks, easements, utilities, and HOA rules
Before choosing a footprint, confirm what the property allows. Local zoning rules may control the home’s size, height, location, garage placement, accessory structures, and distance from property lines. Setbacks can significantly reduce the buildable area, especially on narrow, sloped, or irregular lots.
Ask for a current property survey and identify utility corridors, access easements, drainage easements, and other restrictions. If the property belongs to an HOA, review its architectural guidelines before finalizing exterior plans. These rules may affect materials, rooflines, colors, fencing, driveways, decks, and patios.
Design and drafting fees vary based on the project’s complexity and the professional you hire. Residential plan pricing guidance offers general context, but your actual cost will depend on the site, scope, engineering, and local requirements. Have a Utah builder or design professional review these constraints before approving the floor plan.
Plan driveway access, garage placement, grading, and snow management
The driveway often influences where the home can sit on the property. Consider how vehicles will enter from the street, whether the approach is steep, and how guests, deliveries, trailers, and emergency vehicles will reach the house. A garage placed too far from the entry may create an inconvenient walk, while a garage positioned prominently at the front can affect curb appeal.
Plan for winter conditions, too. Utah snow can collect along driveways, sidewalks, roof edges, and shaded areas. Leave room for snow storage without blocking doors, windows, drainage paths, or sightlines. Grading should direct water away from the foundation while maintaining practical access from the garage to the mudroom or main entry.
Think about long-term use as well. Wider doors, easier movement through the home, and fewer level changes can support future mobility needs. These features are easier to include during the initial design than to add during a remodel.
Design for Utah weather, energy efficiency, and natural light
A floor plan can help your home stay comfortable through hot summers, cold winters, and changing shoulder seasons. Place frequently used rooms where they can receive useful daylight without excessive heat gain. Living rooms and kitchens may benefit from southern exposure, while overhangs, shades, and landscaping can reduce glare and summer heat.
The home’s shape matters, too. A compact layout generally has less exterior wall area, which can support energy performance and simplify construction. Grouping plumbing fixtures, laundry areas, and mechanical spaces can shorten utility runs and make maintenance easier.
Discuss insulation, window performance, air sealing, heating and cooling zones, and ventilation with your builder. Natural light should support the way you use each room, not simply add more glass. A thoughtful plan balances daylight, privacy, energy use, and comfortable temperatures throughout the year.
Position windows for privacy, views, and ventilation
Windows should frame the best parts of the property while limiting unwanted views into bedrooms, bathrooms, and living spaces. Before placing them, document the home’s views, sun exposure, access points, neighboring properties, and natural features. This can help you decide where to use large picture windows, high clerestory windows, smaller openings, or transoms.
Consider ventilation as well. Windows on opposite sides of a room or home can support cross-breezes when conditions allow. Operable windows near kitchens and bathrooms may help with everyday air movement, while high windows can release warm air.
Do not overlook the view from inside the room. A window may look attractive on an elevation drawing but feel awkward if it faces a driveway, fence, or blank wall. Mark likely furniture locations before finalizing window sizes so beds, cabinets, televisions, and shelving do not interfere with the best openings.
Connect rooms to decks, patios, yards, and outdoor spaces
Outdoor areas should be part of the floor plan from the beginning, rather than an afterthought added after construction. Decide how the kitchen, dining area, living room, mudroom, and primary suite should connect to the yard. A covered deck near the kitchen may support outdoor meals, while a patio off the living room may create a comfortable gathering space.
Think about grade changes between indoor and outdoor areas. A walkout basement, stepped patio, or raised deck may suit a sloped Utah lot. Include room for stairs, railings, furniture, grills, planters, lighting, and snow clearance.
Consider how the outdoor area will function in every season. Shade, wind protection, drainage, privacy screens, and durable materials can make the space more useful throughout the year. Review examples of indoor and outdoor connections in the Red Rooster Construction project gallery as you develop ideas for your own property.
Gather Inspiration and Create a Floor Plan Brief
A custom floor plan should reflect the way you live, not simply copy a home you saw online. Before drawing walls or choosing finishes, collect ideas that can help you define what would make your Utah home comfortable, practical, and personal.
The goal is not to create construction drawings on your own. Instead, create a clear starting point for your builder, designer, or architect. A well-organized floor plan brief puts your priorities, questions, style preferences, and budget in one place, making early design conversations more productive.
Review Red Rooster Construction’s project gallery
Start with real homes and completed projects. Red Rooster Construction’s project gallery offers examples of layouts, materials, architectural details, and finished spaces. Look beyond paint colors and countertops. Pay attention to room proportions, window placement, ceiling heights, natural materials, and transitions between indoor and outdoor areas.
Ask yourself what feels right for your household. Do you prefer a kitchen that opens to the living room, or would you rather have some separation? Would a covered deck, walkout basement, large mudroom, or spacious pantry make daily life easier? Save specific examples and explain what caught your attention. Those notes will make your preferences easier to communicate later.
Browse house plans, magazines, design platforms, and social media
Use several sources while researching. House plan websites can help you compare common layouts, while magazines and design platforms offer ideas for lighting, storage, finishes, and room connections. Social media can show how homeowners use their spaces after construction, which may reveal practical details missing from professional photography.
Remember that an online plan was created for another property and lifestyle. A layout designed for a flat lot in another state may not suit a sloped Utah site, local weather, or your family’s routines. Use these sources for inspiration, not as ready-to-build solutions. Look for ideas you can adapt to your lot, household, and budget.
Save ideas for layouts, storage, lighting, and outdoor spaces
Create a digital folder, saved collection, or simple document for your ideas. Include images of room arrangements, built-in storage, lighting fixtures, kitchens, bathrooms, entryways, decks, patios, and landscaping. Add a short note to each image explaining what you like.
Be specific. Instead of saving a kitchen photo with the note “love this,” write, “I like the island seating, pantry location, and pendant lighting.” For outdoor spaces, note whether you prefer a covered area for shade, a deck connected to the kitchen, or a private patio near the primary bedroom. These details help your design team understand the purpose behind each image.
Note what works, what does not, and why
Your dislikes are just as useful as your favorite ideas. As you review homes and floor plans, record anything that feels impractical, awkward, too formal, too exposed, or difficult to maintain. You may discover that you dislike long hallways, want the laundry room near the bedrooms, or need a quieter location for a home office.
Explain the reason behind each reaction. “I do not like this layout” gives a builder limited information. “I do not want the bedrooms next to the great room because noise may interrupt sleep” points toward a clear design decision. This process turns general preferences into practical solutions your team can apply to your home.
Compare design features instead of copying a full plan
A complete plan may look appealing, but copying it rarely produces the right result. The original design may respond to a different lot orientation, family size, climate, budget, or building code. It may include rooms you do not need while leaving out features that matter to you.
Instead, compare individual features across several plans. You might combine the entry and storage arrangement from one home with the kitchen workflow from another and the outdoor connection from a third. This approach creates a more personal starting point while leaving room for a professional to adapt the design to your property and construction goals.
Document rooms, priorities, sizes, style, and budget
Turn your saved ideas into a working document. List every room or area you may need, including bedrooms, bathrooms, offices, playrooms, laundry spaces, storage areas, garages, workshops, decks, and patios. For each one, note its purpose, preferred location, and approximate size.
Separate your priorities into three groups: essential, preferred, and optional. Include style references, accessibility needs, furniture dimensions, and budget limits you already know. If you are still estimating costs, review Red Rooster Construction’s Utah homebuilding cost guide for planning context. Your numbers may change as the design develops, but an early budget helps keep the plan realistic.
Turn your research into a clear project brief
Bring your notes together in a short project brief that a builder or designer can review quickly. Start with a description of your household, property, and project type. Then list your must-have spaces, preferred room relationships, storage needs, style direction, outdoor goals, and budget range.
Add a page of reference images with captions explaining what you like in each one. Include questions about the site, construction options, and decisions where you need professional guidance. When you are ready to discuss the project, contact Red Rooster Construction and share the brief. A clear summary gives the team a stronger understanding of your vision before detailed floor plan work begins.
Include the Right Features in Your Custom Floor Plan
A custom floor plan should do more than fit a certain number of bedrooms and bathrooms. It should support the way your household moves through the home, from the first coffee of the morning to the last load of laundry at night. The best plans also respond to the property itself, including sunlight, views, privacy, slope, outdoor areas, and Utah’s changing weather.
Before settling on a layout, consider how each room connects to the next. A thoughtful plan can make everyday tasks easier, reduce wasted space, and help your home remain comfortable as your needs change. Reviewing completed projects in the Red Rooster Construction gallery can also help you identify useful layouts, materials, and connections between indoor and outdoor spaces.
Organize public, private, service, and outdoor zones
Start by grouping rooms according to how your household uses them. Public spaces usually include the entry, kitchen, dining room, living room, and guest bathroom. Private spaces include bedrooms, home offices, and bathrooms used mainly by household members. Service areas, such as the garage, pantry, laundry room, mudroom, and mechanical room, support the home without needing to sit at its center.
Outdoor zones deserve the same attention as indoor rooms. A deck may work best near the kitchen or living room, while a play area may need clear visibility from the main gathering space. Bedrooms may benefit from quieter sides of the property, especially if the home sits near a busy road.
Consider sun exposure, breezes, vegetation, views, and privacy before assigning rooms. Walking the property and recording these conditions can reveal opportunities that a stock plan may miss. The National Renewable Energy Laboratory’s solar resource maps can provide useful background when considering sunlight and window placement.
Connect the entry, kitchen, garage, and bedrooms efficiently
The most-used routes in your home should feel simple and direct. Many households benefit from a clear connection between the garage, mudroom, pantry, kitchen, and main living area. This arrangement makes it easier to bring in groceries, unload school bags, and store coats or shoes without carrying everything through the front entry.
The front door should lead naturally to the spaces guests use most. You may want visitors to reach the living room or dining area without passing through bedrooms, laundry spaces, or cluttered service areas. At the same time, bedrooms should remain easy for household members to reach at night.
Pay attention to both distance and visibility. A kitchen that overlooks the backyard may help parents keep an eye on children, while a bedroom placed away from the garage can offer more peace and quiet. In a remodel or addition, these connections may depend on the existing structure, plumbing, and exterior access. You can contact Red Rooster Construction to discuss practical layout options for your property.
Size rooms for furniture and daily activities
Room dimensions should reflect how you will use the space, not just how the measurements look on paper. Before approving a layout, measure the furniture you already own and note anything you plan to purchase. Include beds, sofas, dining tables, desks, shelving, exercise equipment, and large appliances.
Leave enough space for people to move around furniture comfortably. A dining room needs clearance for chairs to slide back, while a bedroom needs room to make the bed and open closet doors. In a living room, consider whether people will walk between the seating area, another room, and an outdoor exit.
Use painter’s tape on the floor or place cardboard cutouts where major furniture will go. This simple exercise can reveal that a room feels tighter than its measurements suggest. It can also help you compare options before paying for detailed drawings or making structural decisions.
Measure hallways, stair landings, doorways, and turning areas, too. These spaces affect how furniture enters the home and how easily people move through it each day.
Plan kitchens, bathrooms, laundry rooms, mudrooms, and drop zones
Support spaces often determine whether a home feels organized or constantly cluttered. In the kitchen, consider the relationship between the refrigerator, sink, cooktop, pantry, dining area, and main prep surfaces. Make sure more than one person can work there without blocking drawers, appliances, or walkways.
Bathrooms need practical clearances around toilets, vanities, showers, and tubs. If several people will use the same space, separate sinks or a private toilet area may make the morning routine easier. Place bathrooms where plumbing runs can remain efficient, particularly when planning an addition or major remodel.
Laundry rooms, mudrooms, and drop zones should sit near the entrances your household uses most. A mudroom near the garage might include hooks, benches, boot storage, and a durable floor. A drop zone near the kitchen could hold keys, mail, chargers, and backpacks. These spaces do not need to be large, but they do need a clear purpose.
Add storage and mechanical space without wasting usable area
Storage should appear throughout the plan, not only in bedroom closets. Consider a pantry near the kitchen, linen storage near bathrooms, cleaning supplies near the rooms where they are used, and seasonal storage near the garage or entry. Built-in shelves under stairs, along wide hallways, or beside a fireplace can add capacity without requiring another room.
Mechanical spaces also need a deliberate location and enough clearance for installation, maintenance, and future replacement. Water heaters, furnaces, electrical panels, and other systems should remain accessible. Avoid placing them where someone must move furniture or remove finished surfaces to reach them.
A builder can often identify ways to simplify the structure and group plumbing or mechanical systems efficiently. Those decisions may reduce wasted space and help control construction costs. As you compare room count and square footage, review Red Rooster Construction’s Utah homebuilding cost guide to keep design choices connected to the wider project budget.
Balance open living areas with privacy and noise control
Open layouts can make a home feel spacious and improve connection between the kitchen, dining room, and living room. They work well for households that cook, host guests, or want shared family time. However, removing too many walls can create noise, clutter, and limited privacy.
Consider where sound will travel. A television wall beside a bedroom may disturb someone sleeping, while a home office next to a busy kitchen may make focused work difficult. You can create separation with partial walls, pocket doors, ceiling changes, built-in cabinetry, or a short transition hall.
Not every room needs to be visible from the main living area. A quiet reading room, guest bedroom, office, or playroom can give household members a place to step away. Even within an open plan, furniture placement, rugs, lighting, and changes in ceiling height can define separate areas.
Also consider circulation. A path from the front door to the backyard should not cut directly through the main seating area if another route is possible. Small adjustments can make an open plan feel intentional rather than exposed.
Coordinate windows, lighting, views, and outdoor access
Windows should respond to the property, not simply fill every available wall. Place larger windows where they capture appealing views, useful daylight, and outdoor connections. Use smaller or higher windows where privacy matters, such as bathrooms, bedrooms near neighboring homes, or rooms facing a road.
Window placement also affects furniture. Avoid putting a window where it prevents a bed, cabinet, or television from fitting comfortably. Consider glare, heat gain, and evening privacy when choosing the size and location of each opening.
Plan several layers of lighting alongside the windows. Ambient lighting fills the room, task lighting supports activities such as cooking or reading, and accent lighting highlights architectural details or artwork. Outdoor lights can improve safety around steps, paths, patios, and garage entrances.
Connect high-use rooms to outdoor areas in a practical way. A kitchen may open to a covered patio for easy entertaining, while a bedroom may connect to a private deck. The Red Rooster Construction project gallery offers examples of how interior layouts can work with decks, patios, and other outdoor living areas.
Add flexible rooms and accessibility features for future needs
Your floor plan should work for your household now while leaving room for change. A spare bedroom might serve as a nursery, office, guest room, craft space, or exercise room over time. Consider adding doors, windows, outlets, and closet space that allow the room to change purpose without major construction.
Accessibility features can make the home more comfortable for everyone. Wider doorways, fewer level changes, better-lit stairs, lever-style handles, and a bedroom or full bathroom on the main level may support future mobility needs. Including these features during the initial design is usually easier than adding them later.
Think about aging parents, growing children, injuries, and changes in work routines. A main-level room with nearby bathroom access can offer flexibility, while reinforced bathroom walls may simplify future grab-bar installation. A no-step entry or covered walkway can also improve convenience during Utah’s snowy and icy months.
Share these priorities with your designer or builder before the plan is finalized. Early decisions can protect flexibility while keeping the home comfortable and natural for everyday living.
Design a Custom Floor Plan Step by Step
A custom floor plan should do more than show where walls go. It should reflect how your household moves through the home, how the property receives sunlight, and how the project fits your budget. A clear process helps you make practical decisions before construction begins, whether you are planning a new home, remodel, addition, or outdoor living space.
Use the steps below to move from rough ideas to a workable plan. You do not need professional drafting software to begin, but you do need accurate information and a willingness to test different options. Early sketches are for exploring possibilities, not for construction.
Measure the property and document existing conditions
Start with the property, not the rooms. Record lot dimensions, existing structures, driveway access, utility connections, mature trees, retaining walls, slopes, and drainage patterns. For a remodel or addition, measure the current home carefully. Include wall lengths, ceiling heights, window locations, doors, stairs, fireplaces, plumbing fixtures, and mechanical equipment. Small errors at this stage can create larger problems later.
Also document conditions that affect how the home will feel and perform. Note which rooms receive morning or afternoon light, where the best views are located, and which areas need more privacy. On a Utah property, snow storage, winter access, summer shade, and elevation changes may affect the layout. Take photographs and mark them on a simple site sketch so your builder can evaluate the project accurately.
Create a room list and adjacency diagram
Write down every space your household needs, then describe the activities each room must support. Your list might include bedrooms, bathrooms, a home office, mudroom, pantry, laundry room, storage, workshop, or covered deck. For each space, note must-haves, preferred features, approximate size, and anything you want to avoid. This gives your designer or builder a useful starting point.
Next, create an adjacency diagram. Use circles or boxes to show which rooms should be close together. You may want the kitchen near the dining area and garage entry, bedrooms away from entertaining spaces, and the laundry room near the bedrooms. Mark connections as essential, preferred, or unnecessary. This exercise can reveal conflicts early, such as placing a quiet office beside a busy family room. You can also review Red Rooster Construction’s project gallery to see how different home layouts and features come together.
Sketch bubble diagrams for zones and circulation
Turn your adjacency diagram into a few rough bubble diagrams. Each bubble represents a room or activity zone, and overlapping bubbles can show strong connections. Group the home into broad areas such as public, private, service, and outdoor zones. The public zone may include the entry, kitchen, dining room, and living room. The private zone may contain bedrooms and quiet retreats, while the service zone connects the garage, pantry, laundry, and mechanical areas.
Pay close attention to circulation. Draw the paths people will use to enter the home, unload groceries, reach bedrooms, access the backyard, and move between everyday spaces. Try several versions instead of committing to the first idea. One layout may create a short path from the garage to the kitchen, while another may provide better separation between guests and family areas. Bubble diagrams make these tradeoffs easier to see before you draw exact walls.
Draft an accurately measured 2D layout
Once the zones and relationships feel right, create a measured 2D layout. Start with the exterior dimensions, then place major walls, stairs, windows, doors, and built-in features. Use a consistent scale and label every room. Online tools such as Floor Plan Creator can help you draw, edit, measure, and share a preliminary plan.
Keep the first draft simple. Focus on room proportions, circulation, and major connections before selecting cabinet colors or decorative finishes. Include wall thicknesses and realistic openings so the plan reflects how much space the structure will use. For an existing home, compare the drawing with your measurements and photographs. For a new build, use site information to test how the footprint could sit on the property. A builder can later review framing, mechanical systems, and construction details that a basic planning tool cannot show.
Test furniture placement, door swings, and traffic flow
A room can look generous on paper and still feel cramped once furniture is added. Place the actual or expected sizes of sofas, beds, dining tables, desks, appliances, and storage units on your plan. Leave enough space for people to sit, stand, open drawers, and move around one another. Remember everyday items such as backpacks, shoes, laundry baskets, sports equipment, and pet beds.
Check every door swing, cabinet opening, and appliance clearance. Make sure a bathroom door does not block the vanity, a refrigerator door does not collide with an island, and a bedroom door does not create a tight hallway corner. Trace common routes through the home, including the path from the garage to the pantry and from bedrooms to bathrooms. Testing these details early can prevent expensive revisions after framing begins.
Review the design in 3D and revise key decisions
A 3D view can reveal issues that are easy to miss in a flat drawing. Walk through the plan from the entry, kitchen, bedrooms, and outdoor areas. Look at ceiling heights, window locations, sightlines, room proportions, and how one space opens into another. You may discover that a tall window faces a neighboring home, a hallway feels too dark, or an open living area needs a stronger transition to the entry.
Tools such as RoomSketcher’s house planning software can help you compare 2D layouts with 3D views. Use the model to test major decisions rather than finalize every finish. Try different window placements, furniture arrangements, and wall locations. Share the model with the people who will live in the home and ask specific questions: Does the kitchen connect well to the yard? Is the primary bedroom private enough? Where will guests go? Revise the plan while changes are still manageable.
Check structure, constructability, budget, and future expansion
Before treating the design as final, ask whether it can be built on your property and within your budget. A plan may look appealing but require extensive excavation, complicated rooflines, long plumbing runs, large beams, or costly retaining work. For an existing home, verify which walls are load-bearing and where electrical, plumbing, and HVAC systems are located. These conditions can affect both the layout and the project price.
Discuss the plan with a qualified builder early. Red Rooster Construction’s Utah homebuilding cost guide can help you think through expenses tied to size, materials, site work, and finishes. Consider how the home could adapt, too. A flexible office might become a bedroom, a basement could be finished later, or a covered deck could support future outdoor use. Planning for these options now may be more affordable than making major changes later.
Convert the concept into professional, permit-ready drawings
Your sketches and software model are planning tools, not construction documents. Before work begins, the concept must become a coordinated set of drawings that communicates the structure, dimensions, materials, systems, and site conditions. Depending on the project, this may include floor plans, elevations, foundation details, structural drawings, electrical and plumbing plans, energy information, and a site plan.
The right professionals will depend on the scope and location of your project. An architect or residential designer may prepare the layout and design documents, while engineers address structural, civil, or mechanical requirements. Your builder can review the drawings for cost and constructability, identify conflicts, and coordinate the construction process. Permit requirements vary by jurisdiction, so confirm what your city or county requires before submitting plans. When you are ready to discuss your concept, contact Red Rooster Construction with your room list, sketches, property information, and project priorities.
Compare Online Custom Floor Plan Tools
Online floor plan tools can turn a list of ideas into a visual concept. You can test room sizes, compare layouts, place furniture, and identify issues before meeting with a designer or builder. This early work is useful whether you are planning a new custom home, remodeling an existing space, adding square footage, or connecting your home to a deck or patio.
No single program is best for every project. Some tools are designed for quick 2D layouts, while others provide detailed 3D modeling or interior visualization. Choose one based on the type of decisions you need to make. A simple tool may be enough for room placement, while a more advanced program can help you study rooflines, ceiling heights, or how an addition meets the existing structure.
Use RoomSketcher for accessible 2D and 3D planning
RoomSketcher is a practical choice if you want to create a floor plan without learning complex design software. Its interface supports both 2D drawings and 3D views, allowing you to work with measurements while also seeing how rooms may look when furnished. A furniture library can help you test whether a sectional, dining table, kitchen island, or king-size bed fits comfortably.
This tool works well for homeowners who have a general idea but need help organizing it. You can experiment with room proportions, move walls, and compare layouts before discussing the project with a professional. Its house plan tools can help you prepare a useful starting point for a Utah custom home, remodel, or addition.
Use RoomSketcher to answer practical questions, such as whether the kitchen has enough circulation space or whether a proposed bedroom can hold the furniture you already own. Add notes about your priorities so a builder can understand why you prefer one layout over another.
Use Floor Plan Creator for precise measurements and basic layouts
Floor Plan Creator is useful when accurate dimensions are your main priority. You can draw rooms, adjust wall lengths, add doors and windows, and create layouts with measured spaces. Automatic calculations can make it easier to track room areas and proportions as you revise the plan.
This option may suit homeowners who want a straightforward layout without spending time on detailed rendering. Use it to test bedroom dimensions, hallway widths, storage areas, or the relationship between a garage and the main living space. The Floor Plan Creator platform includes features for creating, editing, viewing, printing, and sharing plans.
Before you begin, measure any existing rooms carefully and keep the same unit of measurement throughout the project. For a remodel or addition, include wall thicknesses, windows, doors, ceiling heights, and fixed features. A simple plan with reliable dimensions gives your builder better information than a polished drawing based on guesses.
Use SketchUp for flexible 3D modeling and detailed design
SketchUp is a strong choice when you want more control over three-dimensional design. You can model the exterior and interior of a home, explore rooflines, test ceiling heights, and study how a deck or addition connects to the existing structure. It takes more time to learn than a basic floor plan app, but it offers greater flexibility for detailed concept work.
SketchUp can be helpful for unusual sites or projects with several connected elements. You might model a sloped yard, retaining wall, covered patio, built-in storage, or a multi-level addition to understand how the pieces relate to one another. Review SketchUp’s official 3D design tools before choosing it for your project.
Keep the model organized as it grows. Label rooms and exterior features, use accurate dimensions, and save separate versions when making major changes. A detailed model can support conversations with a design professional, but it should still be checked against structural, code, and site requirements.
Use Sweet Home 3D for furniture placement and visualization
Sweet Home 3D focuses on interior layouts and furniture placement. You can draw a 2D plan, add furniture, and view the result in 3D. That makes it helpful for testing everyday usability rather than simply fitting rooms inside an outline.
For example, you can check whether people can walk comfortably around a kitchen island, open dresser drawers, or move between a sofa and fireplace. You can also compare furniture arrangements in a living room, home office, guest room, or basement. The Sweet Home 3D website provides access to the software and its planning features.
Use real furniture measurements whenever possible. A generic sofa or table may not match the pieces you plan to keep, and a few inches can affect circulation. Add space for doors to open, chairs to pull out, and people to pass through. These tests can reveal when a room needs to be wider, when a doorway should move, or when built-in storage would work better than freestanding pieces.
Use Homestyler for drag-and-drop layouts and 3D views
Homestyler is designed for quick experimentation. Its drag-and-drop interface lets you add rooms, furniture, finishes, and decorative elements, then view the result in 3D. This can be useful when you are comparing broad ideas, such as an open kitchen versus a partially separated kitchen or a home office versus a flexible guest room.
Because changes are easy to make, Homestyler can help families compare options together. Create several versions and label them clearly, then review how each one handles furniture, storage, privacy, and circulation. The Homestyler floor plan tool offers a visual way to explore a concept before moving into technical drawings.
Use the tool to discuss preferences, not to make final structural decisions. A layout that looks balanced in a rendering may still have a difficult roof connection, expensive plumbing arrangement, or inadequate space for mechanical equipment. Save the versions that best reflect your priorities and bring them to your design or construction team.
Compare free versions, trials, subscriptions, and one-time costs
The best tool depends partly on how long you expect to use it and how much detail you need. Free versions may be enough for a basic sketch, while paid plans can add higher-quality images, larger furniture libraries, more export options, or expanded project storage. Check whether a trial limits downloads, project access, or file types before you spend time developing a detailed plan.
Also compare software costs with professional drafting and design fees. Entry-level floor plan programs often cost about $50 to $150 per year, while freelance designers may charge roughly $800 to $2,700 for drafting and 3D house plans, depending on the scope. These 3D house plan rates can provide a general reference, though local pricing varies with the property, project size, and level of detail.
Consider how much your time is worth, too. A free program may seem economical, but a difficult interface can lead to inaccurate dimensions or repeated revisions. If you already have a clear concept, professional drafting may be more efficient. If you are still comparing layouts, a low-cost tool can help you make better decisions before paying for formal plans.
Look for measurement tools, furniture libraries, exports, and collaboration
A polished image is helpful, but practical features matter more when you are preparing for a construction conversation. Look for measurement tools that let you enter exact wall lengths, room dimensions, and ceiling heights. Furniture libraries are also valuable because they let you test real clearances instead of judging an empty room by appearance alone.
Export and collaboration features can save time later. Choose a tool that lets you print or share a plan in a format your designer or builder can review. Version history, cloud storage, comments, and multiple-user access can help when several people are providing feedback. The Floor Plan Creator feature set illustrates the types of editing, sharing, and viewing options worth comparing.
Before sharing a file, add labels, dimensions, and notes explaining your priorities. Identify features that must remain, such as an existing fireplace or plumbing wall, along with items that can change. A clear basic plan is more useful than an attractive image with no measurements or explanation.
Use online plans for planning, not construction documents
Online floor plan tools are excellent for developing ideas, but they do not usually create permit-ready construction documents. A software-generated plan may not account for Utah building codes, structural loads, energy requirements, drainage, snow conditions, soil, or the engineering details required for your property.
Treat your online plan as a visual brief for a qualified designer, architect, or builder. A professional will need to review the foundation, framing, mechanical systems, electrical layout, window placement, setbacks, and other technical requirements. Local authorities may also require formal drawings before issuing permits. RoomSketcher’s house plan guidance also distinguishes planning and visualization from professional construction documentation.
For a Utah project, share your concept early with a builder who can discuss cost and constructability before the design becomes too detailed. Red Rooster Construction works on custom homes, remodels, additions, and outdoor living projects across areas of the Wasatch Front. You can use the company’s project gallery to compare examples of completed work, then bring your sketches and priorities to the Red Rooster Construction team for a more informed conversation.
Choose the Right Design Professional or Custom Home Builder
The right professional can turn a promising floor plan into a home that fits your property, budget, and daily life. The best choice depends on the project. A simple remodel may need a residential designer and experienced contractor, while a custom home on a steep Utah lot may require an architect, engineer, and builder working together.
Before you hire anyone, create a project brief with your room list, priorities, inspiration, property details, budget range, and preferred timeline. Share the same information with each candidate so you can compare their recommendations. Ask what they handle directly, which tasks require outside consultants, and how they manage changes after construction begins.
Pay attention to communication as well as experience. A professional who explains decisions clearly, raises cost concerns early, and documents responsibilities can help prevent expensive misunderstandings. You should understand who is responsible for drawings, engineering, permits, subcontractors, materials, inspections, and final construction before you sign an agreement.
Decide when DIY planning meets your needs
DIY planning works well for gathering ideas, measuring existing rooms, testing furniture arrangements, and creating a wish list. Home design software can help you compare layouts before you meet with a professional. Your sketches do not need to look polished. They simply need to show how you want the home to function.
DIY planning has limits, especially when you are changing load-bearing walls, adding square footage, relocating plumbing, or building on a sloped property. A sketch will not address structural requirements, drainage, energy standards, or local building codes. Use your plan as a conversation starter, then have qualified professionals prepare and review documents needed for construction and permits.
Bring your brief to Red Rooster Construction’s hands-on Utah team
A local builder can connect your ideas to practical decisions about structure, materials, scheduling, and cost. Red Rooster Construction serves homeowners throughout Utah, including communities along the Wasatch Front, with custom homes, remodels, additions, and outdoor living projects.
Bring your room list, inspiration images, property information, and budget questions to the first conversation. Red Rooster’s project gallery can help you review examples of its craftsmanship and the types of projects the team completes. Ask how the company coordinates design, material selection, pricing, permits, and construction changes. Its hands-on approach and direct material sourcing can also provide useful insight during early planning.
Choose a designer for layouts, finishes, and interior planning
A residential designer may be a good fit when you need help organizing rooms, improving circulation, and selecting finishes. Designers often focus on the details that make a home comfortable, including kitchen layouts, cabinetry, lighting, flooring, paint, built-ins, and storage.
Look for someone with experience on homes similar to yours. Ask to see completed plans and finished spaces, not only computer renderings. Confirm whether the designer prepares permit drawings, coordinates with engineers, and works directly with your builder. You should also ask how many revisions the fee includes and whether finish selections are part of the service. If you already have a builder, include that builder early so the proposed design can be reviewed for cost and constructability.
Choose an architect for complex sites, structures, or custom designs
An architect may be the right choice for a highly customized home, a steep lot, unusual structural requirements, or a large addition. Architects can coordinate a broader set of documents and consultants, including structural, civil, mechanical, electrical, and plumbing professionals.
Choose an architect with residential experience in the Utah communities where you plan to build. Ask about previous work involving slopes, retaining walls, snow loads, wildfire concerns, energy efficiency, and local approvals when those conditions apply. The American Institute of Architects’ guide to working with an architect can help you understand the typical process. Before signing, confirm the services, drawings, consultant coordination, site visits, and construction support included in the agreement.
Choose a builder who reviews cost and constructability early
A floor plan can look attractive and still be expensive or difficult to build. Early builder input may identify complicated rooflines, long plumbing runs, large window areas, difficult structural spans, or materials that do not fit your budget. You then have time to revise the plan before construction starts.
Ask prospective builders when they provide pricing and what their estimates include. Check whether the estimate covers site work, permits, utility connections, allowances, finishes, grading, and outdoor improvements. Red Rooster Construction’s control over material sourcing, including its own lumber mill, supports close attention to material quality and cost management. Ask how that approach applies to your project, and request a clear list of allowances, exclusions, and possible change costs.
Check residential experience, portfolios, references, and Utah code knowledge
Residential experience matters because a home requires close coordination between structure, weather protection, mechanical systems, finishes, and everyday use. Look for projects that resemble yours in size, style, location, and complexity. A contractor who mainly builds production homes may have a different process from a team that regularly completes custom projects.
Ask for references from recent clients. Speak with those homeowners about communication, schedule changes, workmanship, cleanup, and how the contractor handled concerns. Also confirm that the team understands the requirements of your city or county, since approval processes can vary across Utah. The Utah State Construction Registry provides a useful place to review contractor information before you hire.
Verify licenses, insurance, and professional credentials
Before signing a contract, verify that the contractor holds the required Utah license and that the license is active and appropriate for the work. The Utah Division of Professional Licensing provides a license lookup tool for reviewing licensing information. Ask for current certificates of general liability insurance and workers’ compensation coverage.
Verify architects, engineers, and other licensed professionals through the appropriate state licensing authority. Do not rely only on website badges or verbal assurances. Ask what happens if an employee is injured or a subcontractor damages your property. A reputable professional should provide documentation and explain coverage without hesitation. Keep copies of licenses, insurance certificates, and signed agreements with your project records.
Ask about communication, fees, revisions, plan ownership, and timelines
Your written agreement should explain the scope of work, communication process, fees, revision policy, and expected schedule. Ask whether the fee is hourly, fixed, or based on a percentage of construction costs. Confirm how many design revisions are included and what additional changes will cost.
Discuss who owns the drawings and whether you can use them with another builder if circumstances change. Ask who your main contact will be, how often you will receive updates, and how decisions are documented. You should also understand what could affect the schedule, including permit review, engineering changes, weather, material availability, and late selections. Clear terms make it easier to resolve questions before they affect construction.
Confirm responsibility for engineering, permits, subcontractors, and construction
Do not assume the person who draws your floor plan will manage every part of the project. Create a written responsibility list covering surveys, soil reports, structural engineering, energy calculations, permit applications, inspections, utility coordination, and subcontractor hiring.
Ask who submits drawings to the local building department and who responds to plan review comments. Confirm whether the builder coordinates engineers and subcontractors or expects you to hire them separately. For a remodel or addition, ask who investigates existing conditions and handles surprises behind walls or below the foundation. Utah’s contractor and construction resources can help you find relevant licensing information. Put every responsibility in writing before you approve the final plan.
Build a Budget for Your Custom Floor Plan
A custom floor plan gives you more control over how your home looks and functions, but every design choice affects the final cost. Square footage matters, but it is only one part of the budget. The home’s shape, rooflines, foundation, windows, plumbing locations, finishes, and site conditions can all change the price.
Set a realistic project budget before deciding how large each room should be. Then divide it into design, site preparation, construction, materials, finishes, and a contingency for changes. This makes it easier to compare options and adjust the plan while changes are still relatively simple.
Red Rooster Construction’s Utah homebuilding cost guide offers a helpful starting point for understanding local expenses. Use it to identify questions for your builder before finalizing the floor plan.
Compare software, drafting, design, architecture, and builder fees
A custom floor plan may involve several types of professionals. Online planning software can help you arrange rooms and test furniture placement. A draftsperson can turn your ideas into more detailed drawings, while a designer may help with room relationships, finishes, lighting, and the overall look of the home.
An architect may be a good fit for a complex structure, challenging property, or highly customized design. Builders may also charge for preconstruction planning, estimating, plan review, or project development. These services can identify problems before construction begins and help you make decisions with the budget in mind.
Ask each professional what their fee includes. Does it cover site visits, consultations, revisions, engineering coordination, and communication with your builder? Request a written scope of work so you can compare similar services instead of choosing based on price alone.
A lower design fee may not include services you need later. Comparing the full scope gives you a clearer picture of the project’s likely design cost.
Ask whether fees are hourly, flat-rate, or percentage-based
Design and construction professionals commonly use hourly, flat-rate, or percentage-based pricing. An hourly fee may work well for a short consultation, an initial plan review, or limited design support. Before agreeing, ask how time is tracked and whether the professional can provide an estimated range.
A flat-rate fee offers a set price for a defined scope. This can make planning easier, but review the agreement closely. It may include only a specific number of meetings, drawings, revisions, or design phases. Additional changes may be billed separately.
Some architects and design firms charge a percentage of the estimated construction cost. This may cover services such as design development, construction documents, and communication during construction. Ask how the percentage is calculated and whether it changes when the project budget changes.
Clarify deposits, payment milestones, cancellation terms, revision fees, and drawing ownership before work begins. Also ask what happens if your project pauses or the floor plan changes significantly. A clear agreement helps prevent misunderstandings as the design develops.
Price surveys, soil reports, engineering, permits, and inspections
Your floor plan must work with the property beneath and around it. A land survey may confirm property lines, elevations, existing structures, utilities, and easements. This information helps your design team place the home accurately and avoid planning around incorrect assumptions.
A soil report may provide information about bearing conditions, drainage, expansive soils, or other factors that affect the foundation. Structural engineering may also be needed for beams, roof systems, retaining walls, seismic considerations, additions, or unusual layouts.
Permit and inspection requirements vary by location and project type across Utah. Contact the building department serving your property for current requirements and fees. Depending on the site, you may also need approvals for grading, utilities, septic systems, stormwater management, or accessory structures.
Ask your builder which reports, permits, and inspections are included in the estimate. If a professional recommends a report, ask what decision it supports and when it should be completed. Early information can help you avoid costly revisions later.
Separate design, construction, materials, and finish costs
Organize your budget by category instead of treating the project as one large number. Design costs may include planning, drafting, architecture, engineering, and revisions. Construction costs can include excavation, foundations, framing, roofing, siding, mechanical systems, insulation, drywall, and labor.
Materials and finishes deserve their own line items. Cabinets, countertops, flooring, plumbing fixtures, lighting, appliances, doors, windows, paint, and hardware can vary widely in price. Two homes with the same square footage may have very different totals because of their finish selections.
Separate allowances from confirmed prices, too. An allowance is an estimated amount reserved for an item you have not selected yet. If your final choice costs more than the allowance, you will need to cover the difference.
Ask how your builder prepares and updates estimates. A detailed budget makes it easier to identify which decisions have the greatest financial effect. You can then spend more on the features that matter most and choose simpler options where they make sense.
Account for structural changes in remodels and additions
Remodels and additions often require more investigation than new construction. Existing homes may have outdated drawings, hidden damage, uneven foundations, undersized electrical systems, or plumbing that differs from the original plans. Opening walls or connecting new spaces can reveal conditions that were not visible during the initial walkthrough.
If your floor plan changes load-bearing walls, rooflines, foundations, stairs, or exterior walls, include structural review in the budget. You may also need engineering, temporary supports, updated mechanical systems, and repairs to areas that connect with the new work.
For an addition, consider how the new space will connect to the existing home. The roof, siding, windows, flooring, insulation, heating, cooling, and electrical systems may all require coordination. A connection that looks simple on paper can involve several trades.
Share your goals with a builder early. Red Rooster Construction provides custom home construction and remodeling services and can help you evaluate how your ideas may affect the existing structure, budget, and construction process.
Include decks, patios, grading, and other outdoor connections
Outdoor spaces should be part of the floor plan conversation from the beginning. A deck, patio, covered porch, or walkout area can affect door locations, window placement, foundation height, grading, drainage, and movement through the home.
Include site work such as excavation, retaining walls, steps, railings, concrete, paving, landscaping, irrigation, exterior lighting, and utility connections. If the property slopes, grading and drainage may account for a significant share of the project budget. In areas with heavy snow, consider where snow will collect and how people will safely reach entrances.
Think about how each outdoor space will function, not only how it will look. A kitchen may benefit from a nearby dining patio, while a mudroom may connect well to a side yard or covered entry. A primary bedroom may need separation from an active outdoor gathering area.
Red Rooster Construction’s project gallery can help you find ideas for connecting indoor and outdoor spaces. Use the examples to discuss proportions, materials, access, maintenance, and privacy with your design team.
Budget for revisions and unexpected site conditions
Your first floor plan is rarely the final version. You may resize a room, move a window, change the kitchen layout, or revise the relationship between indoor and outdoor spaces. Set aside money for these changes before the design process begins.
Ask how many revisions each professional’s fee includes. Confirm whether changes made after approval are billed hourly, priced by phase, or handled through a separate change order. Establish a deadline for major design decisions, since late changes can affect drawings, permits, material orders, and the construction schedule.
Unexpected site conditions deserve their own contingency. Rock, poor soil, drainage problems, buried utilities, structural damage, and additional permit requirements can all affect the budget. The appropriate amount depends on the property and project type, so ask your builder for a realistic recommendation instead of choosing an arbitrary figure.
Keep a record of approved changes and updated costs. Reviewing the budget throughout design and construction makes it easier to catch small adjustments before they become larger problems.
Review Red Rooster Construction’s Utah homebuilding cost guide
Local pricing depends on the property, labor, materials, project scope, and finish level. A cost guide cannot replace a project-specific estimate, but it can help you set reasonable expectations before choosing a plan.
Red Rooster Construction’s Utah homebuilding cost guide can help you review expenses that may affect a custom home. Compare the information with your priorities, including the home’s size, foundation type, number of bathrooms, kitchen finishes, windows, garage, and outdoor spaces.
Bring your questions to a builder before finalizing the floor plan. Ask which features are likely to have the greatest cost impact and whether a simpler design could provide the same function. When you are ready to discuss your property and project goals, contact Red Rooster Construction to start a conversation about your Utah homebuilding plans.
Review Your Plan Before Construction
A floor plan can look polished on paper and still create problems once you furnish, maintain, and live in the home. Before approving the design, review it as a working plan for everyday life, not just a collection of rooms. Walk through a typical morning, imagine carrying groceries from the garage, and think about where shoes, backpacks, laundry, tools, and seasonal items will go.
This review is also the right time to compare the plan with your property, budget, and long-term goals. A change made before construction is usually simpler than a change made after walls, plumbing, and electrical systems are in place. Red Rooster Construction can help connect design decisions to construction details, materials, and site conditions. Review the company’s Utah homebuilding cost guide before finalizing the size and scope of your project.
Eliminate oversized rooms, wasted hallways, and awkward circulation
Look closely at how much space each room provides and whether that space serves a clear purpose. A large great room may sound appealing, but extra square footage can increase construction, heating, cooling, and furnishing costs without improving daily life. The same applies to long hallways, oversized foyers, and oddly shaped rooms that are difficult to furnish.
Trace the routes between frequently used spaces, such as bedrooms, bathrooms, the kitchen, garage, and laundry room. Ask whether people can move through the home without crossing work areas or interrupting conversations. Mark bottlenecks, unused corners, and confusing transitions on the plan before they become framing decisions.
Recheck furniture sizes, door swings, windows, and lighting
Place scaled furniture on the floor plan before approving room dimensions. Include beds, sofas, dining tables, desks, appliances, and storage cabinets, then check whether people can walk comfortably around each item. Tools such as Floor Plan Creator can help you test furniture placement and identify tight areas.
Review every door swing, especially in bathrooms, bedrooms, closets, and laundry rooms. Make sure open doors do not block another doorway, cabinet, or walkway. Check window locations against furniture, privacy needs, and exterior views. Then review lighting, outlets, and switches so each room works well during both daytime and evening use.
Protect storage, mechanical areas, and everyday drop zones
Storage should appear on the floor plan from the beginning, not as an afterthought. Count the spaces your household uses regularly, including coats, shoes, sports equipment, cleaning supplies, luggage, tools, pantry items, and seasonal decorations. A mudroom near the garage can contain daily clutter, while a pantry or utility closet can keep the kitchen from carrying every storage demand.
Reserve practical locations for the furnace, water heater, electrical panel, plumbing access, and other mechanical equipment. These areas need enough clearance for installation and future service. Plan drop zones near entrances where people naturally remove shoes, set down bags, or sort mail. The Red Rooster Construction project gallery can provide ideas for storage, entry areas, and connections between indoor and outdoor spaces.
Test privacy, noise control, and transitions between zones
Review the relationship between public, private, service, and outdoor spaces. Bedrooms should not open directly toward the busiest entertaining areas if family members keep different schedules. A home office may also need separation from the television room, kitchen, or main hallway. Consider sightlines from the entry, living room, and outdoor areas, especially when neighboring homes are nearby.
Noise deserves the same attention as visual privacy. Place laundry rooms, bathrooms, mechanical spaces, and children’s play areas where their sounds will not disrupt bedrooms or quiet workspaces. Check transitions between zones, too. A short hallway, pocket door, change in ceiling height, or well-placed entry can create separation without adding unnecessary square footage.
Review aging-in-place features and flexible room uses
Even if you are designing for your current household, consider how the home may need to work later. Wider doorways, fewer level changes, comfortable bathroom clearances, and a bedroom or office on the main floor can make the home easier to use over time. These choices can also help guests, children, and anyone recovering from an injury.
Think about which rooms may need to serve more than one purpose. A home office could become a guest room, nursery, hobby space, or main-level bedroom. A bonus room might support work, exercise, storage, or family activities. Plan outlets, lighting, heating, and closet space for possible changes so the home remains useful as your needs develop.
Confirm codes, setbacks, structure, drainage, and budget
Before approving the plan, compare it with the requirements for your Utah municipality and property. Review setbacks, easements, lot coverage, height restrictions, utility locations, driveway access, and HOA rules. The home also needs to respond to grading, drainage, soil conditions, snow management, and the location of existing trees or structures.
Ask how the layout affects foundations, roof spans, bearing walls, plumbing runs, HVAC distribution, and window placement. Then compare the plan with your working budget, including site preparation, permits, engineering, finishes, decks, patios, and allowances for unexpected conditions. Sharing budget limits early gives the builder time to recommend practical adjustments before design decisions become expensive changes.
Have qualified professionals review the plan before approval
A sketch can communicate your ideas, but it does not replace a professional review. A residential designer or architect can identify issues with proportions, structure, code requirements, accessibility, and site response. A builder can review whether the plan is practical to frame, finish, maintain, and price with the proposed materials and construction methods.
Bring your written project brief, property information, inspiration images, and budget to the review. Ask each professional to explain concerns clearly and identify which decisions need attention first. If you are planning a custom home, remodel, addition, or outdoor living project, use Red Rooster Construction’s contact page to start a conversation with a Utah builder.
Set a clear process for revisions and construction changes
Agree on how revisions will be handled before the plan is finalized. Ask how many review rounds are included, who coordinates updates, how decisions are documented, and when pricing is refreshed. A shared revision list can track changes to room sizes, windows, finishes, fixtures, storage, and outdoor connections without relying on scattered messages or memory.
Once construction begins, establish a process for changes. Every adjustment should identify the reason, updated cost, schedule effect, and required approval before work proceeds. This keeps the owner, designer, builder, and subcontractors working from the same information. It also helps you distinguish between a necessary site change and a preference that can wait, keeping decisions organized as the project moves forward.
Related Articles
- House Plans 101: Find Your Perfect Home Design — Red Rooster Construction
- Walkout Basement House Plans: Utah Cost & Design Guide — Red Rooster Construction
- Modern House Design: The Ultimate 2026 Guide — Red Rooster Construction
- Cost to Build a House in Utah — Red Rooster
- How to Choose a House Builder: A Complete Guide — Red Rooster Construction
Frequently Asked Questions
How do I start planning a custom floor plan?
Begin with a written project brief. Describe your household, daily routines, must-have rooms, storage needs, preferred style, property details, and budget range. Add inspiration images with notes explaining what you like about each example. This gives your builder or design professional clear direction from the beginning.
Should I use an online floor plan tool before meeting with a builder?
Yes. Online tools can help you compare layouts, test furniture placement, and spot circulation or storage concerns. Use the plan as a visual aid, not as a final construction document. A qualified professional still needs to review the design for structure, local requirements, site conditions, and cost.
How does my Utah property affect the floor plan?
The lot’s slope, drainage, soil, sunlight, views, utilities, setbacks, driveway access, and HOA rules can all shape the design. A sloped property may need a stepped foundation or walkout level, while a lot with mountain views may benefit from carefully placed windows and outdoor areas. Have the site reviewed before finalizing the home’s footprint.
What should I include in my custom home budget?
Plan for design services, surveys, engineering, permits, site work, utilities, construction, materials, finishes, appliances, landscaping, decks or patios, and a contingency for unexpected conditions. Include allowances for items you have not selected yet, and ask your builder which costs are included or excluded from the estimate.
When should I involve a custom home builder?
Involve a builder during the early planning stage, before the floor plan becomes highly detailed. Early input can identify costly rooflines, structural complications, long plumbing runs, difficult site work, or material choices that may not fit your budget. Contact Red Rooster Construction to discuss a custom home, remodel, addition, or outdoor living project in Utah.
Planning a project in Utah?
Talk with Red Rooster Construction about your build, remodel, or outdoor space.
Request a Quote