
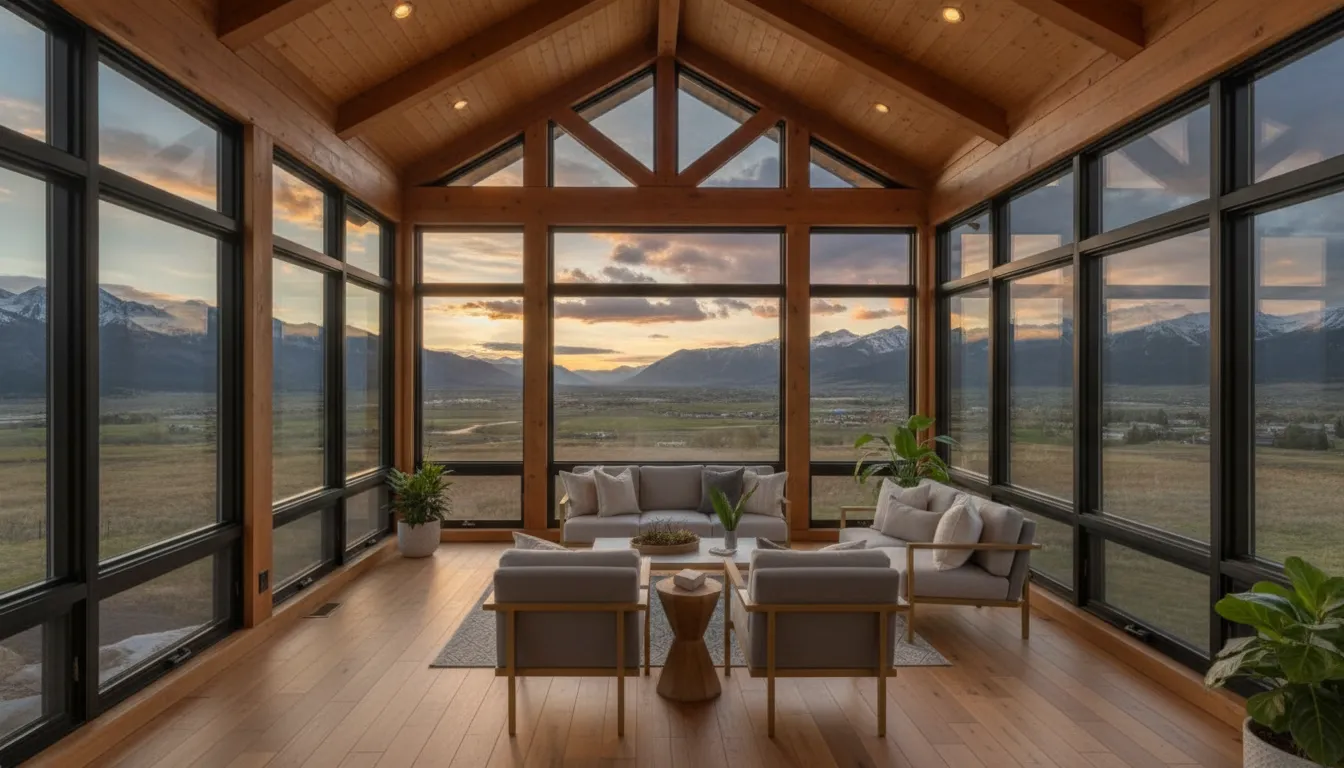
The right sunroom should feel as though it belongs with your Utah home from the day it is finished. That means matching important architectural details, planning a strong connection to the existing structure, and choosing materials that can handle bright sunlight, winter weather, and seasonal moisture. It also means creating a room your family will actually use. A comfortable seating area, flexible workspace, dining zone, plant area, or direct path to the deck can make the addition far more valuable than an oversized room with no clear purpose. Use these sunroom addition ideas to organize your priorities, compare design options, and prepare for a productive conversation with a hands-on local builder.
Key Takeaways
- Define the room’s purpose first: Choose a three-season, four-season, screen-room, or solarium design based on your routines, furniture, comfort needs, and future plans.
- Design for Utah conditions: Account for sun exposure, snow loads, insulation, HVAC, drainage, privacy, permits, setbacks, and the addition’s connection to your existing home.
- Evaluate builders by craftsmanship and project control: Compare estimates by their complete scope, materials, allowances, warranties, and management process, then choose a Utah builder with hands-on oversight and dependable sourcing.
Which Sunroom Addition Fits Your Utah Home?
The best sunroom addition starts with how you plan to use it, not with a picture you found online. A bright reading nook, year-round family room, home office, and plant-filled retreat all have different requirements for insulation, windows, heating, flooring, electrical access, and storage. Your property also plays a major role. Available yard space, existing rooflines, views, privacy, drainage, and access from the house can all shape the design.
Utah’s climate deserves particular attention. A room that feels pleasant during a mild spring afternoon may become too hot in direct summer sun or too cold during a snowy winter. Think about whether you want a seasonal space or a true extension of your home, then consider which rooms should connect to it. Reviewing completed projects in the Red Rooster Construction gallery can help you compare how additions relate to different home styles and outdoor spaces.
Before meeting with a builder, write down your priorities, preferred location, furniture needs, and comfort expectations. This simple planning step can help you choose a sunroom design that fits your routines and remains useful for years.
Compare three-season, four-season, solarium, and screen-room designs
A three-season sunroom is typically designed for spring, summer, and fall. It may use lighter insulation and glazing than a conditioned room, making it suitable for seasonal meals, morning coffee, lounging, and enjoying the yard. Without additional insulation and heating, it may not remain comfortable during Utah’s coldest months.
A four-season sunroom is built for year-round use. Insulated walls, energy-efficient windows, a properly designed roof, and connections to heating and cooling systems can make it feel like a natural extension of the home. It generally requires a larger investment, but it offers more flexibility for families who want to use the room every day.
A solarium places the focus on expansive glass, while a screen room offers airflow and protection from insects without creating a fully enclosed interior. Screen rooms can work well for summer gatherings but provide limited protection from snow, wind, and temperature changes. This sunroom addition guide offers a helpful comparison of seasonal and year-round designs.
Choose attached, detached, bump-out, corner, or wraparound layouts
An attached sunroom provides the most direct connection to a kitchen, living room, or dining area. It can make daily use more convenient and may allow the addition to share certain utilities with the main house. The wall connection, roofline, foundation, windows, and exterior finishes need careful planning so the new space looks and performs like part of the home.
A detached sunroom offers more separation and may work well as an office, art studio, greenhouse, or private retreat. A bump-out adds a smaller amount of floor space, often in an area where a full addition would not fit. Corner layouts can capture views from two directions, while wraparound designs connect multiple sides of the home and may create a natural path to a deck or patio.
Start by considering which rooms you use most and how often you will enter the sunroom. This sunroom planning guide also recommends defining the room’s purpose before choosing its layout.
Design space for living, dining, work, play, fitness, or plants
A sunroom can support one activity or several. For a living area, plan for comfortable seating, side tables, outlets, lighting, and clear walkways. A dining room needs enough space for chairs to move away from the table, along with a convenient connection to the kitchen. If you work from home, include task lighting, glare control, dependable outlets, and a suitable location for a desk.
A playroom benefits from durable finishes, open floor space, and accessible storage. For a fitness area, measure equipment before construction and leave room for safe movement around it. Plant lovers may need shelving, water-resistant surfaces, ventilation, and window placement suited to the plants you want to grow.
Let the flooring, trim, colors, and furniture relate to nearby rooms. A consistent design makes the addition feel connected rather than separate. These four-season sunroom planning tips also emphasize coordinating the room’s flooring, furnishings, and overall design with the rest of the home.
Size the room around traffic, furniture, views, and routines
Begin with measurements of the furniture and equipment you expect to use. Sketch the seating, dining table, desk, storage, plants, and exercise equipment, then mark clear paths between the house, yard, and adjoining rooms. Doors should open without hitting furniture, and people should be able to move through the space without disrupting a conversation, meal, or work area.
Consider the best views and the direction of morning and afternoon sunlight. A narrow room may be ideal for a breakfast nook, but it could feel crowded with a sectional or large dining table. A wider footprint can support several zones, though it will also affect foundation, roofing, insulation, heating, and cooling costs.
The sunroom’s location relative to the rest of the house influences how often you use it. Place it near the routines it supports, such as the kitchen for dining or the living room for relaxing. A thoughtful sunroom layout balances furniture, traffic patterns, natural light, and views.
Plan for accessibility, changing needs, and future use
A well-planned sunroom should remain practical as your household changes. Consider a step-free entry, wider doors, smooth flooring transitions, and enough turning space for mobility aids. These features can make the room easier for children, older adults, guests, and anyone recovering from an injury to use comfortably.
Plan for future electrical and climate needs, too. Extra outlets can support a desk, television, fans, seasonal lighting, or medical equipment. Reinforced walls may make it easier to add handrails, shelves, or built-in seating later. If the room might become a bedroom or office, discuss privacy, insulation, heating, and applicable building requirements before construction begins.
Flexible furniture, durable finishes, and built-in storage can help the room serve different purposes over time. Share these possibilities with your builder early, then use Red Rooster Construction’s contact page to discuss a sunroom addition suited to your Utah home and property.
What Benefits Can a Sunroom Addition Bring?
A sunroom can give your Utah home more than an attractive wall of windows. It can create a comfortable transition between indoor and outdoor living, add usable square footage, and make everyday routines feel more connected to the landscape. With the right design, the room can open toward a garden, deck, mountain view, or private backyard while still providing shelter from wind, rain, insects, and changing temperatures.
The best sunroom additions are planned around the way your household lives. A bright sitting area may be ideal for one family, while another may need a dining room, home office, playroom, or space for plants and hobbies. Placement matters, too. The addition should work with your home’s existing layout, roofline, drainage, and outdoor spaces instead of feeling like a separate structure added without a clear purpose.
Think about how you will use the room throughout the year before choosing windows, flooring, or furniture. Utah’s strong sunlight, winter snow, temperature swings, and mountain weather can all affect comfort and maintenance. A thoughtful plan lets you enjoy natural light and outdoor views without creating a room that becomes too hot in summer or difficult to use in winter. Red Rooster Construction can help homeowners connect sunroom ideas with broader home addition and remodel plans, with close attention to materials, craftsmanship, and the way the new space fits the property.
Add natural light and connect with nature
Sunrooms bring daylight deeper into the home and provide a sheltered place to enjoy the outdoors. Large windows can frame trees, gardens, foothills, or mountain views while keeping rain, wind, and insects outside. That connection can make a compact room feel more open and give everyday activities, such as morning coffee, reading, or breakfast, a stronger sense of place.
Window placement and orientation deserve careful thought. Southern and western exposure may provide beautiful afternoon light, but it can also create glare and unwanted heat. Low-E glass, roof overhangs, shades, and operable windows can help balance brightness with comfort. Browse sunroom ideas on Houzz for examples of how windows, doors, and landscaping can connect interior spaces with the outdoors.
Create space for relaxing, dining, working, entertaining, and hobbies
A sunroom can serve one clear purpose or adapt as your household changes. Use it as a quiet sitting room, a dining area with an outdoor feel, a home office, a children’s playroom, or a place for crafts and hobbies. If you host often, the room can provide extra seating and give guests space to spread out without separating them from the main gathering.
Start by listing the activities you want to support, then measure the furniture and clearances each one requires. A dining table needs room for pulled-out chairs and foot traffic. A workspace needs outlets, task lighting, and a comfortable background for video calls. Built-in benches, nesting tables, storage, and flexible furniture can help the room serve several purposes without feeling crowded.
Connect your home, deck, and yard
A well-planned sunroom can link your interior living areas with the yard. Positioning it beside an existing deck may create a natural path for meals, entertaining, and outdoor activities. Wide doors can make the transition feel easy, while steps, walkways, and planting beds can guide movement between the sunroom and the rest of the property.
The connection should work from both directions. From inside, you should have a clear view and convenient access to the deck or yard. From outside, the addition should look like part of the home, with compatible siding, trim, roofing, and proportions. A site-built design can offer more flexibility around an existing deck, dining room, or uneven lot than a standard unit. See how custom construction responds to existing homes and landscapes in Red Rooster Construction’s project gallery.
Consider resale appeal without assuming a guaranteed return
A sunroom may make a home more appealing to buyers who value natural light, flexible rooms, and a stronger connection to the outdoors. A finished addition can function as a sitting room, office, dining area, or entertaining space. Quality construction, suitable insulation, attractive finishes, and an exterior design that fits the original home can all affect how buyers view the space.
Resale value should not be the only reason to build. The return on an addition varies based on location, construction quality, buyer preferences, and the condition of the rest of the property. An oversized room, poor climate control, or mismatched exterior may limit its appeal. Consider resale potential, but prioritize features your household will enjoy. Before setting a budget, review this Utah home-building cost guide and account for the project’s full scope.
Weigh privacy, maintenance, glare, heat, snow, and lost yard space
Sunrooms also come with tradeoffs, especially in Utah. Extensive glazing can create glare and summer heat, while large windows may reduce privacy from neighboring homes. Snow and ice add structural and moisture concerns, and the addition may take space away from a patio, garden, or play area. Window cleaning, shade maintenance, seal inspections, and seasonal temperature changes should be part of the decision.
Good planning can address many of these concerns before construction begins. Consider privacy glass, interior shades, exterior screens, roof overhangs, durable flooring, and window placements that preserve your best views without exposing every angle of the room. Proper grading, flashing, drainage, insulation, and snow-load planning matter just as much. Discuss your site conditions and construction details with a qualified Utah remodeling contractor before finalizing the design.
How Can You Style and Lay Out a Sunroom?
A sunroom should feel like a natural part of your Utah home, not an extra room attached to the side. Begin with your home’s existing architecture, then plan the addition around how your family will use it. The right combination of windows, finishes, furniture, and access points can make the room comfortable while creating a natural connection to your deck and yard.
Before choosing materials, consider the room’s location, sunlight, privacy, views, and relationship to nearby spaces. Reviewing a builder’s sunroom and outdoor living gallery can help you compare proportions, materials, and details before making design decisions.
Choose modern, contemporary, traditional, farmhouse, rustic, coastal, or Scandinavian styles
Your sunroom can match your home’s style or introduce a complementary look. Modern and contemporary designs often feature clean lines, large glass panes, simple trim, and streamlined furniture. Traditional rooms may include divided-light windows, classic columns, and detailed millwork. Farmhouse and rustic styles work well with natural wood, warm finishes, and comfortable furnishings.
Coastal and Scandinavian designs create a bright, relaxed feel through light colors, simple shapes, and natural textures. Focus first on permanent features, such as windows, flooring, doors, and ceiling details. Then add personality with furniture, rugs, artwork, and decor that can be changed over time. Browse these sunroom design ideas for inspiration, but choose details that suit your home and daily routines.
Match rooflines, siding, trim, windows, doors, and exterior materials
A well-designed sunroom shares visual details with the rest of your home. Matching the roof pitch, siding, exterior trim, and window style can help the addition look intentional. If your home includes brick, stone, or wood accents, consider repeating those materials around the sunroom, foundation, or entry.
The match does not need to be exact, especially if you want the new room to have its own character. However, significant differences in rooflines, colors, or window proportions can make the addition appear disconnected. Your builder should review how the new roof meets the existing roof, how water drains from the connection, and how materials will transition. Red Rooster Construction’s custom home and remodeling services can help coordinate these details as part of the larger project.
Orient the room for sunlight, shade, views, privacy, and Utah’s seasons
Window placement affects how your sunroom feels throughout the day. South-facing windows may receive strong sunlight, while east-facing windows often provide gentler morning light. West-facing windows can bring afternoon glare and extra heat, so you may need exterior shades, roof overhangs, or carefully selected glass. North-facing windows generally provide softer, more consistent light.
Utah’s seasonal changes also deserve attention. Plan for bright summer afternoons, cold winter nights, snow accumulation, and low winter sun. Consider the view from inside the room as well as the view into it from nearby properties. Walk the site at different times of day before finalizing the layout, and note how sunlight, shade, traffic, and privacy change. This information can guide window placement and help you decide where solid walls or screening may be useful.
Add glass walls, skylights, sliding or folding doors, or screened openings
Large windows can make a sunroom feel open and connected to the landscape, but adding more glass is not always the best choice. Consider where you want uninterrupted views, where you need wall space for furniture, and how each opening may affect heat, glare, and privacy. Insulated windows and suitable glass coatings can improve comfort.
Sliding or folding doors can create a wide opening to a deck or patio when the weather is pleasant. Screened openings allow fresh air into the room while helping keep insects outside. Skylights can bring daylight into a room beneath a deeper roofline, but they require careful planning for insulation, flashing, and snow. A combination of fixed and operable windows gives you more control over daylight and ventilation while preserving useful wall space.
Create zones for seating, dining, work, plants, and entertaining
A sunroom can serve several purposes when you divide it into practical zones. Place a sofa and chairs around a coffee table for conversation, then position a dining table near the kitchen or exterior door for easier serving. If you plan to work in the room, reserve a quieter corner for a desk and include outlets for your computer, task lighting, and chargers.
Leave clear walking paths between the home, sunroom, deck, and yard. Avoid placing large furniture in front of frequently used doors or blocking the best views. Plants can fill bright corners, while a storage cabinet or bench can hold blankets, games, and outdoor accessories. Rugs, lighting, and furniture orientation can define each area without adding walls, keeping the room flexible for family gatherings and everyday use.
Improve flow between the home, sunroom, deck, and yard
Think of the sunroom as part of a larger path through your home and outdoor spaces. A wide doorway from the kitchen or family room can make the addition more useful than a room reached through a narrow passage. Aligning doors with an existing walkway, deck, or patio can also simplify outdoor entertaining and everyday movement.
Use related materials and colors to connect each area. Sunroom flooring can coordinate with adjacent interior floors, while decking, railings, and exterior trim can repeat colors from the home. A low threshold, properly planned step, or gradual transition may improve access between spaces. Include lighting along paths, stairs, and doorways so the connection remains practical after sunset. Discuss your preferred layout with a Utah home builder before construction, especially if the project affects an existing deck or exterior wall.
Add biophilic details, built-in benches, and flexible features
Natural materials and greenery can strengthen the connection between your sunroom and yard. Consider wood accents, stone surfaces, woven textures, and cotton or linen upholstery. Choose plants that suit bright indoor conditions, and use containers with drainage trays to help protect the flooring and trim from water.
Built-in benches can provide comfortable seating while using space efficiently, especially beneath windows or along a wide wall. Add storage inside the bench for cushions, books, toys, or seasonal items. Flexible furniture, nesting tables, movable lamps, and lightweight chairs make it easier to change the room from a reading space to a gathering area. If your needs may change, plan for future outlets, adjustable shades, and enough open floor space for a desk, play area, or exercise equipment.
How Can You Make a Sunroom Comfortable Year-Round?
A sunroom can bring in beautiful natural light without becoming too hot in July or too cold in January. For Utah homes, year-round comfort starts with treating the space as a true home addition rather than an enclosed porch. The framing, windows, roof, insulation, heating, ventilation, and drainage all need to work together.
Your sunroom should also connect cleanly to the existing home. That requires careful planning for the foundation, wall connection, roofline, electrical system, HVAC, and water management before construction begins. When these details are addressed early, the finished room feels like a natural extension of the home.
Compare wood, vinyl, aluminum, and composite framing
Framing affects a sunroom’s strength, insulation, maintenance needs, and appearance. Wood offers a traditional look and can be painted or stained to match your home, but it needs regular maintenance to protect it from moisture. Vinyl is low-maintenance and provides reliable insulation, although it may offer fewer color and style options.
Aluminum frames are strong and allow for slim profiles and larger glass panels. Basic aluminum, however, can transfer heat and cold unless it includes a thermal break. Composite framing can provide durability and improved insulation with less maintenance than wood.
The connection between the frame and your home matters just as much as the material. Sunroom construction guidance warns that incorrect load calculations and weak fastening can lead to long-term problems. Ask how the framing will handle snow, wind, roof weight, and movement between structures.
Choose insulated windows, low-E glass, efficient doors, and suitable roofs
Glass has a major effect on temperature, brightness, energy use, and furniture longevity. Double-pane insulated windows are a practical starting point for a four-season sunroom. Low-E glass can reduce unwanted heat gain during summer and heat loss during winter. Your builder can recommend glazing based on the room’s orientation, window size, and exposure to direct sunlight.
Exterior doors need the same level of attention. Look for insulated doors with durable weatherstripping, tight seals, and well-designed thresholds. Sliding or folding doors can open the room to a deck, but the tracks and frames must still limit drafts and water entry.
The roof also influences comfort. A solid insulated roof often provides better temperature control, while skylights and glass roof panels add daylight but may require additional shading. As this sunroom construction guide explains, incorrect glass can cause glare, overheating, energy loss, and fading.
Compare site-built construction with prefabricated components
Prefabricated sunroom components can simplify installation and make pricing easier to estimate. They may suit straightforward projects with standard dimensions, uncomplicated access, and simple rooflines. However, standard components can limit your choices for window sizes, ceiling heights, finishes, and connections to the existing home.
Site-built construction requires more planning, but it can respond to your property and routines. A builder can adjust the footprint around a slope, preserve a favorite view, match existing exterior details, and create a custom roof connection. This approach may also suit Utah homes with unique elevations, heavy snow exposure, or challenging site conditions.
As this sunroom addition guide notes, extensive glass can create a bright connection with the outdoors. Decide whether standardization or customization matters more for your project. A site-built room may offer more flexibility, while a prefabricated system may work well for a simpler design.
Plan foundations, flooring, insulation, air sealing, and Utah snow loads
A comfortable sunroom starts below the windows. The foundation should suit the soil, existing home, site conditions, and intended use of the room. Depending on the design, it may include a slab, crawl space, or another engineered solution. Your plans should also address frost, drainage, settlement, and the transition between the new and existing structures.
Insulation and air sealing help reduce drafts and maintain stable indoor temperatures. Pay attention to the floor, walls, roof assembly, windows, doors, and openings for wiring or plumbing. Choose flooring that can handle temperature changes and occasional moisture from wet shoes, snow, or open doors.
Utah snow conditions make roof design especially important. Your builder and design professionals should account for expected snow loads, roof pitch, drainage, and the connection to the home. A sunroom addition planning guide also emphasizes matching the foundation and heating system to how the room will be used throughout the year.
Connect heating and cooling with HVAC, mini-splits, radiant heat, or fans
A four-season sunroom needs a dedicated heating and cooling plan. Extending the existing HVAC system may provide consistent comfort if the equipment has enough capacity and the ductwork can be designed correctly. Adding a duct without reviewing the whole system can leave the room uncomfortable and affect performance elsewhere in the home.
A ductless mini-split may work well when extending ductwork is difficult. It can provide heating and cooling while allowing the sunroom to have its own temperature settings. Radiant floor heating can make tile and other hard flooring more comfortable during cold months, but it must be planned before the floor is installed.
Ceiling fans can circulate air and reduce hot spots, but they do not replace heating or cooling. Place thermostats away from direct sunlight, and consider a separate zone for the sunroom. A four-season room should function more like a family room addition, as this overview of sunroom designs explains.
Add ventilation, operable windows, and convenient climate controls
Fresh air helps manage heat, humidity, and stale air when people gather in the room. Operable windows can provide cross-ventilation when outdoor temperatures are comfortable. Casement, awning, and sliding windows each offer different benefits, so consider furniture placement, screens, views, and the amount of opening you want.
A ceiling fan, exhaust fan, or dedicated ventilation system can support the mechanical design. Avoid placing furniture in front of supply registers, return-air pathways, or operable windows. Your builder should confirm that the ventilation plan will not pull damp outdoor air into the walls or roof.
Convenient controls make the room easier to use. Consider a separate thermostat, motorized shades, dimmable lighting, and outlets near seating and work areas. Plan these features before drywall installation. Select flooring, furniture, and finishes that coordinate with the rest of your home, as these four-season sunroom planning tips recommend.
Manage glare and heat with shades, blinds, overhangs, and strategic glazing
Large windows can fill a sunroom with light, but direct sunlight may create glare, hot surfaces, and fading. Study how sunlight moves across the proposed room during different seasons. A south- or west-facing room may need more shade than a north-facing room, while nearby trees and buildings can change the results.
Exterior overhangs, roof extensions, and well-placed landscaping can block high summer sun while allowing lower winter light inside. Interior shades and blinds provide additional control throughout the day. Solar shades can reduce glare while preserving the view, and cellular shades add insulation.
Glass selection should reflect the room’s orientation and purpose. Low-E coatings, tinted options, and carefully sized windows may perform better than covering every wall with clear glass. The right glazing choices can keep the room bright and comfortable without requiring the shades to stay closed.
Prevent moisture with grading, drainage, flashing, and proper sealing
Water management protects the sunroom and the existing home. Before construction, review the property’s slope and confirm that rain and melting snow will drain away from the foundation. Downspouts should discharge safely, and the finished floor should not create a low area where water can collect near the addition.
Flashing is essential at the roof, wall, windows, doors, and connection to the house. It directs water outward instead of allowing it behind siding or into the wall assembly. Sealants close small gaps, but they should support proper flashing and drainage rather than replace them.
The room also needs protection from interior condensation. Use suitable insulation and air sealing, control indoor humidity, and provide a way for wet areas to dry. Review how the new roof will shed water during heavy Utah snow and rain. Sunroom construction guidance identifies improper drainage and site preparation as common sources of serious issues.
Choose a hands-on builder who controls materials and sourcing
The builder you choose affects how well these systems come together. Look for a contractor who can explain the framing, foundation, roof, windows, insulation, HVAC, and drainage plan clearly. Ask who coordinates subcontractors, checks material quality, handles changes, and answers questions during construction.
A hands-on company with direct control over material sourcing can provide greater consistency from the estimate through completion. Red Rooster Construction operates its own lumber mill and manages material sourcing, which supports quality control and cost management. That level of involvement can be valuable for a custom sunroom, where small construction details affect appearance, durability, and comfort.
Before choosing a builder, review completed projects in the Red Rooster Construction gallery, then discuss your property and goals through the company’s contact page. Request a detailed scope that lists materials, insulation levels, window specifications, HVAC work, drainage, schedule, and warranty responsibilities.
What Does a Sunroom Addition Cost in Utah?
A sunroom addition in Utah typically costs $75,000 to $150,000, based on regional estimates for professionally built, four-season additions. This range is a starting point, not a fixed price. Your final investment will depend on the room’s size, foundation, windows, insulation, heating and cooling, finishes, and connection to the existing home.
A small three-season room with limited utilities may cost less. A large, fully conditioned addition with custom windows, a new foundation, complex rooflines, and premium finishes may exceed the range. Site conditions also matter. Sloped ground, difficult access, drainage concerns, and extensive changes to the existing exterior can all add labor and materials.
Utah’s climate makes careful planning especially important. Your sunroom should handle hot summer sunlight, freezing winter temperatures, snow loads, and shifting moisture conditions. Before setting a budget, review Red Rooster Construction’s guide to the cost to build a house in Utah for broader context on local labor, materials, and site preparation.
The most reliable way to narrow your budget is to define how you will use the room, then have a qualified Utah builder assess your home and property. A site visit can reveal structural, access, drainage, and utility considerations that a general cost range cannot.
Start with a Utah-specific cost range, not a national average
National sunroom cost figures can help with early research, but they may not reflect construction costs in Utah. Local labor rates, material availability, permit requirements, snow-load standards, and site conditions all affect what homeowners pay along the Wasatch Front.
For initial planning, use $75,000 to $150,000 as a working range for a professionally built sunroom addition. A simpler room with standard materials and limited utility work may fall below that range. A year-round addition with insulated windows, a full foundation, HVAC, custom rooflines, and upgraded finishes may cost more.
Regional estimates are more useful when they reflect the type of room you want to build. Compare the scope carefully, since one estimate may cover a basic enclosed porch while another includes a fully finished living space. Regional sunroom planning guidance can provide helpful context, but a local site assessment is still essential.
Compare three-season, four-season, custom, and site-built costs
A three-season sunroom is generally less expensive because it may use lighter framing, simpler windows, and limited heating or cooling. It can be a comfortable place to sit during spring, summer, and fall, but it may not stay comfortable during Utah’s coldest winters or hottest summer afternoons.
A four-season sunroom costs more because it is designed to function as conditioned living space. Insulation, energy-efficient windows, air sealing, heating, cooling, and stronger structural components all affect the price. This option is often a better fit for a home office, dining area, family room, or plant room you plan to use throughout the year.
Prefabricated components can simplify construction, while a custom, site-built addition allows more control over the footprint, roofline, windows, finishes, and connection to the home. Custom work may cost more, but it can fit an existing Utah house more naturally. Sunroom cost information can help you compare broad project categories before requesting local estimates.
See how size, finishes, labor, windows, rooflines, and utilities affect price
Size is one of the clearest cost factors. A larger room requires more framing, roofing, insulation, flooring, windows, electrical work, and labor. However, cost does not always increase evenly by square foot. A compact addition with difficult access, unusual angles, or specialty windows may cost more per square foot than a larger, straightforward design.
Windows can also make a noticeable difference. Standard units generally cost less than oversized, operable, specialty-shaped, or high-performance windows. Low-E glass and insulated frames may increase the initial price, but they can improve comfort and help manage heat transfer.
Rooflines, siding, trim, flooring, lighting, cabinetry, built-ins, and utility connections add further expense. Extending plumbing for a wet bar, relocating electrical circuits, or connecting the room to the home’s HVAC system requires additional planning and labor. Ask your builder to separate base construction, allowances, and optional upgrades so you can see which choices affect the estimate.
Budget for foundations, excavation, grading, demolition, access, and HVAC
The finished room is only one part of the project. The site may need excavation, grading, footings, a slab, crawl-space work, or another foundation system before framing begins. Sloped lots, rocky soil, drainage problems, and limited equipment access can increase preparation costs.
Your existing home may also require demolition. Removing a deck, patio, exterior wall, window, or section of roof can add labor, disposal fees, and temporary protection. The builder may need a plan for moving materials through the property while keeping the home and work area safe.
Heating and cooling should be considered early. A four-season sunroom may need new ductwork, a mini-split, radiant flooring, electric heat, or upgraded equipment. HVAC costs vary according to the room’s size, insulation, windows, and connection to the existing system. The Angi sunroom cost guide also identifies foundations, excavation, demolition, and HVAC as expenses homeowners should include in early planning.
Allow for design changes, custom details, materials, and contingencies
A detailed design can reduce surprises, but it cannot eliminate every unknown. Existing walls may contain wiring or plumbing, and demolition can reveal framing, drainage, or foundation conditions that were not visible during the initial review. Set aside a contingency amount before construction starts so one unexpected issue does not force difficult compromises.
Design changes after work begins can affect both cost and schedule. Moving a door, changing the window layout, adding skylights, upgrading flooring, or relocating electrical outlets may require new materials and additional labor. Even a small revision can become more expensive if it affects work that has already been completed.
Ask how the estimate handles material substitutions, price changes, and owner-requested revisions. A written change-order process should show the added cost, schedule impact, and approval required before work proceeds. This keeps decisions clear and makes it easier to protect the rest of your budget.
Compare estimates by scope, allowances, schedule, payment terms, and warranty
The lowest estimate is not always the least expensive project. Compare proposals line by line to see whether they include design services, permits, demolition, foundation work, insulation, windows, roofing, electrical, HVAC, finish work, cleanup, and final inspections.
Pay close attention to allowances, which are placeholder amounts for flooring, lighting, cabinets, doors, or plumbing fixtures. A low allowance can make a proposal appear less expensive, but choosing the materials you actually want may increase the final price.
Compare the projected schedule, payment terms, change-order process, warranty, and responsibilities for delays as well. Ask whether the builder coordinates subcontractors and inspections, and clarify anything listed as “owner supplied” or “by others.” A detailed estimate gives you a more accurate comparison than a single total. A reliable builder should also explain what is included before you sign a contract.
Consider how direct sourcing and construction management affect costs
A builder’s purchasing and project-management practices can influence price, consistency, and timing. Direct material sourcing may reduce extra markups or make it easier to maintain quality across framing, trim, and finish work. It can also help identify availability concerns earlier, which may reduce substitutions and delays.
Red Rooster Construction operates its own lumber mill and sources materials directly, giving the company hands-on control over important parts of the building process. This approach does not mean every project will cost less, but it can support careful material selection, quality control, and clearer cost management.
Construction management matters just as much. When one builder coordinates the design, schedule, trades, inspections, and deliveries, fewer details can fall between contractors. Ask who manages the work each day, who handles changes, and how progress is communicated. You can review Red Rooster’s project gallery to see examples of its craftsmanship and completed residential work.
Set must-have features before choosing upgrades and finishes
Start your budget with the features that affect how you will use the room. These might include year-round heating and cooling, large windows, a specific view, an accessible entry, built-in seating, or a direct connection to a deck or backyard. Identify these priorities before choosing decorative upgrades.
Next, divide your preferences into three groups: must have, would like, and optional. This makes decisions easier if the estimate exceeds your target. For example, you might prioritize insulated windows and HVAC while postponing custom cabinetry or specialty flooring.
Bring this list to your builder during the initial consultation. A thoughtful builder can help you decide where to spend more on comfort, durability, and performance, and where a simpler choice may work just as well. When you are ready to discuss your property and starting budget, contact Red Rooster Construction for help planning your Utah sunroom addition.
What Permits and Planning Does a Sunroom Need in Utah?
A sunroom addition is more than a room filled with windows. Because it expands your home’s footprint and connects to the existing structure, it typically requires careful design, permits, inspections, and coordination between several trades. The exact process depends on your city, county, property, and whether you are building a screened room, three-season space, or fully conditioned living area.
Start by checking your local requirements before choosing finishes or ordering windows. Utah’s adopted building codes establish statewide standards, while local jurisdictions may have additional rules for zoning, setbacks, drainage, snow loads, and neighborhood design. Your project may require a building permit, along with separate electrical, plumbing, or mechanical permits if you add those features.
The plans may need to cover the foundation, roof connection, framing, insulation, windows, doors, electrical work, heating and cooling, grading, and the wall that connects the addition to your home. Planning these details early helps you avoid expensive changes during construction. It also gives you a more useful estimate because the project scope includes more than the visible room.
Check permits, zoning, setbacks, easements, and HOA rules
Most permanent sunroom additions require a building permit. Depending on the design, you may also need electrical, plumbing, mechanical, or other trade permits. Fees and review times vary by jurisdiction, project size, and plan complexity. Your local building department can provide the most accurate information, while an experienced contractor can often prepare and submit the required documents on your behalf.
Zoning requirements matter, too. Your addition may need to meet minimum setbacks from the front, side, or rear property lines. Utility, drainage, or access easements can limit where you build, even when the area appears to be part of your yard. If your property is governed by an HOA, review its architectural guidelines before finalizing the design. The HOA may regulate rooflines, exterior colors, siding, window styles, materials, or the amount of visible glass. Get written approval when possible, rather than relying on a verbal response.
Verify city and county requirements across Salt Lake, Davis, Summit, Tooele, Weber, Wasatch, Morgan, and Grand counties
Building requirements can differ between neighboring cities, even when they are located in the same county. A sunroom in Salt Lake City may follow a different application process from one in Sandy, while a property in Weber County may have different requirements from a home in Ogden. Rural properties can involve additional considerations, such as septic systems, private roads, well locations, or more complex site reviews.
First, identify which agency has authority over your address. The project may fall under a city building department, a county office, or another local agency. Ask which drawings and documents you need, such as a site plan, floor plan, elevations, structural calculations, energy details, and contractor information. A builder with experience in Utah home construction can help confirm the right process for properties in Salt Lake, Davis, Summit, Tooele, Weber, Wasatch, Morgan, and Grand counties.
Meet structural, electrical, plumbing, HVAC, energy-code, and egress requirements
A four-season sunroom is generally treated more like conditioned living space than a covered patio. Its design may need to address insulation, air sealing, energy performance, heating, cooling, electrical circuits, lighting, and emergency escape requirements. If you plan to add a sink, wet bar, bathroom, or other water fixture, include plumbing plans and inspections in the project schedule.
The connection to your existing home also needs careful review. Depending on the design, a qualified contractor or engineer may need to evaluate the foundation, framing, roof loads, headers, wall removal, flashing, and attachment points. Utah’s snow conditions make roof-load planning especially important. Windows and doors must suit their location and intended use, including safety glazing and weather performance where required. Correct framing and fastening help prevent movement, leaks, and long-term structural problems.
Confirm property lines, utilities, drainage, grading, and soil conditions
Before excavation begins, confirm your property lines and identify buried utilities. Your builder may need to review a survey and coordinate markings for gas, water, sewer, electrical, irrigation, and other lines. Building over an easement or too close to a utility can delay approval and force a costly redesign.
Water management deserves the same attention as the floor plan. The finished addition should direct water away from the foundation, not toward it. Review the slope of the lot, roof runoff, downspouts, existing drainage, and the connection between the new foundation and the old one. Soil conditions can affect excavation, footings, and settlement, particularly on sloped lots or properties with expansive soils. Addressing these conditions during design is much easier than correcting standing water or foundation movement after construction.
Prepare foundation, roof-load, wall-connection, window, and door plans
Your drawings should show how the sunroom will sit on the property and connect to the house. Depending on the site and design, the foundation may include a slab, crawl space, stem wall, or individual footings. The plans should account for soil conditions, frost protection, floor height, insulation, and the transition between the existing home and the new room.
The roof plan should show how loads transfer through the framing and into the foundation. It should also detail flashing, insulation, drainage, and the connection at the existing roof or exterior wall. Include the size and location of windows, exterior doors, sliding doors, and skylights. These choices affect natural light, ventilation, energy performance, furniture placement, and access to your deck or yard. Review the complete plan before submitting it for approval so major changes do not arise after construction begins.
Coordinate approvals, inspections, contractors, and site access
A sunroom may involve excavation, concrete, framing, roofing, electrical, HVAC, insulation, drywall, flooring, and finish carpentry. One person should coordinate the schedule, inspections, deliveries, and communication between trades. This reduces the risk of a finished wall blocking an electrical run or a late HVAC decision delaying insulation and drywall.
Ask your builder which inspections the project requires and when they will occur. Depending on the jurisdiction, inspections may cover the foundation, framing, rough electrical, rough mechanical, insulation, and final work. The sequence can vary, so confirm it with your building department. Plan how workers and materials will reach the site, particularly when the addition sits behind the house or beside a narrow driveway. Discuss protection for landscaping, fences, decks, and interior finishes, along with responsibility for permit fees, inspection scheduling, cleanup, and site protection.
Avoid skipped permits, underplanned HVAC, and poor water management
Skipping a required permit can create problems when you sell, refinance, insure, or remodel your home. It may lead to corrections, fines, removal of completed work, or difficulty showing that the addition meets code. Do not assume a small footprint or prefabricated package is exempt. Confirm the requirements with your local building department before construction starts.
Heating and cooling deserve careful planning. Glass-heavy rooms can become uncomfortably hot in summer and cold in winter, even when the rest of the home feels comfortable. Ask whether your existing HVAC system has enough capacity and whether extending ductwork is practical. A mini-split, radiant floor system, ceiling fans, or operable windows may be appropriate, depending on the design. Also review gutters, flashing, grading, and foundation drainage. Poor HVAC planning and water management are common sources of comfort and maintenance problems in sunrooms.
Choose a Utah builder familiar with Wasatch Front requirements
A builder with local experience can help you understand how requirements differ between jurisdictions. Look for someone who has completed additions in communities similar to yours and can explain the permit process, inspection schedule, structural approach, and expected documentation. Ask to see examples of projects with roof connections, large windows, or challenging sites. Red Rooster Construction’s project gallery offers examples of its craftsmanship and residential work.
Ask who prepares the drawings, submits permits, schedules inspections, and coordinates subcontractors. Your builder should provide a clear scope of work, realistic allowances, and a plan for weather protection and site access. Red Rooster Construction’s hands-on approach, direct material sourcing, and control over the building process can help keep decisions organized from the planning stage through the final inspection. You can contact Red Rooster Construction to discuss your property and proposed addition.
How Can You Furnish and Decorate a Sunroom?
A well-designed sunroom should feel like a natural extension of your home, not a patio that happens to have windows. Start by deciding how your household will use the space. It might serve as a quiet reading room, an informal dining area, a home office, a children’s playroom, or a flexible combination of several uses.
Utah’s bright sunlight, dry air, seasonal temperature changes, and winter weather should shape your decorating choices. Select durable materials, plan for glare and ventilation, and keep pathways open between the house, sunroom, deck, and yard. You can find additional ideas for connecting indoor rooms with outdoor living areas in the Red Rooster Construction gallery.
Arrange durable seating for lounging, dining, work, play, or multiple uses
Choose furniture based on the activities you expect to do most often. A sofa with two lounge chairs can create a comfortable setting for reading and conversation. If you plan to serve meals in the room, a dining table may be a better starting point. For a multipurpose sunroom, choose lightweight chairs, nesting tables, and ottomans that can move easily when the room changes from a work area to an entertaining space.
Leave clear paths between the main house, exterior doors, deck, and yard. Avoid placing large pieces where they block windows or interrupt traffic. A family sunroom may benefit from washable upholstery, rounded edges, and an open floor area for play. If the room will double as an office, position the desk so direct sunlight does not reflect on your screen.
Choose furniture, fabrics, and finishes for sunlight and temperature changes
Direct sunlight can fade upholstery, warm dark surfaces, and dry out certain materials over time. Look for performance fabrics, removable covers, and finishes that can withstand regular exposure to light. Wicker, seagrass, treated wood, and powder-coated metal are practical options, especially when paired with durable indoor-outdoor cushions.
You can still create a soft, inviting atmosphere. Mix hard-wearing furniture with woven pillows, washable throws, and a comfortable area rug. Keep delicate artwork, antiques, and sensitive leather pieces away from the brightest windows. Consider using window treatments to protect furnishings, and rearrange smaller accessories occasionally so one area does not receive constant exposure.
Layer lighting with shades, blinds, privacy treatments, and glare control
Natural light may be the main reason you want a sunroom, but direct glare can make the space difficult to use. Layer window treatments so you can adjust light and privacy throughout the day. Solar shades can reduce glare while preserving outdoor views. Woven shades and curtains offer additional privacy and can block more light when the room becomes too bright.
Window orientation matters. South- and west-facing glass may receive intense afternoon sun, while north-facing windows often provide softer, more consistent light. Add table lamps, floor lamps, or recessed fixtures for evening use. When selecting large windows and doors, review ENERGY STAR guidance for residential windows and doors to compare features that support comfort and efficiency.
Select moisture-resistant flooring, rugs, finishes, and textiles
A sunroom near an exterior door may collect dirt, wet shoes, snow, and condensation. Choose flooring that is easy to clean and less vulnerable to moisture. Porcelain tile, ceramic tile, luxury vinyl, sealed concrete, and properly finished wood can all be suitable, depending on the room’s foundation, insulation, and connection to the rest of the house.
Place washable rugs near entrances and beneath seating areas, especially if the room opens directly to a deck or yard. Low-pile rugs are generally easier to clean than thick styles and can define different zones without making the room feel crowded. Avoid unsealed natural fibers in areas that may become damp. Before choosing a finish, ask how the floor will be insulated, sealed, and protected from temperature changes.
Add plants suited to bright interiors and Utah’s seasons
Plants can make a sunroom feel more connected to the landscape, but the space may experience wider temperature swings than other rooms. Choose plants based on direct sunlight, winter temperatures, and the amount of care you want to provide. Succulents, snake plants, jade plants, and certain herbs may suit bright conditions, although each variety has specific needs.
Combine floor plants, tabletop pots, and hanging planters to add height without blocking walkways. Keep heat-sensitive plants away from hot glass and cold drafts. Place waterproof saucers beneath containers to protect the flooring, and group plants according to their light and watering needs. If you want a larger collection, include a dedicated plant shelf or bench near strong natural light and an accessible water source.
Use built-in storage, window seats, and multipurpose furniture
Built-in features can make a sunroom feel polished while keeping everyday items out of sight. A window seat can provide extra seating and concealed storage for blankets, toys, or books. Low cabinets can hold games, gardening supplies, serving pieces, and office materials without blocking views or natural light.
Plan storage around the room’s primary function. A family space may need durable drawers and closed cabinets, while a plant-focused room could benefit from open shelving and a nearby work surface. Ottomans with hidden compartments, nesting tables, and storage benches can serve several purposes. Design these details before construction so wall framing, electrical outlets, trim, and flooring align with the final installation.
Install ceiling fans, charging outlets, smart shades, and operable windows
Comfort depends on more than the furniture arrangement. A ceiling fan can circulate air during warmer months, while operable windows may provide natural ventilation when outdoor conditions are comfortable. Place outlets where you expect to use lamps, laptops, phone chargers, and seasonal decorations. In a larger room, floor outlets can be useful, but they should be positioned carefully around furniture and walkways.
Smart shades can simplify glare and heat management, while dimmable lighting gives you more control after sunset. Place climate controls near the main seating or work area for convenient access. If you want to use the sunroom year-round, coordinate these features with the heating and cooling plan. Discuss project-specific options with Red Rooster Construction before construction begins.
Connect the sunroom’s colors, materials, and decor to nearby spaces
Your sunroom does not need to match the adjoining room exactly, but the spaces should feel visually connected. Repeat one or two colors from the nearby interior through cushions, wall paint, flooring, or window trim. Then introduce a different texture, such as woven shades, natural wood, or stone, to give the addition its own character.
Consider the transition between the house, sunroom, deck, and yard. Coordinating flooring, trim, hardware, and exterior materials can make the areas feel more cohesive. If the sunroom opens to an outdoor living space, repeat similar colors in deck furniture, planters, or landscaping. A consistent palette creates a finished look without requiring every surface and accessory to be identical.
Related Articles
- Cost to Build a House in Utah — Red Rooster
- Red Rooster Construction — Utah's Hands-On Home Builder
- Project Gallery — Red Rooster Construction
- Contact — Red Rooster Construction
Frequently Asked Questions
How much does a sunroom addition cost in Utah?
A professionally built sunroom often costs between $75,000 and $150,000. The final price depends on the size, foundation, windows, insulation, heating and cooling, finishes, site conditions, and how much the existing home must be modified. A site visit and detailed scope of work will provide a more useful estimate than a general range.
Is a three-season or four-season sunroom better for a Utah home?
A three-season room may work well for spring, summer, and fall use, while a four-season room is designed for comfortable use throughout the year. Utah’s winter temperatures and summer sunlight make insulation, energy-efficient windows, air sealing, and climate control especially important if you want the room to function as daily living space.
Do I need a permit to build a sunroom in Utah?
Most permanent sunroom additions require a building permit. Depending on the project, you may also need electrical, plumbing, or mechanical permits. Local rules for setbacks, easements, drainage, snow loads, and HOA approval can vary, so confirm requirements with the agency responsible for your property before construction begins.
What features help keep a sunroom comfortable year-round?
Insulated windows, Low-E glass, proper wall and roof insulation, sealed doors, effective drainage, and a suitable heating and cooling system all contribute to comfort. Exterior overhangs, shades, operable windows, and ceiling fans can help manage glare, summer heat, and ventilation. The design should also account for Utah snow loads and winter conditions.
How do I choose the right sunroom builder?
Look for a Utah builder who can explain the foundation, roof connection, windows, HVAC, drainage, permits, schedule, and warranty in clear terms. Ask how the company manages subcontractors, material sourcing, changes, and inspections. Red Rooster Construction takes a hands-on approach, operates its own lumber mill, and directly sources materials for greater control over quality and cost management. Contact Red Rooster Construction to discuss your home and project goals.
Planning a project in Utah?
Talk with Red Rooster Construction about your build, remodel, or outdoor space.
Request a Quote