
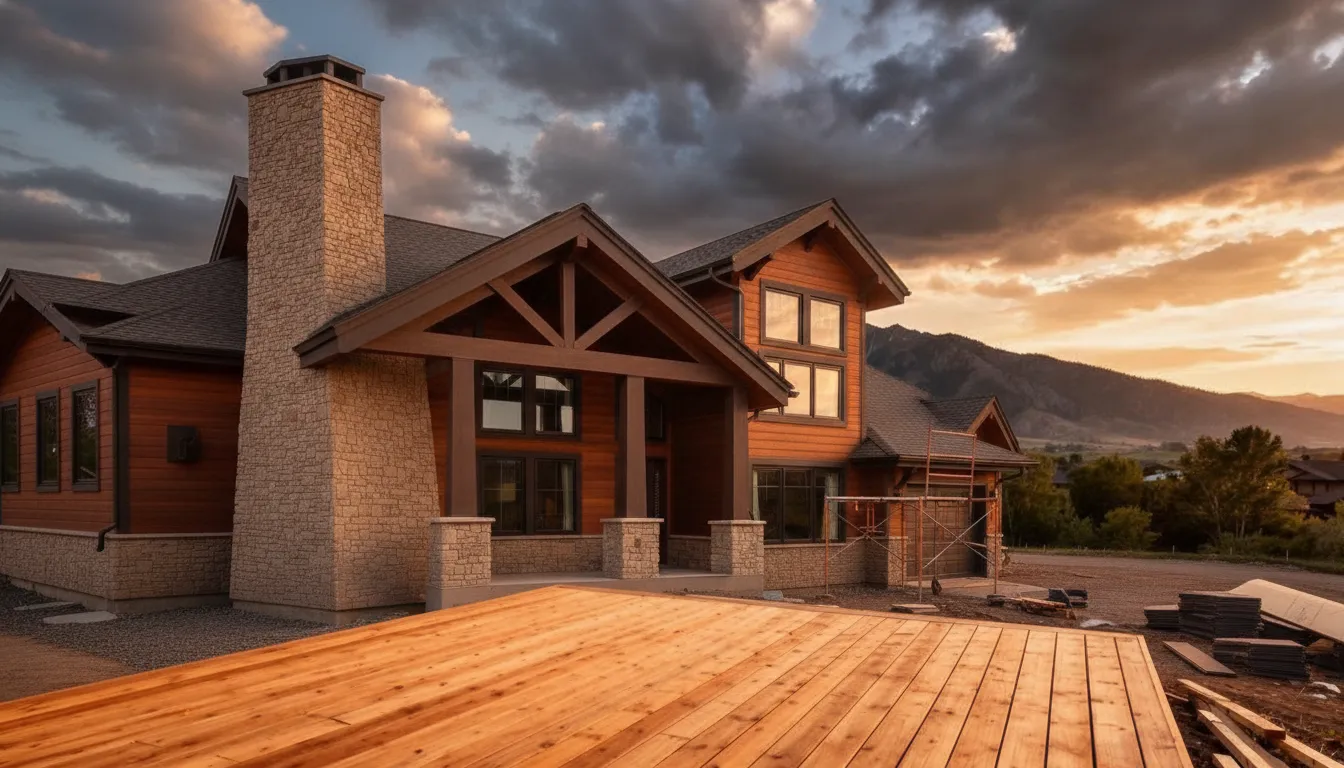
The best siding contractors do not treat your home’s exterior like a collection of panels. They understand how every layer works together to manage water, air, insulation, and weather exposure. That knowledge becomes especially important when siding meets a roofline, deck, window, door, addition, or foundation wall. Utah properties face conditions that can expose weak installation details quickly, from winter freezes in Morgan County to intense sun along the Wasatch Front. This guide explains what to look for before hiring a contractor, how to spot warning signs, which siding materials to compare, and how to review estimates without overlooking preparation or repair costs.
Key Takeaways
- Verify the contractor’s qualifications: Check Utah licensing, insurance, material experience, references, service area, and examples of comparable siding projects.
- Evaluate the entire exterior system: Confirm the plan addresses moisture damage, house wrap, flashing, trim, insulation, windows, doors, rooflines, and proper surface preparation.
- Compare complete written proposals: Review materials, labor, removal, repairs, schedules, payment milestones, change orders, cleanup, and separate workmanship and product warranties.
Choose Siding Contractors for Utah Homes and Remodeling Projects
Siding protects your home from weather while shaping its appearance. It helps manage moisture, supports energy performance, and creates a finished exterior around windows, doors, rooflines, and foundation walls. In Utah, siding must also stand up to dry summers, freezing temperatures, snow, wind, and sudden weather changes.
The right contractor will look beyond the visible panels. They should understand how siding connects with flashing, trim, house wrap, insulation, windows, doors, decks, and drainage. That attention to detail matters whether you need a small repair in Weber County, a full replacement in Salt Lake County, or siding for a custom home near Park City.
Before requesting estimates, define the work your property needs. Is the siding damaged in one area, nearing the end of its service life, or part of a larger remodel? The answer will help you find a contractor with the right experience and determine whether a siding specialist or full-service builder makes more sense.
Match the contractor to your project
Start with the contractor’s experience. A company that mainly installs vinyl siding may not be the best fit for a custom home with fiber cement, wood siding, detailed trim, or several exterior finishes. Ask to see recent projects similar to yours in material, style, size, and complexity.
Confirm that the contractor holds an active Utah license and carries appropriate insurance. Then request a detailed written estimate covering materials, preparation, labor, cleanup, scheduling, and payment terms. The proposal should also list separate warranties for workmanship and materials, since these cover different parts of the project.
Ask who will complete the work and who will supervise it. If the contractor discovers damaged sheathing or framing, you should know how the company handles additional repairs before work begins. The Better Business Bureau’s siding contractor guidance offers useful questions to ask before hiring.
Plan siding installation, replacement, or repair
A clear plan helps prevent delays and last-minute decisions. During the site visit, discuss whether the project involves isolated repairs, partial replacement, or removal and replacement across the entire home. If only one section needs work, ask how the contractor will match the existing siding’s profile, color, and exposure.
Many siding replacement projects can take about a week, but the schedule depends on the home’s size, material, wall condition, access, and weather. Utah’s freezing temperatures and summer storms may affect exterior work, so ask about the expected start date and weather plan.
Confirm when the old siding will be removed, how exposed walls will be protected, and how the crew will manage daily cleanup. You should also know where materials will be stored and how workers will protect landscaping, windows, doors, walkways, and vehicles.
Request exterior and moisture inspections
Siding damage is not always obvious from the ground. Cracked panels, stains, loose sections, or swelling may indicate water intrusion behind the exterior. Before approving repairs, ask the contractor to inspect the siding, trim, caulking, flashing, house wrap, and any exposed sheathing.
A careful inspection can reveal deterioration, moisture damage, poor installation, or water entering around windows and doors. Covering damaged materials without addressing the source can leave the underlying problem in place.
Request photos and a written explanation of recommended repairs. Ask whether the contractor will check areas beneath damaged siding and around rooflines, penetrations, decks, and other transitions. The Department of Energy’s moisture control guidance explains why managing water at the exterior is important for protecting a home.
Complete trim, flashing, soffit, and fascia work
Siding is one part of a weather-resistant exterior. Trim creates clean transitions around windows, doors, corners, and rooflines. Flashing directs water away from vulnerable areas, while soffits and fascia help protect roof edges and support proper attic ventilation.
Ask whether these components are included in the estimate or listed as separate work. A complete proposal should explain how flashing will be installed around openings, how joints will be sealed, and how siding will meet the roof, foundation, decks, and other structures.
Pay close attention to areas where different materials meet. Poorly planned transitions can allow water behind the siding or create premature cracking and staining. The contractor should also identify any damaged trim, fascia, or soffit that needs replacement before new siding is installed.
Coordinate siding for custom homes, additions, and remodels
Siding work becomes more detailed when it is part of a larger construction project. An addition may need to match the existing home, or a remodel may call for a coordinated update across the entire exterior. Differences in wall depth, window placement, rooflines, and materials can make transitions more complicated than they appear.
Choose a contractor who reviews these details before ordering materials. For a custom home, siding should coordinate with the architectural plans, insulation, windows, doors, exterior lighting, decks, and drainage. For an addition, the contractor may need to locate a discontinued product or create a deliberate contrast.
Ask how the crew will manage connections between old and new construction. Careful preparation and regular communication are especially important when several trades share the same exterior work area.
Know when to choose a full-service builder
A siding specialist may be a practical choice for a straightforward repair or replacement. A full-service builder may be better when the siding connects to framing, windows, roofing, insulation, additions, structural repairs, or a larger remodel.
Using one team for related work can simplify scheduling and make responsibility clearer. If damaged framing is found beneath the siding, for example, a full-service builder may be able to coordinate the repair instead of requiring you to hire another company.
Compare each contractor’s portfolio, service area, insurance, materials, schedule, and written estimate. Ask who performs the work, who supervises the crew, and how the company handles concealed damage or changes to the scope. Red Rooster Construction provides custom home construction and remodeling services for Utah homeowners planning connected exterior projects.
Explore Red Rooster Construction’s hands-on approach
Red Rooster Construction takes a hands-on approach to custom homes, remodels, additions, and outdoor living projects throughout Utah. The team maintains direct involvement in key parts of the building process, including material sourcing and quality control. Its own lumber mill also provides greater control over materials used in appropriate projects.
That level of involvement can be helpful when siding is part of a broader project rather than a stand-alone installation. Exterior finishes need to work with the home’s framing, windows, rooflines, insulation, decks, and drainage. Coordinating those details through one experienced builder can make the process more organized.
Homeowners can review the Red Rooster project gallery to see examples of the company’s craftsmanship and project approach. When you are ready to discuss siding, a remodel, or a custom home, contact Red Rooster Construction to talk through your goals, property, and next steps.
When Should You Hire Siding Contractors?
Siding helps protect your Utah home from sun, wind, snow, hail, rain, and seasonal temperature changes. It also supports the exterior’s insulation and moisture-control systems. When siding begins to fail, the damage may extend beyond what you can see from the yard. A cracked panel, for example, can let water reach the sheathing, insulation, or framing beneath it.
You do not have to wait for a major problem before calling a contractor. Schedule an inspection when you notice changes in the siding’s appearance, drafts near exterior walls, recurring stains, or damage after a storm. A qualified professional can examine the panels, trim, flashing, house wrap, and nearby wall components, then explain whether a repair, partial replacement, or full replacement makes the most sense.
Address cracks, holes, warping, and loose panels
Cracks, holes, warped panels, and loose sections can create openings for water, insects, and cold air. Warping may result from heat exposure, impact, moisture, or installation problems. Loose panels can also allow wind-driven rain to reach the layers beneath the siding.
Call a contractor when damage extends across several panels or appears near windows, doors, corners, or rooflines. The surrounding materials may have hidden problems, even if only one panel looks damaged. A professional can identify the cause, secure loose sections, and replace damaged siding with the closest available match. If you are unsure where to begin, use a professional siding inspection to assess the condition of the exterior.
Repair rot, mold, stains, and moisture damage
Rot, mold, soft areas, and dark stains often indicate that water is entering through failed siding, trim, flashing, caulking, windows, or roof intersections. Utah’s dry climate does not prevent moisture damage. Snow, ice, irrigation, storms, and condensation can all affect exterior walls when water cannot drain properly.
Hire a contractor soon after you notice these signs. Delays can allow moisture to spread into sheathing, framing, insulation, or interior drywall. The repair should address the source of the water, not just cover the visible stain. Ask the contractor to inspect the house wrap, flashing, fasteners, and nearby penetrations before installing replacement siding.
Replace bubbling, blistering, peeling, or faded siding
Bubbling and blistering may indicate trapped moisture, excessive heat, or installation problems that prevent the siding from expanding and contracting correctly. Peeling paint and severe fading can also signal that the material is deteriorating or nearing the end of its service life.
If these issues affect several areas of the home, replacing individual panels may produce an uneven appearance without solving the underlying problem. A contractor can evaluate the siding’s age, condition, and availability before recommending a repair or replacement plan. Older profiles and colors may no longer be available, so full replacement could provide a more consistent finish. Browse Red Rooster Construction’s project gallery for ideas on exterior materials and design details.
Resolve drafts, uneven temperatures, and higher energy bills
Drafts and rooms that feel unusually hot or cold may point to gaps in the exterior, damaged house wrap, missing insulation, or problems around windows and doors. Siding is only one part of the wall system, so replacing a few panels may not resolve the issue.
Ask a contractor to inspect corners, seams, penetrations, trim, and flashing. They can also check whether insulation or sheathing needs attention. Higher energy bills do not always mean the siding is failing, but they deserve attention when combined with drafts, uneven temperatures, or visible exterior damage. Request a written explanation of the findings and a clear scope for any recommended work.
Repair wind, hail, impact, and storm damage
Wind, hail, falling branches, and vehicle impacts can crack panels, dent metal siding, loosen fasteners, and damage corners or trim. Small openings may allow water into the wall assembly, even when the damage appears mostly cosmetic.
After a storm, inspect the siding from the ground. Look for missing panels, dents, cracks, exposed seams, and displaced trim. Avoid climbing ladders or pulling on loose materials. A contractor can document the damage, check for moisture intrusion, and determine whether matching materials are available. If you plan to contact your insurance company, photographs and a detailed repair estimate may help support your claim.
Inspect for hidden siding damage
Damage behind siding may extend beyond the area that first caught your attention. Water can travel along the wall and affect sheathing or framing near windows, doors, decks, vents, hose bibs, and rooflines. A stain or loose panel may be the visible part of a larger moisture problem.
Before hiring a contractor, ask how they investigate concealed damage and how they handle rot or structural repairs. Confirm who will supervise the project, whether subcontractors will be involved, and how additional work will be approved. The contractor should explain how they will remove affected materials, protect exposed areas, and document any changes to the original scope.
Choose between repair, partial replacement, and full replacement
A repair may be appropriate when the damage is limited, the surrounding siding remains in good condition, and matching material is available. Partial replacement can make sense when one wall or section has extensive damage while the rest of the exterior is sound. Full replacement may be more practical when deterioration appears in several areas, moisture problems keep returning, or the siding has reached the end of its service life.
Ask for more than one option when possible. Each proposal should explain the existing siding’s condition, the recommended materials, preparation work, related repairs, and expected timeline. Removal, weather, material availability, and concealed damage can all affect the schedule. For larger exterior projects, explore Red Rooster Construction’s Utah home building and remodeling services to see how siding work can fit into a custom home, addition, or remodel.
What Should You Look for in Reputable Siding Contractors?
The right siding contractor does more than install exterior panels. They should understand Utah’s weather, local building requirements, moisture control, material specifications, and the details that help protect your home over time. A reliable contractor will inspect the existing exterior, explain the recommended work, provide a detailed estimate, and give you a clear point of contact.
Before comparing prices, compare each contractor’s qualifications and process. Review their license, insurance, experience, references, completed projects, service area, and warranty terms. The Utah Division of Professional Licensing provides information about contractor licensing and registration requirements.
Try to meet with at least two or three contractors on-site. Ask how they will handle preparation, flashing, trim, ventilation, weather delays, and hidden damage beneath the existing siding. A reputable professional should welcome questions and give you enough time to review the proposal before signing.
Verify an active Utah contractor license
Confirm that the contractor holds an active Utah license before signing a contract or paying a deposit. Licensing helps verify that the business is authorized to perform the type of work included in your project. Use the state’s contractor license lookup to check the company name, license status, and available business information.
Make sure the name on the license matches the name on your estimate and contract. If a salesperson provides a different business name, ask how the companies are connected. Also confirm that the license covers the work you need, particularly when siding repairs include structural work or other remodeling.
An active license does not guarantee perfect workmanship, but it is an important first step. Be cautious if a contractor will not provide a license number or claims that licensing is unnecessary for a major exterior project.
Confirm liability insurance, workers’ compensation, and bonding
Ask whether the contractor carries general liability insurance and workers’ compensation coverage. General liability insurance may help address accidental damage to your property, while workers’ compensation generally covers job-related injuries to employees. These protections matter when crews work on ladders, scaffolding, roofs, and areas near windows or landscaping.
Bonding may offer additional protection, depending on the type of bond and its terms. Ask the contractor to explain the coverage they carry and how it applies to your project. Utah’s workers’ compensation resources can help you understand coverage requirements.
If subcontractors will work on your home, ask whether they carry their own insurance and how the primary contractor verifies it. Do not rely on verbal assurances. A professional contractor should be comfortable discussing coverage and providing current documentation.
Request current insurance certificates and business details
Request current certificates of insurance before work begins, particularly for a large siding replacement or remodeling project. The certificate should identify the insured business, coverage types, policy dates, and insurance provider. Contact the insurer if you need to confirm that the policy remains active.
Collect the contractor’s legal business name, physical address, phone number, license number, and primary contact information. This makes communication easier during the project and helps you locate the correct company if a warranty question arises later.
The written contract should use the same business information. Pay attention to mismatched names, incomplete addresses, personal payment accounts, or requests for cash without a receipt. These details do not automatically indicate a problem, but they can make it difficult to determine who is responsible for the work.
Keep the estimate, contract, insurance certificates, permits, product documents, payment records, and warranty paperwork together. Complete records make it easier to resolve questions about materials and workmanship.
Check manufacturer certifications and installation training
Siding products often have specific installation requirements. Ask whether the contractor has completed manufacturer training or holds certifications for the products they recommend. This can be especially important for fiber cement, engineered wood, insulated siding, and specialty profiles that require particular fasteners, clearances, or cutting methods.
A qualified installer should know how to prepare the wall, maintain drainage paths, install flashing, seal openings, and follow product instructions. Reviewing James Hardie installation resources can help you understand the technical details your contractor should be ready to discuss.
Ask for the exact brand and product line in the estimate. Terms such as “fiber cement siding” can refer to products with different installation methods, appearances, and warranty requirements. If the contractor suggests a substitute, ask how it changes the cost, maintenance, appearance, and warranty.
Training is only one part of quality work, but it indicates that the installer takes product requirements seriously.
Match experience to your siding material and home style
Look for experience with the material you plan to install, not only general construction experience. Vinyl, fiber cement, wood, metal, and engineered wood require different tools, fasteners, clearances, cutting methods, and maintenance practices.
Your home’s design also matters. Older Utah homes, mountain properties, modern builds, and historic-style homes may have different rooflines, window layouts, trim details, and moisture concerns. Ask to see projects with a similar exterior style, number of stories, or level of architectural detail.
Discuss your priorities before choosing a product. You may want to preserve an older home’s character, coordinate siding with an addition, improve insulation, or create clean lines around gables and dormers. The contractor should explain which materials fit those goals and where each option has limitations.
Red Rooster Construction handles custom homes and remodeling projects, and its project gallery gives homeowners a closer look at its craftsmanship and exterior work.
Read reviews and request recent references
Online reviews can reveal patterns in a contractor’s communication, scheduling, cleanliness, and workmanship. Look for reviews that describe the complete project experience. Comments about clear estimates, reliable updates, careful preparation, and problem-solving are more useful than general praise.
Ask for two or three recent references from projects similar to yours. Ask each homeowner whether the work finished near the promised schedule, whether the final price changed, and how the crew treated the property. You can also ask how quickly the contractor responded to questions or concerns.
Recent references are more useful than a long list of old projects because companies change crews, supervisors, and processes. Ask when each project was completed and whether it used the same siding material you are considering.
One negative review does not necessarily rule out a contractor. Pay attention to the company’s response. A specific, professional response may show accountability, while repeated complaints about unfinished work or poor communication deserve careful consideration.
Review galleries and verify completed projects
A contractor’s gallery can help you assess finished work, but photos should not be your only source of information. Ask whether the images show the company’s own work and whether the contractor completed the entire exterior or only one portion.
Look closely at siding lines, seams, corners, window trim, roof transitions, and areas beneath decks or overhangs. Panels should appear straight and evenly spaced. Trim should fit cleanly, while flashing should direct water away from openings. Ask for close-up photos of challenging details, not only wide exterior shots.
If possible, visit a completed project with the homeowner’s permission. This can show how the siding looks from different angles and whether the property was left clean. Ask how long ago the work was completed and whether the homeowner has noticed separation, staining, warping, or water intrusion.
A strong portfolio should include work similar to your home, material, and project scope. Two-story homes, complex rooflines, and detailed trim require experience that simpler installations may not demonstrate.
Confirm who performs, supervises, and inspects the work
Ask who will serve as your main contact and who will supervise the crew each day. Some contractors use employees, while others hire subcontractors for part or all of the installation. Either arrangement can work, but you should know who is responsible for quality control and communication.
Find out whether the person who prepares your estimate will remain involved after you sign. Ask who answers questions, approves changes, coordinates inspections, and handles concerns about hidden damage. A clear chain of responsibility prevents confusion when several people work on the project.
Ask how the contractor inspects the installation before completing each stage. This may include checking the sheathing, house wrap, flashing, trim, fasteners, panel alignment, caulking, and cleanup. If permits are required, confirm who schedules inspections and provides the records.
Also ask how the company handles wood rot, damaged sheathing, insect damage, or moisture problems under old siding. The contract should explain how these conditions are documented, priced, approved, and repaired.
Check service areas, scheduling, and communication
Confirm that the contractor regularly works in your Utah county and understands local weather, building practices, and inspection requirements. A company may advertise a broad service area but have limited availability near your home. Ask how often a supervisor visits the site and whether crews work locally throughout the year.
Request a realistic schedule that covers material ordering, removal, preparation, installation, inspections, weather delays, and cleanup. Siding work may pause during rain, snow, high winds, or temperatures that affect caulking and other products.
Ask how the company provides updates. You might receive a weekly call, text message, email, or project management update. Find out who to contact with questions and how quickly you can expect a response.
The written estimate should explain what happens if materials are delayed or weather changes the schedule. Good communication means knowing what is happening, which decisions you need to make, and when the next stage will begin.
Identify siding contractor red flags
Watch for warning signs before work starts. Be cautious if a contractor pressures you to sign immediately, refuses to provide a written estimate, requests full payment upfront, or offers a price far below other detailed bids without explaining why.
A low estimate may leave out removal, disposal, house wrap, surface repairs, soffits, fascia, or window and door detailing. Ask for an itemized scope that identifies included materials, preparation, labor, cleanup, and related repairs. This makes proposals easier to compare.
Other concerns include missing insurance documents, an inactive license, unclear subcontractor arrangements, poor communication, and a lack of recent references. Reconsider a contractor who cannot explain how the crew handles hidden moisture damage or change orders.
Pay attention during the initial site visit. Careless measurements, disrespectful behavior, damage to landscaping, or dismissive answers may reflect how the project will be managed. A reputable contractor should provide clear information, respect your property, and give you time to review the agreement.
Which Siding Materials Do Contractors Offer?
Siding protects your home’s exterior while shaping its overall appearance. It helps shed rain and snow, covers the wall assembly, and can contribute to energy performance when paired with proper insulation and air sealing. The best material for your home depends on more than its appearance. Consider your budget, maintenance preferences, exposure to Utah weather, and the condition of the existing exterior.
Contractors may install one siding material across the entire home or combine several materials for contrast. For example, a custom home could pair fiber cement lap siding with a stone accent, while a remodel might use new siding alongside updated trim, soffits, fascia, and exterior insulation. Red Rooster Construction’s project gallery shows how exterior materials and architectural details can work together.
Before choosing a product, ask the contractor which materials they install regularly and how each one performs in Utah. Confirm how the wall will be prepared, whether moisture damage needs repair, and how future replacements will be handled. A siding sample may look appealing, but proper installation, maintenance, and repair availability have just as much influence on long-term value.
Choose vinyl siding for affordability and low maintenance
Vinyl siding is a practical choice for homeowners who want an affordable exterior with limited upkeep. It comes in a wide range of colors, textures, and profiles, including traditional lap, board and batten, shake, and vertical styles. Many products can recreate the appearance of painted wood without regular repainting.
Routine maintenance usually involves rinsing away dirt and checking seams, corners, and trim. Vinyl also resists moisture when installed correctly. The wall assembly still needs appropriate house wrap, flashing, drainage, and ventilation, since siding alone cannot prevent water intrusion. The U.S. Department of Energy’s siding guidance explains how siding works with insulation and other parts of the building envelope.
Vinyl can crack after a strong impact or become brittle over time. Ask whether replacement panels will be available if a section is damaged. It is also worth confirming how well the color and profile can be matched if you are replacing only one wall or adding an extension later.
Choose fiber cement for durability and design flexibility
Fiber cement siding combines cement-based materials with reinforcing fibers to create a durable exterior. Contractors can install it in lap, panel, shake, and trim profiles, making it suitable for traditional, modern, craftsman, and farmhouse-style homes. Prefinished products are available, while other options are painted after installation.
Fiber cement resists insects, fire, and many common forms of exterior wear. It can provide the look of painted wood with less routine maintenance than traditional wood siding. However, it is heavier than vinyl, and cutting or fastening it requires careful handling. Improper installation may lead to cracked boards, exposed edges, or moisture problems.
Ask which product the contractor recommends, how joints will be treated, and how cut edges will be sealed. The manufacturer’s instructions should guide fastener placement, clearances, flashing, and spacing around windows and rooflines. Fiber cement can be a strong fit for a custom home or major remodel when you want a substantial appearance and long-term durability.
Choose wood siding for natural character
Wood siding adds warmth and texture that manufactured products often try to imitate. Cedar, pine, and other wood products can be installed as lap siding, shingles, shakes, board and batten, or vertical panels. You can stain the surface to highlight the grain or paint it to complement your home’s architectural style.
One advantage of wood is that damaged sections can often be removed and replaced individually. This can make localized repairs more manageable when the contractor can match the wood species, profile, and finish. Wood also gives you the flexibility to change the exterior color later.
The tradeoff is ongoing maintenance. Wood siding needs regular inspections, paint or stain upkeep, and prompt repairs when you find peeling finishes, open joints, rot, or insect damage. Proper clearances from soil, concrete, decks, and rooflines can reduce moisture exposure. Ask how the contractor will flash, ventilate, and seal the siding before selecting wood for your Utah home.
Compare engineered wood and composite siding
Engineered wood siding is made from wood fibers and resins that are formed into boards or panels. It offers a wood-like appearance with consistent dimensions and improved moisture resistance compared with some traditional wood products. Factory-applied finishes may reduce on-site painting, and the material is available in several profiles.
Composite siding uses a blend of materials designed to withstand impact, moisture, and changing weather conditions. Performance can vary considerably between products, so review the manufacturer’s specifications instead of relying on the word “composite” alone. Ask about impact resistance, finish durability, expansion and contraction, and the process for replacing damaged sections.
Both materials need careful flashing, fastening, sealing, and clearance details. Review the product’s installation requirements before approving a material. You should also find out whether future repairs will require a matching factory finish or repainting an entire wall.
Consider metal siding for weather resistance
Metal siding offers a durable exterior with relatively limited maintenance. Steel and aluminum are common choices, and both are available in horizontal, vertical, ribbed, and corrugated profiles. Metal does not rot and resists insects, making it useful for homeowners who want a tough exterior material.
Steel is generally strong and impact-resistant, while aluminum is lightweight and does not rust in the same way steel can. Both materials can dent or scratch, and severe weather or improper handling may affect the finish. Fastener placement and panel movement also matter because metal expands and contracts as temperatures change.
Ask how the contractor will address corrosion protection, cut edges, flashing, drainage, and contact between dissimilar metals. Metal siding can suit a modern or mountain-style home, either as an accent or a complete exterior. View physical samples outdoors before choosing a color, since sunlight can make the finish look different from an indoor sample.
Explore PVC and specialty siding profiles
PVC siding is a synthetic option known for moisture resistance and dimensional stability. Contractors can use it in detailed profiles and decorative trim around gables, porches, dormers, and entryways. It may be a good fit when your home’s design calls for a specific texture or period-inspired appearance.
Specialty products include shakes, scalloped shingles, vertical panels, board and batten, and insulated profiles. Combining profiles can add visual interest, but too many patterns may make the exterior feel busy. A skilled contractor can help place accents where they support the architecture and highlight important features.
Ask how the product performs through Utah’s temperature changes and whether it requires specialized trim or spacing. Confirm that matching pieces will remain available for future repairs. If you are remodeling one elevation or adding an extension, bring existing siding samples to the consultation so the contractor can compare color, texture, and profile compatibility.
Compare cost, lifespan, maintenance, insulation, and appearance
Cost is only one part of a siding decision. A lower-priced material may require more painting or have a shorter service life, while a higher-priced product may reduce maintenance but require more labor to install. The final price can also change based on the home’s size, number of stories, wall layout, access, removal, and surface preparation.
Compare each option across these practical categories:
- Initial cost: Include materials, labor, removal, disposal, trim, and preparation.
- Expected service life: Ask how long the product typically lasts with proper care.
- Maintenance: Confirm cleaning, painting, staining, caulking, and inspection needs.
- Insulation: Determine whether the product includes insulation or needs separate upgrades.
- Appearance: Review colors, textures, profiles, and future replacement options.
Siding is not a substitute for a complete insulation and moisture-control plan. Ask what will be installed behind it, including house wrap, flashing, sheathing, and insulation. Red Rooster’s Utah home construction cost guide can help you consider how exterior choices fit within a larger construction or remodeling budget.
Match siding to Utah weather and your home’s design
Utah homes experience dry heat, winter freezes, snow, wind, intense sun, and significant temperature changes. Conditions can differ between communities along the Wasatch Front and higher-elevation areas. A shaded wall near sprinklers has different moisture concerns than a south-facing wall exposed to direct sunlight.
Your contractor should inspect roof runoff, grade, decks, porches, window openings, and areas where snow may collect. These locations need carefully planned flashing and clearances to keep water away from the wall assembly. Freeze-thaw cycles also make small gaps, failed caulk, and damaged finishes worth addressing before they become larger problems.
The siding should complement the roof pitch, window proportions, stone or brick accents, and overall scale of the home. Use different profiles to emphasize architectural features rather than hide them. Request physical samples and view them outdoors before making a final decision, since sunlight can change how the color and texture appear.
Confirm installation requirements and repair compatibility
Each siding material has specific installation requirements. Confirm how the contractor will prepare the substrate, install house wrap, flash windows and doors, seal penetrations, space panels, and finish corners and transitions. These details often determine how well the siding performs, so they should appear in the written scope.
If the project includes existing siding, clarify whether the contractor will remove it, install over it, or repair selected areas. Installing over damaged or wet materials can conceal problems and shorten the life of the new exterior. Ask who will perform the installation, who will supervise the crew, and how the completed work will be inspected.
Review the product warranty and the contractor’s workmanship warranty separately. Confirm coverage periods, exclusions, maintenance responsibilities, and the process for reporting a problem. For help planning siding as part of a remodel, addition, or custom home, contact Red Rooster Construction to discuss your project and material options.
How Do You Compare Siding Contractor Estimates and Warranties?
Comparing siding estimates takes more than placing the totals side by side. Contractors may quote different prices because they include different products, preparation steps, repair allowances, or warranty terms. One estimate may include house wrap and trim replacement, while another covers only the visible siding panels.
Ask each contractor for the same information in writing. A detailed proposal helps you compare the work fairly, understand what happens if hidden damage appears, and avoid unexpected costs during the project.
Request an on-site, written, itemized estimate
A dependable estimate should begin with an on-site inspection. The contractor should examine the existing siding, trim, windows, doors, corners, roofline, and areas where water may have entered the wall assembly. Measurements and photos can help document the home’s condition before work begins.
Request an itemized proposal that lists materials, labor, siding removal, disposal, preparation, permits, taxes, and related repairs. It should also include the estimated siding quantity, trim details, installation method, project timeline, and payment schedule. A verbal price or one-page total is not enough to compare contractors fairly.
Compare brands, profiles, colors, quantities, and material grades
Two estimates can use the same general siding material but offer very different products. Compare the manufacturer, product line, profile, thickness, finish, color, and material grade. For example, one vinyl proposal may include a basic panel, while another includes a thicker insulated profile with a different finish.
Check the quantities for siding, trim, starter strips, corner posts, vents, and other accessories. Ask for product specifications and samples before making a selection. If your siding project is part of a larger remodel, Red Rooster Construction’s project gallery can provide ideas for exterior colors, materials, and design details.
Confirm removal, disposal, and surface preparation
Ask whether the estimate includes removing the existing siding, nails, house wrap, damaged trim, and debris. Some contractors include disposal in their labor price, while others charge separately for dumpsters or hauling. Confirm how the crew will protect your landscaping and clean the property during and after the work.
Surface preparation should be listed in similar detail. Ask whether the contractor will inspect and repair sheathing, replace rotted wood, correct uneven areas, and prepare the walls for the new siding. Installing new siding over a damaged or uneven surface can affect its appearance and make moisture problems harder to detect.
Review house wrap, flashing, trim, insulation, and moisture protection
The visible siding panels are only one part of the exterior system. Your estimate should explain the planned house wrap or weather-resistive barrier, flashing around windows and doors, drip edges, kick-out flashing, sealants, and trim. These components help move water away from vulnerable areas.
If you are adding insulation, confirm its type, thickness, and cost. Ask how the contractor will handle transitions around the roof, masonry, decks, windows, and additions. Proper flashing and moisture protection are especially important for Utah homes, where snow, rain, freezing temperatures, and strong sunlight can place stress on exterior materials.
Separate materials, labor, permits, taxes, and related repairs
A clear proposal separates the main cost categories instead of combining them into one total. Look for individual amounts for siding, accessories, labor, removal, disposal, permits, taxes, sheathing, framing, insulation, and other repairs. This format makes it easier to see what is included and what may change.
Ask whether the estimate covers items attached to the siding, such as exterior lights, shutters, vents, house numbers, or utility fixtures. For an addition or remodel, confirm whether painting, electrical work, insulation, or other trades are part of the scope. Red Rooster Construction’s Utah home-building cost guide can also help you plan a broader exterior project budget.
Identify allowances, exclusions, contingencies, and change-order terms
An allowance is a placeholder amount for an item that has not been selected or fully priced. It may apply to specialty trim, upgraded colors, insulation, or repairs discovered after removal. Ask what happens if the final cost is higher or lower than the allowance.
Review exclusions just as carefully. A proposal may leave out structural repairs, permit fees, painting, window trim, or disposal. Ask how the contractor handles change orders, who approves them, and whether you will receive the revised price in writing before the added work begins. Keep verbal promises out of the process by documenting every change.
Plan for concealed damage and structural repairs
Existing siding can hide damaged sheathing, framing, insulation, flashing, or house wrap. Ask how the contractor will inspect the wall after removal and how the crew will document concealed problems. Photos can help you understand why a repair is needed before you authorize additional work.
Your contract should explain how hidden damage will be priced. The contractor may use a set labor rate plus material costs or provide a separate repair estimate. Ask who can approve the work and whether repairs could affect the completion date. Planning for rot, mold, insect damage, or long-term moisture exposure helps prevent confusion during the project.
Compare timelines, milestones, and payment schedules
Compare the complete project schedule, not only the proposed start date. Ask how long the work should take and what could affect it, including weather, inspections, material availability, or concealed repairs. The project may include removal, inspection, preparation, moisture protection, siding installation, trim work, and cleanup.
Request a payment schedule tied to clear milestones. Payments might be divided among signing, material delivery, completed preparation, installation, and final inspection. Avoid paying the full amount before work starts. Confirm how approved change orders will be billed and make sure a final payment remains due after the walkthrough and punch-list work.
Separate workmanship and material warranties
Siding projects generally involve two separate warranties. The manufacturer’s warranty covers the siding product and may address manufacturing defects or premature deterioration. The contractor’s workmanship warranty covers installation quality, such as fastening, flashing, and other work performed by the crew.
Ask for both warranties before signing the contract. Confirm each coverage period, start date, claim process, and responsible party. Ask whether the contractor will help with a manufacturer claim if a product issue occurs. A material warranty may not cover problems caused by improper installation, poor flashing, or water intrusion related to workmanship.
Review warranty exclusions, maintenance duties, and transfer rules
Read the warranty documents carefully instead of relying on a verbal summary. Look for exclusions involving impact, improper cleaning, repainting, alterations, pest damage, unusual weather, or work completed by another contractor. Check whether the warranty covers labor to remove and replace defective siding or only the replacement materials.
Ask what maintenance the warranty requires, including cleaning, caulking, painting, or keeping drainage paths clear. Confirm whether coverage transfers to a future homeowner and whether the transfer must be completed within a set period. Store the contract, receipts, product details, warranty documents, inspection records, and project photos together.
Choose the clearest apples-to-apples proposal, not just the lowest price
After collecting estimates, compare matching details in a written checklist. Review the product, quantity, preparation, house wrap, flashing, trim, insulation, disposal, repairs, schedule, payment terms, and warranties. If one proposal excludes a major item, its lower total does not represent a true cost comparison.
Also consider how each contractor communicates. A reliable professional should explain uncertainties, answer questions directly, and identify what could affect the price or schedule. If you are considering siding as part of a remodel, addition, or larger exterior project, contact Red Rooster Construction to discuss your home, project scope, and service area.
How Much Does Siding Installation and Repair Cost in Utah?
Siding costs in Utah depend on more than the material you choose. The total price can change based on your home’s size, layout, number of stories, exterior access, and the condition of the wall beneath the siding. A small repair on one section will cost much less than a full replacement that includes new sheathing, insulation, trim, and moisture repairs.
The best way to plan your budget is to request a detailed, on-site estimate. Your contractor should explain how they measured the home, which products they recommend, what preparation the project requires, and what could change once the existing siding is removed. Red Rooster Construction’s Utah home-building cost guide can also help you consider the broader expenses involved in exterior construction.
Estimate material, labor, and preparation costs
A siding estimate typically includes materials, labor, and preparation. Materials may include siding panels or boards, starter strips, fasteners, house wrap, trim, flashing, vents, and sealants. Labor covers removal, installation, cutting, fitting, cleanup, and inspections. Preparation may include protecting landscaping, moving exterior fixtures, repairing the wall surface, or addressing water damage.
Ask for these categories to appear separately in the proposal. This makes it easier to compare contractors and identify missing work. One estimate may include removal, disposal, and complete trim replacement, while another may price only the siding and basic installation. A clear scope of work gives you a more useful comparison than the total price alone.
Calculate siding square footage, not just floor area
Your home’s floor area does not show how much siding the exterior requires. Contractors measure the vertical wall surfaces, including gables, dormers, bump-outs, attached garages, and other sections that add to the total. They usually measure each wall, combine the measurements, and subtract large openings such as windows and doors.
The material order may include extra siding for cuts, pattern matching, and future repairs. Waste varies based on the siding profile and the shape of your home. Ask the contractor to explain the measurements in the proposal so you understand how they calculated the quantity. A smaller home with several angles and rooflines may require more siding than a larger home with a simple rectangular design.
Account for stories, layout, access, windows, and architectural details
A two-story home often requires more equipment, setup, and labor than a single-story home. Steep rooflines, narrow side yards, retaining walls, decks, and limited access can make installation more difficult. Crews may need scaffolding, lifts, specialized safety equipment, or additional time to move materials around the property.
Windows, doors, roof intersections, porches, bay windows, and decorative features require careful cutting and flashing. These details affect material quantities and labor hours. Point out additions, enclosed porches, detached garages, and hard-to-reach areas during the site visit. A thorough contractor should inspect these features instead of preparing a price from exterior measurements alone.
Add trim, corners, vents, soffits, fascia, and flashing
Siding is only one part of a finished exterior. Trim frames windows and doors, corner pieces finish outside edges, and vents support airflow through the roof and wall system. Soffits and fascia complete the roofline, while flashing directs water away from vulnerable joints. Each component contributes to the home’s appearance and helps protect it from moisture.
Ask whether the estimate includes matching trim and whether damaged pieces will be repaired or replaced. Reusing existing trim may cost less, but it may not fit a new siding profile or color. Pay close attention to flashing around windows, doors, rooflines, and utility penetrations. These areas need careful installation because they are common points for water intrusion.
Budget for removal, disposal, sheathing, insulation, and moisture repairs
Removing old siding can reveal problems that were not visible during the first inspection. Damaged sheathing, deteriorated framing, missing insulation, mold, rot, or water intrusion may need attention before new siding is installed. The contractor may also need to replace house wrap or improve the wall assembly to create a sound surface.
Ask how concealed damage will be handled. Some estimates include a repair allowance, while others list possible repairs as change orders. Either approach can work, but you should understand the process before construction begins. The EPA’s moisture control guidance explains how proper water management helps protect building materials and indoor air quality.
Factor in labor rates, material availability, and seasonal scheduling
Labor costs can vary based on project complexity, contractor experience, crew size, and location. A home along the Wasatch Front may have different access and scheduling considerations than a property in a rural area. Material availability also affects pricing, especially when you select a specialty profile, custom color, or product that must be ordered.
Utah weather can affect the schedule as well. Cold temperatures, snow, rain, and high winds may delay exterior work or affect which products crews can install safely. Ask when materials will be ordered, how long delivery may take, and what happens if weather changes the start date. A realistic schedule leaves room for conditions that are common during exterior construction.
Include permits and related exterior work
Permit requirements vary by city and county, so your contractor should confirm which approvals apply to your project. Siding work may have different requirements from a larger exterior remodel, addition, or structural repair. The Utah Division of Professional Licensing provides contractor licensing information, while your local building department can explain project-specific permit requirements.
Your budget may also need to cover related exterior work. Crews might need to move downspouts, detach exterior lights, remove shutters, adjust hose bibs, or work around decks and landscaping. If the siding connects to an addition or porch, those areas may require separate detailing. Include these tasks in the written scope so they do not become unexpected expenses.
Compare siding repair and replacement costs
Repair may be appropriate when damage is limited to a small, accessible area and matching material is available. A contractor might replace individual boards or panels, correct loose sections, reseal joints, or repair flashing. However, a repair can be difficult to blend when existing siding has faded, weathered, or been discontinued.
Replacement may make more sense when damage is widespread, moisture has affected the wall system, or the siding no longer protects the home effectively. Ask contractors to price both options when practical. Then consider the siding’s age, future maintenance, energy performance, appearance, and whether the work will address the source of the damage rather than only the visible symptoms.
Understand why contractor estimates differ
Contractor estimates can vary because each company may make different assumptions about measurements, product quality, preparation, labor, and warranty coverage. One proposal may include premium siding, new house wrap, upgraded insulation, and complete trim replacement. Another may use a standard product and exclude repairs beneath the existing siding.
Read each proposal line by line before deciding which one offers the best value. Compare the siding brand and profile, material grade, trim package, flashing details, removal process, cleanup, warranty, and payment schedule. You can also review previous exterior work in the Red Rooster Construction gallery to see how the company handles siding, trim, and related construction details.
Set aside a contingency for unknown conditions and upgrades
Even a careful inspection cannot reveal everything behind existing siding. Once the exterior is opened, crews may find damaged sheathing, missing flashing, pest activity, or framing that needs repair. Set aside a contingency so necessary work does not bring the project to a halt or create financial pressure.
You may also choose upgrades after reviewing your options. These could include improved insulation, wider trim, upgraded flashing, decorative accents, or a different siding profile. Ask the contractor to price upgrades separately before signing the agreement. The contract should also explain how change orders are approved and how added work affects the final price and schedule.
Use Utah-specific cost guidance before requesting bids
Before requesting bids, prepare a basic project brief with your home’s location, approximate exterior size, number of stories, current siding material, visible damage, and preferred finish. Include photos of problem areas and note any additions, garages, decks, or hard-to-reach sections. This information helps contractors prepare for a more productive site visit.
Use Utah-specific cost guidance as a starting point, not a guaranteed price. Local conditions, product availability, property access, and concealed repairs can affect the final estimate. Request several detailed proposals and ask each contractor the same questions. If siding is part of a remodel, addition, or larger exterior project, you can contact Red Rooster Construction to discuss your home’s needs.
How Do You Hire and Manage the Right Siding Contractor?
The right siding contractor does more than install exterior panels. They inspect the home, identify moisture risks, explain the work, protect your property, coordinate related repairs, and keep the project moving from preparation through the final walkthrough. This matters in Utah, where snow, wind, sun, temperature changes, and seasonal storms can put demanding conditions on siding and the layers beneath it.
Before signing a contract, meet the person responsible for your project and ask specific questions about the work. Confirm who will supervise the crew, how the contractor will handle unexpected damage, and how often you will receive updates. A written scope, clear payment schedule, and defined communication process can prevent many common disagreements.
It is also worth asking how the contractor manages quality control. Will someone inspect the wall before siding is installed? Who checks flashing around windows and doors? How will the team document repairs that become hidden? Clear answers show that the contractor has a process, rather than relying on a quick installation and a final cleanup.
Strong communication supports a better working relationship throughout construction. Estimate Rocket’s customer service guidance recommends accurate estimates, clear expectations, and regular communication before and during a project. Use the following steps to choose a contractor and stay informed once work begins.
Meet the contractor or project manager on-site
Begin with an in-person meeting at your home. A site visit gives the contractor an opportunity to inspect the siding, corners, windows, rooflines, foundation, and areas where water may collect. It also lets you discuss your goals while looking at the actual condition of the property.
Ask who will manage the project after you sign the contract. The person who prepares your estimate may not supervise the crew. Confirm the project manager’s name, how often they will visit, and how you can reach them with questions.
Pay attention to the conversation. A reliable contractor should listen to your concerns, explain recommendations in plain language, and point out potential problems without pressuring you into unnecessary work. Ask what they see, what they recommend, and which repairs are essential before siding can be installed.
A careful site meeting may reveal details that a quick estimate misses. It should leave you with a clear understanding of the project’s purpose, likely challenges, and next steps.
Ask how crews will protect landscaping, windows, doors, and property
Siding work can affect gardens, walkways, driveways, windows, doors, decks, and other exterior features. Crews may move ladders, scaffolding, tools, materials, and debris around these areas, so ask how the contractor will protect them before work begins.
A thorough plan may include covering plants, securing loose branches, protecting windows and doors, placing materials away from sprinkler heads, and using a designated area for debris. Ask whether the crew will inspect the property with you before starting and record any existing damage with photos.
Daily cleanup deserves attention, too. Confirm where removed siding will go, how nails and scraps will be collected, and whether the crew will use magnetic tools around driveways and walkways. Ask how damaged plants, screens, trim, or other property will be handled if an accident occurs.
Give the contractor more than one way to reach you if possible. Text, phone, and email can help important information reach the right person. Estimate Rocket’s communication recommendations support using accessible communication channels throughout a project.
Confirm permits, inspections, weather plans, and start dates
Ask whether your siding project requires permits in your Utah city or county, and confirm who will apply for them. Requirements may vary depending on the scope of work, exterior alterations, structural repairs, and local rules. Projects involving sheathing, insulation, or changes around windows and doors may require additional inspections.
Request a realistic start date and estimated completion window in writing. Siding installation can depend on dry conditions, temperature, material delivery, and other trades working at the home. Ask how rain, snow, high winds, or freezing temperatures may affect installation and whether the contractor has a plan for protecting exposed walls.
You should also confirm how weather delays will be communicated. Will the project manager call, text, or email you? Where will materials be stored if the schedule changes? What happens if the crew has to stop after removing the existing siding?
Written information about timelines and expectations helps reduce confusion, as Estimate Rocket’s contractor guidance explains. Make sure the contract identifies what happens when the start date or completion date changes.
Put the scope, materials, price, schedule, and warranties in writing
A siding contract should describe the complete project, not simply say “replace siding.” It should identify the manufacturer, product line, profile, color, finish, estimated quantities, trim, accessories, and installation method. Confirm whether the contractor will remove and dispose of the existing siding.
Include preparation work such as sheathing repairs, house wrap, flashing, insulation, caulking, and sealing around openings. List labor, materials, permits, taxes, disposal, and related repairs separately when possible. This makes the proposal easier to understand and helps you compare contractors on equal terms.
The agreement should also identify the expected schedule, payment terms, workmanship warranty, manufacturer warranty, and process for unexpected work. Ask whether color or product substitutions require your approval. If a material is unavailable, you should know what alternatives are acceptable before installation begins.
A detailed proposal gives both sides a shared reference point. Vague estimates can weaken trust because homeowners cannot tell what each charge includes. Estimate Rocket notes that unclear cost information can negatively affect the client relationship.
Establish one point of contact and a clear change-order process
Choose one primary contact for the project. This may be the contractor, project manager, or office representative. Ask how updates will be delivered, such as by phone, text, email, or a project management platform. One contact reduces the chance that instructions get lost between the homeowner, office, crew, and subcontractors.
Agree on how often you will receive updates. Weekly reports may be enough for a straightforward replacement, while a project involving moisture damage, structural repairs, or several exterior improvements may need more frequent communication. Ask for photos before important areas are covered.
Unexpected conditions often appear after old siding is removed. The contractor may find damaged sheathing, missing flashing, rot, insect damage, or inadequate insulation. Before additional work begins, require a written change order that explains the problem, recommended solution, added cost, and schedule impact.
Do not rely on a casual conversation for changes that affect the price or finished result. ECI Solutions’ construction communication guidance emphasizes organized communication as a way to support faster decisions and fewer misunderstandings.
Understand the installation and inspection sequence
Ask the contractor to explain the installation sequence in order. A typical project may begin with removing the existing siding, inspecting the wall surface, repairing damaged sheathing, and preparing the substrate. The crew may then install house wrap or another water-resistive barrier, integrate flashing around openings, and install siding panels, trim, and accessories.
The sequence can vary by siding material and the condition of your home. Clarify when windows, doors, vents, utility penetrations, decks, and roof-to-wall transitions will be addressed. These areas require careful detailing because they are common points for water intrusion.
Ask when inspections will occur and who will check the work before sections are covered. You may want photos of the wall surface, repairs, house wrap, and flashing before the panels conceal them. Find out how concerns will be documented and corrected.
Regular updates make it easier to address problems while the crew can still access the work. CONEXPO-CON/AGG’s communication guidance highlights the value of consistent updates, project tracking, and active listening during construction.
Review preparation, house wrap, flashing, panels, trim, and sealing
Do not focus only on the visible siding. The layers beneath it help protect your home from water and air infiltration. Ask how the crew will prepare the wall surface, repair rot, install or repair house wrap, and seal penetrations before panels go up.
Flashing deserves special attention around windows, doors, corners, rooflines, decks, hose bibs, vents, and other openings. Ask how the contractor will connect these details to the water-resistive barrier and direct water away from the wall. The answer should address your home’s actual design, not just provide a general promise.
Discuss panel spacing, starter strips, corner posts, trim, fasteners, and caulk. Some siding systems need room for expansion and contraction, while others have material-specific installation requirements. Ask which installation instructions the crew will follow and who will inspect the finished details.
Before final approval, look for gaps, loose pieces, uneven lines, open seams, and incomplete sealing. Organized project records and regular updates can help keep these details visible, a practice supported by CONEXPO-CON/AGG’s construction communication recommendations.
Agree on payment milestones without paying in full upfront
Use payment milestones tied to completed portions of the project. For example, a contract may divide payments among material procurement, completed removal and preparation, substantial installation, and final completion. The exact structure should reflect the project and comply with applicable Utah requirements.
Avoid paying the entire balance before work begins. A deposit may be reasonable for custom materials, but the contract should explain what it covers and when additional payments are due. Ask whether payments are based on delivered materials, completed work, or inspection approval.
Before each payment, confirm that the associated work is complete and that agreed-upon repairs have been addressed. If the contractor requests a payment earlier than planned, ask for an updated explanation in writing. Keep copies of invoices, receipts, and payment confirmations.
The final payment should not be due until the agreed work is finished, cleanup is complete, and outstanding items are documented. A clear milestone schedule gives you a practical way to track progress while preserving funds for unfinished or corrected work.
Complete a final walkthrough before the last payment
Schedule a final walkthrough with the contractor or project manager before releasing the last payment. Walk around the entire home and compare the finished work with the written scope. Look for consistent lines, secure panels, clean trim, sealed penetrations, properly finished corners, and complete work around windows and doors.
Inspect areas that are easy to overlook, including behind downspouts, beneath decks, around hose bibs, near vents, and along rooflines. Check that removed materials have been hauled away and that walkways, driveways, landscaping, and exterior fixtures are clean and undamaged.
If something remains incomplete, write it down with the person responsible and the expected completion date. Take clear photos for your records, especially of repairs or details that will become difficult to see later. Ask when the remaining work will be completed and whether it affects the warranty period.
Use the walkthrough to discuss cleaning, maintenance, warranty registration, and care instructions. The last payment should follow the contract’s completion terms, not simply the arrival of the final workday.
Collect warranty documents, receipts, permits, and maintenance instructions
Create a project file before the contractor leaves. Keep the signed contract, approved change orders, invoices, product information, color names, receipts, permit records, inspection approvals, and photos together. These records can help if you need a repair, file an insurance claim, or sell the home later.
Ask for separate information about the siding product warranty and the contractor’s workmanship warranty. Confirm who handles each type of claim, how long coverage lasts, and which actions could affect coverage. Some product warranties require registration or include maintenance and installation conditions.
Request written care instructions for your specific siding material. These may cover washing methods, approved cleaners, repainting, caulk checks, snow removal near the walls, and signs of damage to monitor. Ask whether the contractor recommends an inspection after the first winter or severe storm.
Organized records can make future warranty claims easier by reducing missing information and repeated questions. ECI Solutions’ construction communication guidance discusses how connected records and clearer claim processes can improve customer service after construction is complete.
Learn about Red Rooster Construction’s hands-on oversight and direct material sourcing
For homeowners planning more than a basic siding replacement, a full-service builder may offer a simpler experience. Red Rooster Construction works on custom homes, remodels, additions, and outdoor living projects in Utah communities along the Wasatch Front. That broader experience can help when siding connects to windows, roofing, decks, additions, or structural changes.
Red Rooster’s hands-on approach includes direct oversight of the building process and material sourcing through its own lumber mill. Managing more of the process in-house can support consistent quality and closer cost management from planning through completion. It also gives homeowners a direct place to discuss material choices, installation details, and related exterior work.
When comparing builders, review completed work in the Red Rooster Construction gallery and ask how the team would approach your home. You can also use the company’s Utah home-building cost guide to prepare for a broader construction conversation. For help with a siding, remodel, addition, outdoor living space, or custom home project, contact Red Rooster Construction to discuss your plans.
Related Articles
- Cost to Build a House in Utah — Red Rooster
- Red Rooster Construction — Utah's Hands-On Home Builder
- Project Gallery — Red Rooster Construction
- Contact — Red Rooster Construction
Frequently Asked Questions
When should I call a siding contractor for my Utah home?
Contact a contractor when you notice cracked, warped, loose, faded, bubbling, or missing siding. Stains, soft areas, drafts, and damage after wind or hail also deserve prompt attention. A professional can determine whether the issue needs a small repair, partial replacement, moisture correction, or a complete siding upgrade.
How can I tell whether a siding contractor is reputable?
Verify the contractor’s Utah license, insurance, references, experience with your chosen material, and record of completed projects. Request an on-site estimate that explains preparation, flashing, trim, removal, cleanup, scheduling, payment terms, and separate product and workmanship warranties. The contractor should also explain who supervises the crew and how concealed damage will be handled.
Which siding material is best for Utah homes?
There is no single best option for every property. Vinyl offers affordability and simple maintenance, fiber cement provides durability and design flexibility, wood adds natural character, and metal offers strong resistance to rot and insects. Compare each product’s installation requirements, maintenance, appearance, repair availability, and performance in your home’s specific location.
What should a siding estimate include?
A complete estimate should identify the siding brand, profile, color, quantity, labor, removal, disposal, house wrap, flashing, trim, insulation, permits, taxes, and related repairs. It should also explain the expected timeline, payment milestones, change-order process, and warranty coverage. Comparing itemized proposals helps reveal when a low price leaves out important exterior work.
Should I hire a siding specialist or a full-service builder?
A siding specialist may suit a straightforward repair or replacement. A full-service builder can be a better fit when the project also involves windows, insulation, framing, roofing, an addition, a remodel, or an outdoor living area. Red Rooster Construction works on connected Utah construction projects and can help coordinate exterior details through one team.
Planning a project in Utah?
Talk with Red Rooster Construction about your build, remodel, or outdoor space.
Request a Quote