
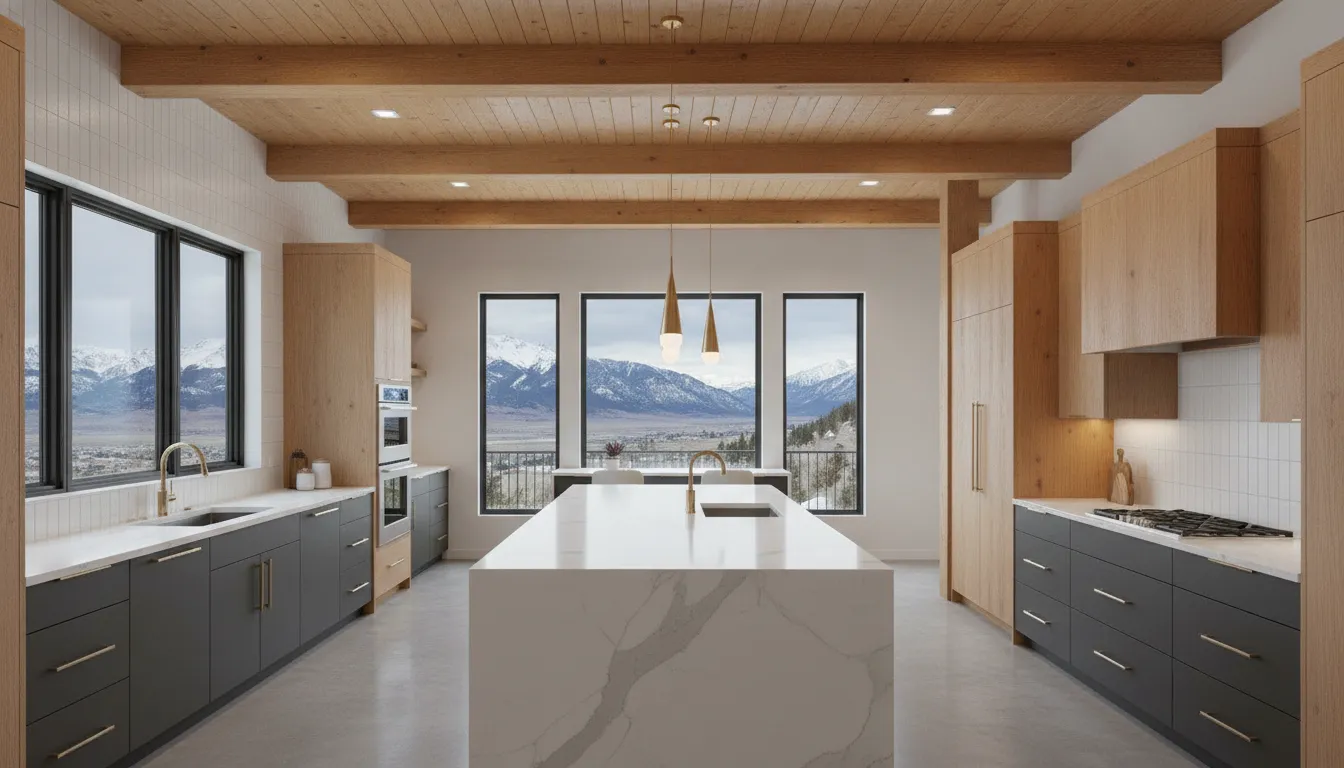
A kitchen renovation or custom build gives you the chance to solve problems that have bothered you for years. Maybe your current space lacks pantry storage, hides appliances in deep cabinets, or leaves the island too small for family meals. Perhaps you want warmer materials, better lighting, or a direct route to an outdoor entertaining area. Start with those daily frustrations, then build your design around practical solutions. Modern kitchen design ideas work best when they reflect your household instead of copying a showroom. With hands-on guidance from Red Rooster Construction, Utah homeowners can plan a kitchen that combines craftsmanship, comfort, durability, and personal style.
Key Takeaways
- Start with how you live: Base the kitchen layout, work zones, island, storage, and appliances on your household’s cooking, dining, entertaining, and traffic patterns.
- Pair modern simplicity with lasting comfort: Combine clean cabinet profiles with warm wood, layered lighting, durable surfaces, easy-care flooring, and accessible storage.
- Plan every detail with the right builder: Coordinate structure, plumbing, electrical systems, ventilation, materials, permits, and budget early with a hands-on Utah construction team.
What Defines Modern Kitchen Design Ideas?
Modern kitchen design is about more than white cabinets, sleek appliances, and a large island. It combines clean visual lines with practical planning, comfortable materials, and storage that supports your daily routine. In many Utah homes, the kitchen serves several purposes at once, from cooking and homework to entertaining and connecting with an outdoor living area.
Start by considering how your household uses the space before choosing finishes. Think about cooking habits, grocery storage, natural light, entertaining, and future needs. A custom kitchen should fit the way you live, not force your routine around a predetermined style. For inspiration, explore modern kitchen designs on Houzz, then compare those ideas with projects that reflect your home’s layout and architecture. Red Rooster Construction’s project gallery can also help you see how thoughtful design details work in completed homes.
Use clean lines without making the room feel cold
Modern kitchens often include flat-panel or simple Shaker cabinet doors, smooth surfaces, limited decoration, and streamlined hardware. Together, these choices create a calm, uncluttered appearance. However, relying only on hard surfaces and cool colors can make the room feel stark or impersonal.
Add warmth with natural wood, textured backsplash tile, woven counter stools, or open shelving for a few carefully chosen items. A wood island can soften painted cabinets, while matte black or brushed brass hardware adds contrast. Keep the overall palette focused, then use one or two distinctive details to give the kitchen character without creating visual clutter.
Balance minimalism with warmth, texture, and natural light
Minimalism works best when each material contributes to the room’s comfort or function. Pair smooth cabinet fronts with visible wood grain, veined stone, handmade-look tile, or a lightly textured wall finish. These subtle variations add interest while preserving the simple appearance associated with modern design.
Natural light should guide your color and finish choices. A bright, south-facing kitchen may benefit from softer tones and light-filtering window treatments, while a darker room may look more open with pale cabinetry and reflective surfaces. Use layered lighting to keep materials inviting after sunset. House & Garden’s kitchen guide offers useful examples of combining storage, comfort, color, and personality.
Design around prep, cooking, cleanup, dining, and gathering
Plan the kitchen around movement before selecting countertops or cabinet colors. Identify where groceries enter the room, where food is prepared, where cooking takes place, and how dishes move between the sink, dishwasher, and storage. Separating these activities can reduce unnecessary steps and prevent several people from competing for the same work surface.
Consider who will use the kitchen and what they need. A busy family may want island seating and a homework area, while someone who enjoys baking may prefer a wide counter near the oven with dedicated storage for supplies. If you entertain often, include room for serving dishes and conversation without blocking the main cooking and cleanup zones.
Choose features that serve your household for years
A modern kitchen should remain useful as your routines change. Wide drawers, pull-out shelves, brighter task lighting, easy-grip hardware, and varied counter heights can make the room more comfortable for people of different ages and abilities. Kitchen design research from REALTOR® Magazine highlights practical features such as pull-out cabinets and improved lighting that support long-term convenience.
Durability matters as much as appearance. Choose countertops that handle heat and daily spills, flooring that provides secure footing, and finishes that are easy to clean. During a custom build or remodel, discuss these choices early with your builder so the layout, plumbing, electrical work, cabinetry, and lighting all support the way you plan to use the kitchen.
Which Modern Kitchen Layout Fits Your Utah Home?
The right modern kitchen layout depends on more than the room’s shape. Think about how your household cooks, where people gather, how much storage you need, and how the kitchen connects to the rest of the home. A layout that works well in a new Utah build may need a different approach in an older house with load-bearing walls, narrow rooms, or limited natural light.
Start by listing your daily priorities. Do you want a social hub for family meals and entertaining, or a focused cooking space with more separation from nearby rooms? Your answer will guide decisions about the island, seating, storage, appliance placement, and lighting. Browse Houzz’s collection of modern kitchen ideas to see how different layouts work in homes of various sizes and styles.
It also helps to consider the project itself. New construction usually offers more freedom to position windows, plumbing, electrical circuits, and doors. A remodel may require you to work around the existing structure, or decide whether a larger change is worth the added cost. Before choosing finishes, create a rough plan based on your room dimensions, household routines, and home construction or remodeling goals.
Compare open, L-shaped, U-shaped, galley, and one-wall layouts
Open kitchens suit households that want a direct connection to the dining or living room. They can make the home feel more spacious, but they also keep cooking mess, dishes, and appliances visible from nearby rooms. Good storage, effective ventilation, and a well-placed island help the space feel orderly.
L-shaped kitchens use two adjoining walls and leave room for an island, dining table, or open walkway. They work well in medium-sized rooms and create a natural division between cooking and gathering. U-shaped kitchens place cabinets on three walls, providing ample storage and counter space for frequent cooks, although they can feel enclosed in a smaller room.
Galley kitchens use two parallel cabinet runs to make efficient use of a narrow footprint. One-wall kitchens keep cabinets and appliances on a single wall, which can suit compact homes or kitchens connected to a larger living area. Compare each option against your room dimensions, household routines, and modern kitchen remodeling plans, rather than choosing a layout based on appearance alone.
Organize practical work zones
Think of the kitchen as a collection of work zones instead of relying only on the traditional triangle between the sink, range, and refrigerator. Create a prep zone with counter space near the refrigerator, cutting boards, and mixing bowls. Place frequently used cookware near the range, and give the cleanup zone enough room for the sink, dishwasher, waste bin, and recycling.
Keep plates, glasses, and everyday serving pieces close to the dishwasher or dining area so unloading takes less effort. If your household bakes, consider a dedicated station with a generous work surface, nearby outlets, and storage for mixing bowls, ingredients, and baking sheets. Coffee and beverage stations can also keep small appliances contained and reduce traffic around the main prep area.
Thoughtful zones help multiple people use the kitchen without constantly crossing paths. They also help your builder coordinate plumbing, electrical work, ventilation, cabinetry, and appliance placement. House & Garden’s kitchen planning guidance emphasizes the importance of movement and placing the dishwasher and waste bin near the sink.
Plan clearances for traffic, seating, and appliance doors
A beautiful kitchen can become frustrating when walkways are too tight. Leave enough room for people to pass behind island seating without bumping into someone who is cooking. You also need to account for open refrigerator, oven, dishwasher, pantry, and cabinet doors. These details matter when several family members use the kitchen at once.
Mark the proposed cabinet and island footprints on the floor with painter’s tape before construction begins. Walk through the space while carrying a mixing bowl, opening appliance doors, pulling out drawers, and moving between the kitchen and dining area. This simple exercise can reveal conflicts that are difficult to spot on a floor plan.
Check whether guests can reach island seating without entering the main cooking zone. Make sure the island does not block a primary path to the backyard, garage, mudroom, or dining room. If your kitchen connects to an outdoor living area, test the route while carrying serving dishes or groceries. A few extra steps during planning can make everyday movement much easier.
Account for daylight, views, and the existing structure
Natural light can make modern materials feel warmer and bring out the texture of wood, stone, and cabinetry. If your kitchen faces the mountains, yard, or garden, position the sink, prep area, or seating where the view can be enjoyed without interfering with daily tasks. Windows, skylights, and clerestory windows may also brighten a kitchen with limited wall space. Houzz highlights how natural light in modern kitchens can emphasize clean lines and flat surfaces.
The existing structure will shape what is possible in a remodel. Plumbing lines, electrical capacity, window locations, ceiling height, and load-bearing walls can affect the placement of an island or appliance wall. An older home may benefit from a layout that works with its current structure instead of requiring extensive changes.
A custom home offers more flexibility, but every design still needs to respond to the site, sun exposure, views, and household needs. Review the layout with your contractor before finalizing the design, especially if you plan to remove walls, enlarge windows, or add space through an addition.
Connect open kitchens with dining, living, and outdoor areas
An open kitchen should feel connected to nearby rooms without looking unfinished. Consistent flooring, complementary cabinet colors, or repeated wood and metal details can create a visual relationship between the kitchen, dining area, and living room. A carefully positioned island can define the kitchen while keeping conversation and sightlines open.
Consider sound and visibility, too. A range hood with effective ventilation can limit cooking odors, while a pantry or tall cabinet wall can hide small appliances and countertop clutter. If the kitchen is visible from the living room, choose storage and finishes that look intentional from every angle, including the back of the island.
Think about how your household uses outdoor space. If you regularly host summer meals or spend time on a deck, place the kitchen near the main outdoor access point when the floor plan allows. A nearby dining area, door, or pass-through window can make serving easier. Red Rooster Construction also designs outdoor living spaces, so reviewing kitchen and deck possibilities in the project gallery can help you consider both areas as part of one connected plan.
Choose Modern Kitchen Cabinetry With Warm Wood and Clean Profiles
Modern kitchen cabinetry can feel warm, practical, and personal. The goal is not to create a stark room with no visual detail. Instead, choose simple door profiles, natural materials, and storage features that support the way your household cooks, gathers, and lives.
Start with the cabinet layout before selecting colors or hardware. Wall dimensions, ceiling height, appliance placement, windows, and nearby rooms all affect the final design. In a Utah home, custom cabinetry can also make better use of views, natural light, and the unique proportions of a new build, remodel, or addition.
Choose slab, Shaker, or integrated cabinet doors
Slab doors have a flat, uninterrupted face that gives modern kitchens a clean, minimalist appearance. Their simple surface creates fewer visual breaks and can make a smaller kitchen feel more open. Shaker doors add a recessed center panel and subtle framing, offering more definition while maintaining a straightforward look. They work well in both modern and transitional Utah homes.
Integrated doors provide another option by concealing appliances behind matching cabinet fronts. A panel-ready dishwasher or refrigerator can blend into the surrounding cabinetry, creating a continuous appearance across the room. As Canadian Home Style explains, slab, Shaker, and integrated doors can all support a sleek modern design.
Choose the profile based on the amount of detail you prefer, how much cleaning the surface may require, and how the kitchen relates to nearby living spaces.
Use medium-toned wood for warmth and lasting appeal
Wood cabinetry adds texture and character without relying on decorative details. Medium-toned finishes, including natural oak, walnut, and warm maple, pair easily with stone countertops, refined metal hardware, and painted surfaces. They also bring warmth to kitchens with large windows, bright white walls, or views of Utah’s landscape.
A clear or lightly tinted finish can preserve the appearance of the grain while keeping the design simple. Use wood throughout the kitchen for a consistent look, or feature it on the island, lower cabinets, or a tall pantry wall. A focused application can provide contrast without making the room feel visually busy.
Flexfire LEDs identifies medium-toned wood as a popular choice for its warmth and broad design appeal. Review large samples in natural and artificial light before making a final decision, since wood tones can change throughout the day.
Combine wood with painted upper or lower cabinets
Two-tone cabinetry creates contrast while keeping the kitchen cohesive. Warm wood lowers paired with soft white, beige, or taupe uppers can make the room feel lighter. Alternatively, painted base cabinets with a wood island can create a grounded focal point. In kitchens with tall ceilings, painted upper cabinets may reduce the visual weight of a full wall of wood.
Give each finish a clear role instead of mixing several unrelated colors. For example, repeat the wood tone in open shelving, a range hood, or nearby flooring. A painted cabinet color might coordinate with the backsplash grout, countertop veining, or surrounding trim.
As Flexfire LEDs notes, two-tone cabinets allow homeowners to express their style while maintaining a coordinated appearance. Ask your builder to review finish samples together, since neighboring materials can change how each color looks.
Maximize storage with full-height cabinetry
Full-height cabinets use vertical space that often remains empty above standard wall cabinets. They can store pantry goods, serving pieces, baking supplies, small appliances, and seasonal items. Extending the cabinetry closer to the ceiling also creates a cleaner outline and eliminates the dust-catching ledge found above shorter cabinets.
Make tall storage easier to use with adjustable shelves, deep drawers, and pull-out organizers. Keep everyday dishes and ingredients at comfortable heights, then place holiday serving pieces or specialty equipment in less accessible areas. A full-height cabinet wall can also conceal clutter near an open dining or living area.
House & Garden recommends full-height cabinets as a way to make better use of available space while maintaining a streamlined appearance. Plan for crown trim, ceiling angles, lighting, and installation access before the cabinet order is finalized.
Integrate appliances for a clean, continuous look
Integrated appliances can make the kitchen feel like a finished part of the home instead of a collection of separate machines. Panel-ready refrigerators, dishwashers, and trash centers can sit behind cabinet fronts that match the surrounding doors. This approach is particularly effective in open-concept kitchens that remain visible from the dining or living room.
Not every appliance needs to disappear. A stainless steel range, statement hood, or built-in coffee maker can add contrast when it has been placed intentionally. Consider concealing the appliances that create the most visual interruption, particularly along a long cabinet wall.
U-Line’s kitchen design guidance describes integrated appliances as a way to create a continuous, organized look. Confirm appliance dimensions, ventilation, door clearances, plumbing, and electrical requirements early so the cabinetry and mechanical systems fit together properly.
Customize cabinets for corners, walls, and ceiling height
Standard cabinet sizes do not always make effective use of an existing kitchen. Custom cabinetry can fit around corners, windows, uneven walls, sloped ceilings, and other architectural features. It can also turn narrow spaces beside appliances, areas beneath windows, and awkward wall sections into useful storage.
For a corner, consider a revolving tray, angled cabinet, or pull-out organizer instead of a deep compartment that is difficult to reach. On a tall wall, combine open shelving with closed cabinets to display a few favorite pieces while keeping everyday items concealed. In a home with high ceilings, carefully scaled upper cabinets can add storage without making the room feel top-heavy.
House & Garden’s kitchen ideas show how cabinetry tailored to corners, walls, and ceiling heights can improve both appearance and function. Red Rooster Construction’s project gallery offers additional examples of how custom materials and built-in details shape a finished home.
Coordinate Modern Kitchen Colors and Materials
A modern kitchen feels intentional when its colors and materials work together instead of competing for attention. Begin with the elements that are difficult or expensive to change, such as flooring, windows, natural stone, and finishes in nearby rooms. From there, choose cabinetry, countertops, backsplash tile, hardware, and lighting that support the same overall palette.
This approach matters in an open-concept Utah home, where the kitchen often connects directly to the dining and living areas. The materials should feel distinct enough to define the kitchen, but consistent enough to keep the surrounding spaces connected. Warm wood, soft neutrals, and natural textures can help a sleek kitchen feel comfortable rather than stark.
Material selection should also reflect how your household uses the room. Smooth countertops may be easy to wipe clean, while wood grain, textured tile, and woven accents add warmth and visual interest. You do not need every finish to match. Instead, repeat a few colors, textures, or metal tones throughout the room to create a cohesive look. Houzz’s collection of modern kitchen ideas shows how designers combine practical surfaces with distinctive materials.
During the design process, request samples of every major finish and review them together. A color that looks appealing on its own may feel different beside your flooring, appliances, or cabinet hardware. Red Rooster Construction can help coordinate these choices as part of a custom build or kitchen remodel, with hands-on control over sourcing and construction details.
Build a palette with soft white, beige, taupe, gray, or brown
Soft neutrals create a flexible foundation for a modern kitchen. White can make a smaller space feel bright and open, while beige and taupe add warmth without making the room feel busy. Gray pairs well with stainless steel and natural stone, and brown adds depth through wood cabinetry, flooring, or furniture.
Choose one main color for the largest visual area, usually the cabinets or walls. Then select one or two supporting neutrals for the countertops, backsplash, and flooring. Warm white cabinets, for example, can work well with a taupe countertop, medium-toned wood, and brushed brass hardware.
Always compare undertones before making a final choice. A blue-gray cabinet may look out of place beside a yellow-toned countertop, while warm white cabinetry usually pairs more naturally with cream, beige, and brown. A balanced neutral palette also gives you flexibility to change seating, artwork, and décor later.
Add muted green, navy, terracotta, or earthy accents
Accent colors add personality without taking over the room. Muted green can reflect Utah’s natural landscape, while navy brings definition to an island or lower cabinet run. Terracotta, clay, rust, and ochre add warmth through backsplash tile, bar stools, pendant shades, or artwork.
Use an accent where you want to direct attention. A navy island can anchor light perimeter cabinets, and a muted green backsplash can frame the range. For a quieter approach, repeat the accent in smaller details such as hardware, textiles, open shelving, or accessories.
Natural materials help stronger colors feel grounded. Wood, stone, woven accents, and aged metal can soften a bold shade and keep it from looking too sharp. House & Garden’s collection of kitchen ideas offers examples of how color, lighting, art, and reclaimed materials can add character without sacrificing function.
Create contrast with a two-tone island or cabinet layout
A two-tone kitchen creates visual interest without requiring an elaborate design. One popular option is light perimeter cabinetry with a darker or wood-finished island. You can also use painted lower cabinets with natural wood uppers, or place a contrasting finish on one pantry or appliance wall.
The island is often the easiest place to introduce contrast because it already serves as a focal point. A medium wood island can warm up white cabinetry, while deep green, charcoal, or navy can give the room a stronger visual anchor. Keeping the countertop and hardware consistent helps the change feel deliberate.
Two-tone cabinetry can also define separate areas in a large kitchen. A different finish around a beverage station, pantry wall, or dining area can signal a shift in purpose while keeping the palette connected. If you use several cabinet colors, keep the backsplash and flooring relatively calm. REALTOR® Magazine discusses two-tone cabinet designs as one way to add contrast.
Choose countertops that resist heat, stains, and daily wear
Countertops should support the way your household cooks, cleans, and gathers. Look for surfaces that can handle spills, frequent wiping, hot cookware, and everyday activity. Quartz is popular for its consistent appearance and straightforward care, while natural stone offers unique veining and variation. Each material has different sealing, cleaning, and repair requirements, so review those details before deciding.
Connect the countertop to both the cabinetry and flooring. A lightly veined surface can bridge painted cabinets and wood accents, while a solid color may work better when the backsplash or cabinets already have a strong pattern. Ask to see a large sample when possible, since a small piece may not show the full movement of a stone pattern.
Edge profiles and thickness also affect the finished design. A simple eased edge suits a streamlined kitchen, while a thicker edge can give an island a more substantial appearance. Compare durability, maintenance, cost, and installation requirements with your builder before materials are ordered.
Pair stone, wood, refined metal, and textured backsplash materials
Modern kitchens often feel more comfortable when they combine several materials instead of repeating one finish throughout the room. Wood cabinetry can soften stone countertops, while stainless steel appliances add a crisp, practical surface. Brushed brass, bronze, or black hardware can provide a repeated accent across the cabinets, lighting, and plumbing fixtures.
The backsplash is a useful place to introduce texture. Handmade-look ceramic tile, ribbed tile, natural stone, or a slab backsplash can add depth behind the range and sink. Choose a surface that is easy to wipe clean in areas exposed to grease and splashes. A quiet backsplash lets a dramatic countertop stand out, while patterned tile can give simple cabinets more character.
Aim for balance rather than a collection of unrelated samples. If the cabinets have strong grain, choose a calmer countertop. If the stone has bold veining, use simpler hardware and backsplash materials. Houzz features combinations such as wood cabinets with marble countertops and natural wood with quartz for a layered appearance.
Choose easy-care flooring and moisture-resistant finishes
Kitchen flooring should handle dropped dishes, tracked-in dirt, spills, and frequent cleaning. Porcelain tile, luxury vinyl, sealed stone, and properly finished hardwood can all work well, depending on your home’s style and how the kitchen connects to nearby rooms. Choose enough texture for traction, but avoid deep grooves that can trap crumbs.
Medium tones and subtle patterns tend to hide everyday dust and small marks better than very dark or completely uniform flooring. If you choose wood flooring, coordinate its undertone with the cabinetry rather than trying to match the two surfaces exactly. A little variation usually looks more natural than a nearly identical match.
Moisture-resistant finishes are especially important around sinks, dishwashers, refrigerators, and beverage stations. Use the correct sealer for natural stone and grout, and confirm that cabinet finishes can withstand regular humidity and cleaning products. Plan storage and finishes together so counters stay clearer and surfaces remain easier to maintain.
Consider recycled, low-VOC, and responsibly sourced materials
Your material choices can support a healthier, more durable home. Recycled-content tile, reclaimed wood, responsibly sourced timber, and long-lasting countertops are all options to discuss during planning. Low-VOC paint, sealer, adhesive, and cabinet finishes can help reduce odors and indoor pollutants after installation.
Ask where each material comes from, how it should be maintained, and how long it is expected to last. A surface that requires frequent replacement may create more waste than a durable option with a higher initial cost. Your builder can compare these factors with your budget and the performance needs of your household.
Energy-related decisions belong in the same conversation. Efficient appliances, improved insulation, airtight construction, and all-electric heating and cooling can contribute to a comfortable, efficient home. Houzz highlights kitchens that include recycled materials and energy-efficient systems, which may give you useful ideas for your own project.
Test colors and finishes in natural and artificial light
Do not choose kitchen finishes from small samples under showroom lighting alone. Place cabinet, countertop, backsplash, and flooring samples together, then review them near a window and under the lighting you plan to install. Bright Utah daylight may make white surfaces appear sharper, while warm evening lighting can bring out yellow or red undertones.
Check samples at different times of day and against the actual wall color. Hold cabinet and backsplash samples vertically, since their appearance can change with direction and surrounding surfaces. Large samples are particularly helpful for stone and wood, where veining and grain may vary across pieces.
Review the finishes beside appliances, plumbing fixtures, and hardware as well. A metal that appears soft and warm on its own may look different beside stainless steel or black appliances. Finalizing storage, lighting, and appliances before ordering finishes can prevent costly changes and help the kitchen feel coordinated from every angle.
Which Modern Kitchen Island Ideas Work Best?
A modern kitchen island should do more than fill the center of the room. When planned well, it becomes a work surface for meal preparation, a gathering spot for family and guests, and a storage hub that helps keep the rest of the kitchen orderly. The right design depends on your household, the kitchen’s dimensions, and how the room connects to nearby living spaces.
Start by considering how you use the kitchen each day. Do you need room to roll out dough, serve family meals, or help children with homework? Would a second sink make entertaining easier? Should the island face a mountain view, dining area, or outdoor living space? Your answers will help determine the island’s size, layout, appliances, and seating.
Modern islands can also define separate zones without closing off the room. Layered lighting, contrasting materials, and thoughtful storage make the island feel like part of the architecture rather than an afterthought. For inspiration, explore the Red Rooster Construction project gallery to see how custom details can work within Utah homes.
Use the island for prep, dining, storage, and socializing
A well-designed island can support several activities at once. One section might provide an open surface for chopping and mixing, while another offers seating for breakfast or conversation. Drawers below the counter can hold cookware, utensils, and everyday dishes, keeping frequently used items within reach without crowding the perimeter cabinets.
Think about how people gather in your home. If guests tend to sit and talk while you cook, place seating on the side facing the living or dining area. If the island will serve as the main dining spot, allow enough counter depth for plates, glasses, and comfortable elbow room.
An island can also make entertaining easier by creating a clear serving area. Keep prep tools near the work side and leave part of the countertop open for setting out food. According to Flexfire LEDs’ kitchen lighting guide, islands commonly support preparation, cleanup, storage, casual dining, and socializing. Planning for these uses from the beginning helps every feature serve a purpose.
Choose an island over seven feet only when space allows
A large island can provide valuable workspace, but bigger is not always better. An island longer than seven feet may suit a spacious custom kitchen that needs generous seating or multiple work zones. However, its length should never come at the expense of comfortable movement around the room.
Measure the full kitchen before committing to a large design. Account for cabinet depth, appliance doors, seating overhangs, walkways, and traffic from nearby rooms. A long island can feel awkward if it creates a narrow passage or forces people to squeeze behind seated guests. It may also make cleaning and reaching the center of the countertop more difficult.
Consider dividing functions instead of stretching one surface across the room. A shorter island with deep drawers and a separate pantry may provide more useful storage than an oversized island. In a larger kitchen, pairing an island with a nearby dining table can offer greater flexibility for meals and entertaining.
Your builder can test these dimensions against the complete floor plan. If you are comparing project sizes and costs, review Red Rooster Construction’s Utah home building cost guide before finalizing the island’s footprint.
Preserve comfortable walkways and appliance clearances
An island should improve movement through the kitchen, not interrupt it. Leave enough room for people to pass each other, open drawers, and use appliances without collisions. The work aisle between the island and the main cabinets deserves particular attention because it often carries the most activity.
Check every door and drawer in the plan. The refrigerator, dishwasher, oven, and corner cabinets should open without blocking a key walkway. If the island includes seating, measure the space behind the stools as well. People need room to sit down, stand up, and move past the seats without stepping into the cooking zone.
Also consider how the island affects routes between the kitchen, entryway, dining area, and backyard. During the design phase, mark appliance swings and walking paths on the floor with painter’s tape. This simple exercise can reveal cramped areas before construction begins and help your builder adjust the layout.
Add seating without disrupting cooking or cleanup zones
Island seating works best when it has a clear relationship to the rest of the kitchen. Place stools on the side facing a living area, dining space, or view. This lets family members and guests stay connected without sitting directly beside hot pans, open ovens, or a busy cleanup station.
The counter overhang should provide adequate legroom, while the island base should leave space for knees and feet. Avoid placing seating where it blocks the refrigerator or creates a bottleneck between the island and a wall. If the island is narrow, seating at one end may work better than a row of stools along the entire front.
You can also create different heights for different activities. A standard-height counter supports food preparation and casual dining, while a raised section can hide dishes or create a visual boundary. However, varied heights can reduce flexibility and make the surface harder to use for large gatherings. Choose the arrangement based on how your household eats, works, and visits.
Integrate a sink, dishwasher, microwave, or cooktop when practical
Adding an appliance to the island can make the kitchen more efficient, but each choice should support a clear work pattern. A prep sink is useful when the island handles chopping, rinsing, and serving. Pairing it with a dishwasher can create a convenient cleanup zone, provided the open dishwasher door will not block a main walkway.
A microwave drawer can keep the appliance within easy reach while preserving a clean sightline. It may be especially useful for families because children can access it without reaching over a hot cooktop. A cooktop can place the main cooking action at the center of the room, but it requires careful planning for ventilation, heat, splatter, and safe separation from seating.
Avoid placing too many functions in one island. A sink, cooktop, stools, and several appliances can leave little uninterrupted counter space and make the island feel crowded. Decide whether the island’s main role is preparation, cooking, cleanup, serving, or gathering. Then add only the features that support that role.
Include deep drawers, hidden outlets, and charging space
Modern island storage should accommodate the items you use most often. Deep drawers can hold pots, pans, mixing bowls, small appliances, and serving pieces more conveniently than standard lower cabinets. Wide drawers with sturdy hardware are helpful for heavier cookware, but they should be sized so contents remain easy to organize.
Outlets can be placed discreetly beneath the countertop overhang, inside a cabinet, or within a pop-up unit designed for kitchen use. Their location matters. Add power where you are likely to use a blender, mixer, laptop, or small appliance, while keeping cords away from the sink and primary cooking area.
A dedicated charging drawer can keep phones and tablets off the countertop. Include cable openings and ventilation so devices can charge without creating a tangle. You might also reserve a drawer for lunch containers, water bottles, or children’s art supplies.
Plan these details before cabinet fabrication and electrical work. Hidden outlets, drawer dimensions, and appliance connections are much easier to coordinate during the design phase than after the island is installed.
Add contrast with a finish, waterfall edge, or statement surface
The island is a natural place to introduce contrast without making the entire kitchen feel busy. A wood base can warm up a kitchen with painted cabinetry, while a painted island can stand out against natural wood cabinets. Muted green, deep blue, taupe, and warm gray can add character while staying compatible with a modern palette.
A waterfall countertop edge creates a continuous line that carries the surface material down the sides of the island. It works particularly well with stone or porcelain slabs and gives the island a furniture-like presence. Before choosing this detail, confirm that the material, edge profile, and support structure fit the construction plan and budget.
You can also create interest with a textured backsplash behind the island, a distinctive pendant light, or a thicker countertop profile. Keep surrounding finishes restrained so the focal point feels intentional. U-Line Lifestyle’s kitchen design guidance describes how sculptural lighting and layered materials can help define kitchen zones. A skilled custom builder can coordinate those details with cabinetry, flooring, and nearby spaces for a cohesive result.
Create Modern Kitchen Storage for a Clutter-Free Space
A modern kitchen feels calm when every item has a practical place. The goal is not to hide cookware in a distant closet, but to organize the room around the way your household actually cooks, eats, and gathers. Start by making a list of everything the kitchen needs to hold, including bulk pantry items, baking supplies, serving pieces, small appliances, cleaning products, recycling bins, and everyday dishes. Then assign each category to a location based on how often you use it.
Storage should follow the kitchen’s work zones. Keep knives, cutting boards, mixing bowls, and prep tools near the main counter. Place pots, pans, and cooking utensils close to the range. Dishes and glassware belong near the dishwasher or dining area, where they can be put away quickly. This approach reduces unnecessary movement and keeps frequently used items within easy reach.
Plan storage at the same time as the kitchen layout, plumbing, electrical work, and cabinetry. That coordination matters during both a remodel and a custom home project. Red Rooster Construction’s project gallery offers examples of how cabinetry, built-in features, and open kitchen layouts can work together in finished Utah homes.
Add pantry cabinets, walk-in pantries, or butler’s pantries
A pantry gives food and kitchen supplies a dedicated home, helping prevent crowded countertops and overfilled cabinets. Pantry cabinets work well in smaller kitchens because they provide tall storage without requiring a separate room. Add adjustable shelves, full-extension drawers, and door racks for cans, grains, snacks, and small appliances.
If you have more room, a walk-in pantry can hold bulk purchases, serving pieces, countertop appliances, and cookware you use less often. A butler’s pantry offers another option between the kitchen and dining area. It can provide space for beverage service, food staging, dish storage, and cleanup during gatherings.
For Utah homes, consider how the pantry connects to the garage, mudroom, or entry. A convenient route makes unloading groceries easier. Include outlets for appliances, durable flooring for heavy traffic, and adequate lighting so the pantry does not become a dark storage closet. If you are building a custom home, account for pantry shelving and door swing before finalizing the surrounding layout.
Create coffee, beverage, snack, and baking stations
Dedicated stations make popular routines easier and keep specialized supplies from spreading across the kitchen. A coffee station might include a shelf for mugs, a drawer for filters and pods, an outlet for the coffee maker, and a landing area for preparation. A beverage station could include glassware, an undercounter refrigerator, and storage for sparkling water or mixers.
Snack stations work especially well for families. Use low drawers or open cubbies for items children can access safely, while keeping sharp tools and breakable dishes elsewhere. For baking, place mixing bowls, measuring tools, baking sheets, and ingredients near the main work surface. A lift-up mixer shelf keeps a heavy appliance accessible without leaving it on the counter.
Think about traffic before assigning a station. A coffee area outside the main cooking path can prevent congestion during busy mornings. If you are remodeling, discuss these routines before cabinet drawings are finalized. Red Rooster’s contact page provides a starting point for planning custom storage around your household.
Use pull-out shelves, drawer dividers, and cabinet racks
Deep cabinets can hold plenty, but items at the back are easy to forget. Pull-out shelves bring those items forward, making it easier to see and reach pots, pantry containers, and small appliances. They are especially useful in lower cabinets, where bending and searching can become frustrating.
Use wide drawers for cookware and dishes, then add dividers to keep lids, cutting boards, utensils, and baking tools upright. Pegged drawer systems can hold plates securely, while adjustable dividers allow storage to change as your needs do. Cabinet racks can create separate levels for plates, bowls, spices, or cleaning products.
Measure your items before choosing an insert. A divider designed for flat utensils will not work well for tall bottles or bulky cookware. Check the cabinet’s interior width and depth, too, since plumbing, hinges, and drawer slides can reduce usable space. Custom cabinetry can fit storage around unusual walls, windows, and appliance locations instead of relying only on standard inserts.
Improve corner access with revolving trays and pull-outs
Corner cabinets often provide valuable volume but poor access. Without a plan, they become places where extra cookware and rarely used ingredients disappear. Revolving trays, sometimes called lazy Susans, turn stored items toward the opening. Choose a design with a stable surface, smooth rotation, and enough clearance for the cabinet door.
Another option is a corner pull-out system. These shelves extend from the cabinet so you can view the contents without reaching deep into the corner. Some systems use connected shelves that move together, while others include separate trays for more flexible organization.
The best choice depends on the cabinet shape and what you plan to store. Revolving trays suit bottles, cans, and smaller containers. Pull-outs may work better for pots, mixing bowls, or heavier items. Ask your cabinet designer to show the hardware fully extended before selecting it. This confirms that doors, handles, and nearby appliances will not interfere with one another.
Add spice drawers, tray dividers, and vertical sheet-pan storage
Small storage decisions can make a noticeable difference in daily kitchen use. A shallow spice drawer keeps labels visible from above and places seasonings near the prep or cooking zone. If you prefer a cabinet solution, tiered shelves or a narrow pull-out can prevent jars from hiding behind one another.
Tray dividers give baking sheets, cutting boards, cooling racks, and serving platters an upright home. Vertical storage makes each item easier to remove without lifting a stack. Place it near the oven if you use sheet pans often, but avoid locating it directly above a heat source.
Before finalizing the cabinet layout, count your trays and measure their dimensions. Oversized roasting pans may need a wider divider section than standard baking sheets. Include extra room for future additions. A tall, narrow cabinet beside the oven or island can provide organized storage without taking much floor space.
Conceal waste, recycling, cleaning supplies, and small appliances
A streamlined kitchen still needs room for practical items. Pull-out waste and recycling bins keep containers off the floor and make sorting easier. Place them near the sink or main prep area, but leave enough clearance for the cabinet to open fully while someone is working nearby.
Cleaning supplies should have a dedicated location with a child-safe latch when needed. A narrow cabinet beneath the sink can hold sprays, sponges, and towels, while a separate drawer can store trash bags and dishwasher supplies. Use a removable tray to protect the cabinet base from leaks and make cleaning simpler.
Small appliances require more planning than their size suggests. Blenders, toasters, air fryers, and slow cookers can quickly take over a counter. Store frequently used items in an appliance drawer or lift-up cabinet, and place heavier machines on reinforced shelves. Provide ventilation where manufacturer instructions require it, especially for appliances that generate heat.
Plan appliance garages and charging drawers early
An appliance garage can hide a toaster, coffee maker, blender, or other countertop item while keeping it connected and ready to use. It may sit beneath upper cabinets, inside a tall cabinet, or behind a roll-up or lift-up door. Choose the location based on how often you use the appliance and how close it is to the prep area.
Electrical planning matters. Outlets inside cabinets must follow local requirements and the appliance manufacturer’s instructions. Your builder can coordinate outlet placement, cabinet dimensions, ventilation, and access before the walls and cabinetry are complete. Avoid placing an appliance garage where an open door would block a walkway or interfere with another cabinet.
Charging drawers can store phones, tablets, and kitchen timers without leaving cords across the counter. Include an outlet inside the drawer and provide a neat path for cables. Keep charging areas away from sinks and cooking surfaces. Planning these features during the design phase is much easier than adding them after installation.
Keep everyday items accessible with aging-in-place storage
Accessible storage benefits everyone, not only people planning for aging in place. Keep everyday dishes, glasses, cookware, and food between knee and shoulder height when possible. Wide drawers are often easier to use than deep lower cabinets, while pull-down shelves can bring upper-cabinet contents within reach.
Choose handles that are comfortable to grasp, such as simple pulls rather than tiny knobs. Soft-close drawers reduce noise and require less force, while full-extension slides make heavy cookware easier to manage. Bright interior lighting also improves visibility inside pantries and cabinets.
Leave clear floor space around key work areas so more than one person can use the kitchen comfortably. Avoid storing frequently used items in a corner that requires twisting or reaching over an open door. The AARP HomeFit guide includes practical ideas for making home storage more comfortable and accessible. During design, consider how these features can serve your household now and remain useful if mobility or reach changes later.
Layer Modern Kitchen Lighting for Every Need
Modern kitchen lighting should support much more than food preparation. It needs to work for cooking, cleanup, homework, family meals, entertaining, and quiet evenings at home. The most effective plan combines several lighting layers, so the room remains comfortable and functional throughout the day.
Utah homes often receive strong natural light during the day, but that light changes with the seasons and fades early in the evening. Plan your lighting with the kitchen layout, cabinet design, ceiling height, and electrical work in mind. During a remodel, this helps prevent visible cords, awkward switches, and fixtures that cast shadows in the wrong places. New construction offers even more flexibility because wiring and fixture locations can be coordinated from the beginning. Red Rooster Construction’s home building and remodeling services can help bring those details together as part of a larger kitchen project.
Combine ambient, task, and accent lighting
Ambient lighting provides general illumination throughout the room. Task lighting focuses on work areas, such as countertops, sinks, and the range. Accent lighting adds depth by drawing attention to shelving, artwork, architectural features, or a statement backsplash. Combining these layers creates a kitchen that feels bright without becoming harsh or flat.
Start by identifying where you prepare food, cook, wash dishes, serve meals, and gather with family. Then add accent lighting to the features you want to emphasize. Give each layer its own switch or dimmer when possible, so you can use bright task lighting while cooking and softer accent lighting during dinner. A layered lighting plan also helps prevent a common problem: a ceiling fixture that lights the floor but leaves the countertop in shadow.
Install under-cabinet LEDs over prep and cleanup areas
Under-cabinet LEDs place light directly on the countertops where you need it most. Install them beneath upper cabinets over food prep areas, the sink, coffee station, and other frequently used surfaces. They reduce shadows from overhead fixtures and make simple tasks easier, including reading recipes, chopping vegetables, and wiping down counters.
A continuous LED strip typically provides more even illumination than individual puck lights, especially beneath a long cabinet run. Puck lights can still work well in shorter sections or where you want more defined pools of light. Choose a slim fixture that remains hidden from normal sightlines, and plan the wiring before installing the backsplash. Dimmable LEDs let you adjust the brightness for different activities. Sleek under-cabinet lighting can also keep the backsplash and countertops looking clean, as appliance lighting guidance explains.
Use recessed lights for even general illumination
Recessed lights offer dependable ambient lighting without competing with pendants, cabinetry, or decorative fixtures. Instead of placing every light in a strict grid, arrange them around the room’s main walking paths, open floor areas, and work zones. The goal is consistent coverage without creating bright spots or dark corners.
Placement matters near countertops. If a recessed light sits too far behind someone working at the counter, their body may cast a shadow across the work surface. Coordinate the layout with the front edge of the countertops and upper cabinets so light reaches the areas where tasks happen. Adjustable recessed fixtures can direct light toward a pantry, backsplash, artwork, or tall cabinet. An electrician or builder should also coordinate fixture locations with ceiling joists, ventilation, insulation, and other mechanical systems before installation.
Scale pendants to fit islands and dining areas
Pendants provide focused light over an island while adding a strong visual detail to the kitchen. Choose their size based on the island’s length, the room’s ceiling height, and the scale of nearby cabinetry. One larger fixture may suit a compact island, while two or three smaller pendants can create better balance over a longer surface.
Leave enough space between fixtures so they do not feel crowded. They should also hang high enough to preserve sightlines across the room while still illuminating the countertop. Clear glass can help a smaller kitchen feel open, while wood, metal, or textured shades can introduce warmth. If the island connects to a dining or living area, select pendants that coordinate with nearby finishes without matching every fixture. A well-scaled statement fixture can serve as both a practical feature and a focal point, as this kitchen lighting guide shows.
Highlight shelving, artwork, backsplashes, and architectural details
Accent lighting gives a modern kitchen more depth and draws attention to the details that make the room personal. Use small adjustable fixtures to wash light across a textured backsplash, illuminate open shelves, or highlight artwork. A vaulted ceiling, exposed beam, stone wall, or custom range hood can also benefit from carefully placed accent lighting.
Keep the effect subtle. The light should emphasize a feature without producing glare or making the rest of the kitchen feel dim. Adjustable recessed fixtures, narrow-beam spots, and concealed LED strips all work well. Interior lighting can make glass-front cabinets, dishes, and serving pieces more visible in the evening. When selecting decorative fixtures, look for pieces that contribute to the room’s style while still providing useful light. These modern kitchen lighting ideas show how functional fixtures can also become design details.
Add toe-kick, pantry, and interior-cabinet lighting
Concealed lighting can make storage easier to use while giving the kitchen a finished appearance. Interior-cabinet lights help you find cookware, pantry items, and serving pieces without turning on every light in the room. Motion-activated fixtures work especially well inside tall pantry cabinets, deep drawers, appliance garages, and frequently used storage areas.
Toe-kick lighting runs along the recessed base of lower cabinets and islands. It provides low-level illumination for nighttime trips to the kitchen without the brightness of overhead fixtures. Use a diffused strip with a warm color temperature for a soft glow. Plan these features before cabinet construction, since the cabinet design and electrical connections need to accommodate them. Motion sensors are particularly helpful in pantry and cabinet areas because they turn the light on when you need it, as kitchen lighting guidance from Decorilla notes.
Create a subtle floating effect with plinth lighting
Plinth lighting, often called toe-kick lighting, can make base cabinets or an island appear to float above the floor. The effect works best when the light source stays hidden and the cabinet base is recessed enough to create a clean shadow line. A continuous LED strip usually creates the most even result along a long cabinet or island.
Treat plinth lighting as a soft accent rather than the kitchen’s primary illumination. A warm, dimmable setting can provide a comfortable evening glow, while a brighter setting can help guide movement through the room. Consider how the light interacts with the flooring. Highly reflective tile may create glare, while matte wood or stone tends to diffuse the effect more gently. Flexible LED products can follow curved cabinetry and unusual island shapes, making them useful in custom kitchens. Concealed lighting adds a refined detail without taking attention away from the cabinetry, flooring, or other finishes.
Use dimmers, smart controls, and adjustable LEDs
Dimmers allow one lighting plan to support several activities. You may want bright task lighting while preparing dinner, softer ambient light during a meal, and low-level illumination after everyone goes to bed. Place pendants, recessed fixtures, under-cabinet lights, and accent lighting on separate switches whenever possible.
Smart controls can make those settings easier to use. Depending on the system, you may control brightness, schedules, or individual fixture groups from a wall switch, phone, or voice assistant. You do not need a complicated system to make the kitchen more comfortable. A few preset scenes, such as cooking, entertaining, and nighttime, may be enough. Confirm that each LED fixture is compatible with the selected dimmer or smart control before installation. Adjustable fixtures can also direct light toward specific work areas, while smart systems allow control through apps or voice commands, as these modern kitchen lighting recommendations describe.
Keep color temperatures consistent throughout the kitchen
Color temperature affects how cabinets, countertops, flooring, backsplash materials, and paint appear. If one fixture produces a warm yellow tone while another looks cool and blue, the kitchen can feel visually disconnected. Choose a consistent color temperature for fixtures that operate in the same area, particularly recessed lights, pendants, and under-cabinet LEDs.
Warm white light often suits kitchens with wood cabinetry, beige walls, or natural stone. A neutral white may work well for crisp white cabinets, gray finishes, or detailed prep areas. The best choice depends on the materials and the amount of daylight in the room. Before ordering fixtures, test samples near the cabinets, counters, backsplash, and flooring. Check them in both daylight and evening conditions, since natural light can change how colors appear. Consistency matters more than choosing a specific temperature, and dimmers can adjust brightness without changing the overall character of the room.
Which Practical Features Make a Modern Kitchen Work Better?
A modern kitchen should look polished, but its real value comes from how well it supports everyday life. The right features make it easier to prepare meals, clean up, store supplies, host guests, and move through the room without unnecessary friction. For Utah homeowners, practical planning may also account for dry conditions, seasonal temperature changes, busy family schedules, and an open layout that connects the kitchen to the rest of the home.
Start by listing the tasks your household performs most often. Do you prepare quick breakfasts, cook large family meals, bake regularly, or entertain on weekends? Your answers can guide decisions about appliance placement, storage, lighting, outlets, seating, and work surfaces.
These details should be planned before construction begins, while plumbing, electrical systems, cabinetry, and ventilation are still being coordinated. Red Rooster Construction takes a hands-on approach to custom home construction and remodeling projects, helping Utah homeowners connect practical kitchen features with the larger design of the home.
Add smart appliances that solve real household problems
Smart appliances can make a kitchen more convenient, but each feature should solve a specific problem. A refrigerator with flexible temperature zones may help preserve fresh food, while a connected oven can send cooking alerts to your phone. An adjustable, quiet dishwasher may be more useful than an appliance with features you rarely use.
Smart lighting can also support daily routines. Systems with programmed schedules, voice controls, or adjustable brightness can provide stronger illumination during food preparation and softer light during dinner. Choose technology that saves time or makes a common task easier. Before selecting connected appliances, confirm that your electrical plan, cabinet layout, ventilation, and home network can support them.
Consider induction cooking, efficient ventilation, and water-saving fixtures
Induction cooktops provide fast, precise heating and a smooth surface that is easy to wipe clean. They may also release less excess heat into the room than some other cooking methods, which can make the kitchen more comfortable during warmer months. If you prefer gas cooking, review the installation and ventilation requirements before making a final decision.
Effective ventilation matters with any cooking method. A properly sized range hood can remove smoke, grease, moisture, and odors before they spread into nearby rooms. For water efficiency, consider a pull-down faucet with a pause function, a touchless control, or a dishwasher designed to use water carefully. Combining the right cooking, ventilation, and plumbing features can improve comfort without adding visual clutter. This kitchen design guide offers additional ideas for coordinating appliances, lighting, and finishes.
Place outlets, USB ports, and controls where you use them
Electrical planning deserves attention long before cabinets are installed. Add outlets near food preparation areas, countertop appliances, and serving spaces. An outlet inside an appliance garage can keep a blender or toaster ready without leaving cords across the counter. Charging drawers provide a dedicated place for phones and tablets, while USB ports near a breakfast area can support homework or remote work.
Think about controls, too. Place switches for pendants, under-cabinet lights, and ceiling fixtures near the areas where you enter or work. If you plan to use smart lighting, include manual controls so the system remains simple for everyone in the household. Your electrician and builder should coordinate outlet locations with cabinet elevations, backsplash materials, appliance dimensions, and local code requirements. This prevents outlets from ending up behind appliances or too far from the work zones.
Improve accessibility with easy-open hardware and varied counter heights
Accessibility features can make a kitchen more comfortable for people of different ages, heights, and abilities. Lever-style pulls or touch-latch hardware may be easier to use than small knobs, especially when your hands are wet or full. Wide drawer pulls, full-extension drawers, and soft-close hardware can also reduce reaching and bending during daily tasks.
More than one counter height may make the room easier to share. A standard work surface can support general food preparation, while a lower section may help with baking, seated tasks, or meal preparation. A raised part of the island can define a dining area and shield some kitchen activity from view. Also consider clear paths, generous turning space, and appliance doors that do not block walkways. Flexfire LEDs discusses easy-open hardware and varied counter heights as useful elements in accessible kitchen planning.
Add pull-outs, brighter task lighting, and nonslip flooring
Pull-outs can make deep or narrow cabinets much easier to use. Add them to pantry cabinets, corner storage, trash and recycling centers, or lower cabinets that would otherwise require you to reach toward the back. Drawer dividers can organize utensils, while vertical slots can hold cutting boards, baking sheets, and serving trays.
Lighting should support each work zone. Under-cabinet fixtures can illuminate countertops without creating shadows from upper cabinets, while brighter task lighting can improve visibility at the sink, range, and island. Choose flooring with a nonslip surface that remains comfortable during long cooking sessions. In Utah homes, it should also handle tracked-in dirt and seasonal moisture near exterior doors. A layered plan combining task, ambient, and accent lighting can improve visibility throughout the room.
Choose durable, easy-clean surfaces for busy Utah homes
Kitchen materials should match the way your household lives. If you cook often, choose countertops that resist stains, heat, and everyday scratches. Quartz, durable natural stone, and other low-maintenance surfaces can reduce upkeep, but each material has different care requirements. Ask how a surface reacts to hot pans, acidic foods, spills, and regular cleaning products before choosing it.
Cabinet finishes should withstand fingerprints, splashes, and repeated opening. A backsplash with fewer grout lines may be easier to maintain than a highly textured installation. For flooring, look for a finish that stands up to foot traffic and hides minor debris. Under-cabinet lighting can make counters and backsplashes easier to clean by improving visibility, while also giving the room a streamlined appearance. Vista Manufacturing’s lighting guide explains how this type of lighting can serve both practical and design purposes.
Provide ventilation, daylight, and comfortable year-round heating
A comfortable kitchen needs more than attractive finishes. Windows or strategically placed glazing can bring in daylight and provide views, but they should not interfere with upper cabinets, countertop space, or privacy. If the kitchen receives strong afternoon sun, consider shades or window treatments that reduce glare and help protect finishes from fading.
Mechanical ventilation is especially important in an open-concept layout, where cooking heat and moisture can move into nearby living areas. Directing exhaust outdoors may offer stronger performance than a recirculating hood, but the right approach depends on the home’s design and local requirements. Heating and cooling should also be planned early. Large windows, exterior walls, and open connections to living areas can affect comfort throughout the year. Your builder can coordinate insulation, ductwork, windows, and ventilation so the kitchen remains comfortable during Utah’s cold winters and warm summers.
Plan flexible features that adapt as household needs change
A kitchen can support several stages of life when its features are planned with flexibility in mind. Deep drawers may store pots and pans today, then make everyday items easier to reach later. A wide island can serve as a prep surface, homework station, buffet, or gathering place. Extra outlets can support new appliances, charging needs, or changes in how your family uses the room.
You can also include a small work area, beverage station, or open shelf that changes purpose over time. Choose durable finishes that will remain appealing if your style changes, and avoid permanent features that limit future updates. If you are remodeling, consider whether an addition could create space for a larger pantry, mudroom connection, or expanded dining area. Red Rooster’s project gallery can help you compare how layout, materials, and custom details work together in completed Utah homes.
Personalize Modern Kitchen Design Without Losing Function
Modern kitchen design should feel intentional, not identical to every other home. Clean lines and streamlined finishes create a strong foundation, but the details should support the way your household cooks, works, and spends time together. Start with the practical needs of the room, then choose materials, lighting, and features that make the kitchen feel personal.
For Utah homes, personalization may also mean responding to the home’s architecture, mountain views, natural light, and connection to outdoor living areas. A kitchen in a new custom home may offer more flexibility than a remodel, but both projects can benefit from the same approach: establish the layout first, then select finishes and features that fit your routines.
Consider how the kitchen will look from nearby rooms, how many people will use it at once, and which tasks happen most often. This helps you avoid spending your budget on details that look attractive but make everyday work harder. The most successful modern kitchens balance visual simplicity with storage, comfortable movement, durable materials, and thoughtful lighting.
Match cabinetry, hardware, and lighting to your home’s architecture
Your kitchen should feel connected to the rest of the home. In a mid-century-inspired house, flat-panel cabinets, simple pulls, and streamlined lighting can reinforce the architecture. A traditional Utah home may feel more balanced with Shaker doors, warm wood, and classic metal hardware. In a contemporary home, integrated appliances and minimal hardware can create a continuous, uncluttered look.
Pay attention to ceiling height, window placement, trim, flooring, and nearby finishes before selecting cabinets or fixtures. Hardware can repeat a metal tone found elsewhere in the home, while cabinetry can echo existing woodwork or architectural details.
Lighting deserves the same care. Statement fixtures can provide practical illumination and serve as a visual focal point. Layered lighting can also define prep, dining, and gathering areas. U-Line’s kitchen design guidance explains how lighting can shape a kitchen’s character rather than simply brighten it.
Express your style with an island, backsplash, or feature wall
You do not need bold finishes throughout the kitchen to make a strong design statement. Choose one or two areas for personality, such as a contrasting island, handmade backsplash, open shelving wall, or sculptural range hood. Keeping surrounding cabinetry and countertops simpler allows the feature to stand out without making the space feel busy.
An island is especially useful because it combines visual impact with everyday function. A painted island can add color, while a wood island can bring warmth to a white or neutral kitchen. You might also use a waterfall countertop edge, distinctive pendant lights, or a full-height backsplash to create a focal point.
Before committing to a feature, consider how it will look from the dining and living areas. A statement surface should complement those rooms rather than compete with them. U-Line’s lighting guidance notes that bold pendants and layered fixtures can help establish zones while setting the room’s mood.
Mix textures and finishes within a cohesive palette
A modern kitchen can include several materials without looking disjointed. The key is to repeat a few related colors and balance smooth surfaces with natural or tactile finishes. For example, pair warm wood cabinetry with a honed stone countertop, brushed metal hardware, and a lightly textured backsplash. The materials feel different, but the palette keeps them connected.
Try to vary texture more than color when you want a calm, lasting result. A matte cabinet finish can balance a lightly reflective backsplash, while wood grain can soften polished stone and stainless steel. Repeating one finish in small details, such as cabinet pulls, faucets, and light fixtures, can make the overall design feel deliberate.
Reflective surfaces can help move light through the room, which may be useful in kitchens with limited daylight. Natural textures can also keep a neutral palette from feeling flat. U-Line’s kitchen design research describes how combining metal, wood, and thoughtful lighting adds depth and warmth while preserving a modern look.
Design work zones for coffee, entertaining, baking, or family meals
Personalization works best when it reflects what you actually do in the kitchen. A coffee station might include a dedicated outlet, mug storage, water access, and a small landing area for the machine. A baking zone may need deep drawers for mixing bowls, vertical storage for baking sheets, and countertop space near the oven.
If you entertain often, place beverage storage and serving pieces where guests can reach them without entering the main cooking area. For family meals, keep everyday dishes, flatware, and seating close to the dining or island area. These small decisions can reduce interruptions and help several people use the kitchen comfortably.
Think about lighting and controls within each zone, too. Under-cabinet lights can illuminate prep surfaces, while dimmable pendants can create a softer setting during meals. Decorilla’s kitchen lighting recommendations describe how programmed settings and adjustable fixtures can support different activities throughout the day.
Choose details that reflect how your household cooks and gathers
The best kitchen details solve small frustrations before they become daily annoyances. If several people cook together, include wider aisles, separate prep areas, and drawers that keep frequently used tools easy to reach. If family members gather around the island, plan comfortable seating, clear legroom, and durable surfaces that can handle homework, meals, and conversations.
Think about the items you reach for every day. A knife drawer near the main prep area, a pull-out trash bin beside the sink, or a drawer for cooking utensils near the range can make the room easier to use. These details may not be the first things guests notice, but they have a meaningful effect on daily comfort.
Your choices should also account for changing needs. Easy-open hardware, bright task lighting, pull-out shelves, and varied counter heights can help people of different ages and abilities use the kitchen. Flexfire LEDs’ kitchen lighting guide also points to lighting as an important part of cooking safety and the room’s personality.
Coordinate the kitchen with nearby living and outdoor areas
When the kitchen opens to a dining room, great room, patio, or deck, treat those spaces as part of one design plan. The finishes do not need to match exactly, but they should share a visual connection through repeated wood tones, metal finishes, flooring, or accent colors. This helps an open floor plan feel deliberate instead of divided into unrelated areas.
Consider the view from each connected space. Cabinet colors, pendant lights, and a backsplash may be visible from the living room, while large windows or sliding doors may frame an outdoor area from the kitchen. Keep those sightlines in mind when selecting high-contrast features or open shelving.
Transitions should also be practical. Choose flooring that can handle kitchen spills and traffic from the patio, along with easy-to-clean surfaces near doors and serving areas. Coordinate lighting so the kitchen remains comfortable after sunset without overpowering the living or outdoor spaces. Browse the Red Rooster Construction project gallery for examples of custom home details that connect interior living spaces with Utah’s outdoor setting.
Plan Your Modern Kitchen With Red Rooster Construction
Planning a modern kitchen starts with how the space needs to work, not with cabinet colors or appliance packages. Think about who cooks, how often meals are prepared, whether your household eats at the island, and how often you host friends or family. These details influence the layout, storage, lighting, surfaces, and seating you will use every day. House & Garden’s kitchen planning guide also recommends considering cooking habits, shopping routines, and dining needs before finalizing the design.
Make a list of your must-haves and nice-to-haves before meeting with a builder. Your priorities may include a larger island, full-height cabinets, better pantry storage, improved lighting, durable countertops, or a stronger connection to an outdoor living space. Separating essential features from optional upgrades helps you make thoughtful budget decisions.
Red Rooster Construction can help bring those ideas together through custom home construction, remodeling, additions, and outdoor living projects. Its hands-on approach gives you one experienced partner to help coordinate the design, materials, permits, and construction details from the beginning.
Set priorities for layout, storage, materials, features, and budget
Start by identifying what works and what does not work in your current kitchen. You may need more counter space, better lighting, easier access to cookware, or a place to store small appliances. Write down these frustrations along with the features you would like to add. This gives your builder practical information to use during the planning process.
Organize your priorities into categories such as layout, storage, appliances, materials, lighting, and budget. Decide where it makes sense to invest more, whether that means custom cabinetry, durable countertops, high-quality flooring, or improved ventilation. Remember to account for plumbing, electrical work, permits, installation, and possible structural changes.
A modern kitchen should balance function, storage, comfort, and personality. Red Rooster can help you compare options and create a plan that reflects how your household cooks, eats, and gathers.
Compare new construction, remodeling, and home additions
New construction offers the most design flexibility. You can determine the kitchen’s location, window placement, ceiling height, plumbing, electrical systems, storage, and connection to nearby rooms before construction begins. This approach works well if you want an open kitchen, a large island, or direct access to a deck or patio.
A remodel may be more practical when the kitchen is in the right area but needs better storage, finishes, lighting, or organization. An addition can provide more space when the existing footprint cannot accommodate the island, pantry, seating, or clear walkways you need. It may also create a better connection between the kitchen and an outdoor living area.
Homeowners are placing more emphasis on function, flexibility, personalization, and long-term usability, according to REALTOR® Magazine’s kitchen design research. Discussing all three options with a builder can help you compare cost, disruption, structural requirements, and future value.
Coordinate design, sourcing, permits, and construction from the start
A kitchen project may involve much more than cabinets and countertops. Structural changes, plumbing, electrical circuits, lighting, ventilation, insulation, flooring, windows, and heating should all work together. Planning these elements separately can lead to delays, unexpected costs, or compromises later.
Red Rooster Construction can coordinate these decisions early. The process may include reviewing the existing structure, developing the layout, selecting materials, placing appliances, and identifying permit requirements. Early coordination also helps confirm that the design is practical to build and that each finish works with the surrounding rooms.
Plan storage before choosing finishes or appliances. You may want separate areas for coffee-making, baking, food preparation, cleanup, entertaining, and snacks. Sharing these routines at the start helps place outlets, plumbing, lighting, and cabinetry where you will use them most.
Use direct sourcing and Red Rooster’s in-house lumber mill
Material sourcing affects the appearance, durability, schedule, and cost of a kitchen. Red Rooster operates its own lumber mill and directly sources materials, giving the team greater involvement in the products and wood elements used throughout your project.
Wood can add warmth to a modern kitchen when paired with sleek surfaces such as quartz, stainless steel, or refined metal. Consider wood cabinetry, open shelving, an island accent, ceiling details, or a custom range hood surround. Combining warm materials with smooth surfaces creates contrast without making the room feel busy. Houzz offers additional examples of how modern kitchens combine wood and stone.
Direct sourcing also supports clearer communication during construction. Your builder can explain how a material will perform, where it fits within the design, and how it coordinates with other finishes. Browse Red Rooster’s project gallery to see examples of its craftsmanship and custom building work.
Maintain quality through hands-on craftsmanship and control
The quality of a kitchen depends on details that may not stand out in a photo. Cabinet alignment, trim transitions, countertop support, flooring connections, appliance clearances, and lighting placement all affect the finished space. Careful oversight helps address these details throughout construction instead of waiting until the final walkthrough.
Red Rooster maintains close control over much of the building process, including material sourcing and its in-house lumber mill. This hands-on approach allows the team to stay involved as the project develops and respond to the unique requirements of a custom kitchen.
A dependable builder should also explain when a requested feature may create construction, maintenance, or budget concerns. Discussing those issues early helps protect the overall design and keeps the project aligned with your priorities. The result should be a kitchen that looks polished while remaining comfortable and practical for everyday use.
Plan for Utah homes across the Wasatch Front and surrounding counties
Utah homes vary in age, structure, lot size, natural light, and available views. A modern kitchen in an older Salt Lake home may require a different approach than a new build in Summit or Wasatch County. Existing walls, plumbing, ceiling heights, windows, and heating systems can all influence the design.
The kitchen should also respond to the property around it. You may want direct access to a deck, patio, garden, or outdoor dining area. Another household may prioritize mountain views, abundant daylight, or a comfortable gathering space during cold weather. Natural wood, textured materials, and carefully chosen color can keep a modern kitchen feeling warm and personal.
Red Rooster serves homeowners in Salt Lake, Davis, Summit, Tooele, Weber, Wasatch, Morgan, and Grand counties, along with other communities near the Wasatch Front. Local experience can help you create a kitchen that suits both your property and your household’s routines.
Review the cost guide and project gallery before requesting a consultation
Before your consultation, collect examples of kitchens you like. Note specific details such as cabinet profiles, island proportions, lighting, backsplash materials, flooring, hardware, and storage features. A short list of likes and dislikes gives your builder a more useful starting point than a general request for a modern kitchen.
Review Red Rooster’s Utah home construction cost guide to begin thinking about the larger project budget. Kitchen costs vary based on size, materials, appliances, labor, installation, and the amount of structural or mechanical work involved. A project-specific consultation will provide more useful guidance for your space.
Bring inspiration images, your priorities, an approximate timeline, and questions to the meeting. For a remodel, include photos of the existing kitchen and any known problems. For new construction or an addition, share property details and explain how you want the kitchen to connect with the rest of the home.
Discuss your plans through Red Rooster Construction’s contact page
When you have a general direction, contact Red Rooster Construction through its project inquiry page. You do not need to select every cabinet finish or determine every dimension before reaching out. A builder can help you evaluate the possibilities and decide whether a remodel, addition, or new construction project best fits your goals.
Include your location, project type, approximate kitchen size, desired changes, and preferred timeline in your message. You can also mention features such as custom cabinetry, a larger island, improved pantry storage, new windows, outdoor access, or structural changes. These details help the team understand the project before your initial discussion.
A useful consultation should clarify the likely process, important decisions, and next steps. With thoughtful planning and experienced construction support, your modern Utah kitchen can combine clean design, practical storage, durable materials, and craftsmanship suited to your home.
Related Articles
- Cost to Build a House in Utah — Red Rooster
- Red Rooster Construction — Utah's Hands-On Home Builder
- Project Gallery — Red Rooster Construction
- Contact — Red Rooster Construction
Frequently Asked Questions
What makes a kitchen design modern?
Modern kitchens typically feature simple cabinet profiles, uncluttered lines, practical storage, durable materials, and layered lighting. Warm wood, textured tile, natural stone, and carefully chosen hardware can keep the space comfortable and personal.
How do I choose the best kitchen layout for my Utah home?
Consider your room’s dimensions, cooking habits, storage needs, traffic patterns, and connection to nearby spaces. An L-shaped, U-shaped, galley, one-wall, or open layout may work well depending on the home’s structure and how your household uses the kitchen.
What should I prioritize when designing a modern kitchen island?
Decide whether the island’s main purpose will be food preparation, seating, storage, cooking, cleanup, or entertaining. Then confirm that the island leaves enough room for walkways, appliance doors, seating, and access to connected areas such as the dining room, garage, patio, or deck.
Which materials work well in a busy modern kitchen?
Choose surfaces that suit your cleaning habits and daily routines. Quartz, natural stone, porcelain tile, sealed wood, and durable cabinet finishes can all work well when selected for their maintenance needs, moisture resistance, and ability to handle regular use.
How can Red Rooster Construction help with a modern kitchen project?
Red Rooster Construction can help with custom home construction, kitchen remodels, additions, and connected outdoor living spaces. Its hands-on process includes construction coordination, direct material sourcing, and access to an in-house lumber mill, helping keep design, craftsmanship, and project details aligned.
Planning a project in Utah?
Talk with Red Rooster Construction about your build, remodel, or outdoor space.
Request a Quote